I was standing in my kitchen, half‑asleep, when my roommate shouted, “I’m craving something crunchy and cheesy!” I grabbed a bag of frozen fries, tossed them in the air, and they landed with a sad, soggy plop. That moment of culinary disappointment sparked a dare: I would create a wedge that could out‑shine any restaurant side dish and still be simple enough for a lazy Tuesday night. I rummaged through the pantry, pulled out a couple of sweet potatoes, and thought, “What if I marry the natural sweetness of these tubers with the bold, salty punch of Parmesan and a whisper of garlic?” The result? A batch of wedges that made my oven smell like a cozy Italian trattoria and had my friends begging for the secret.
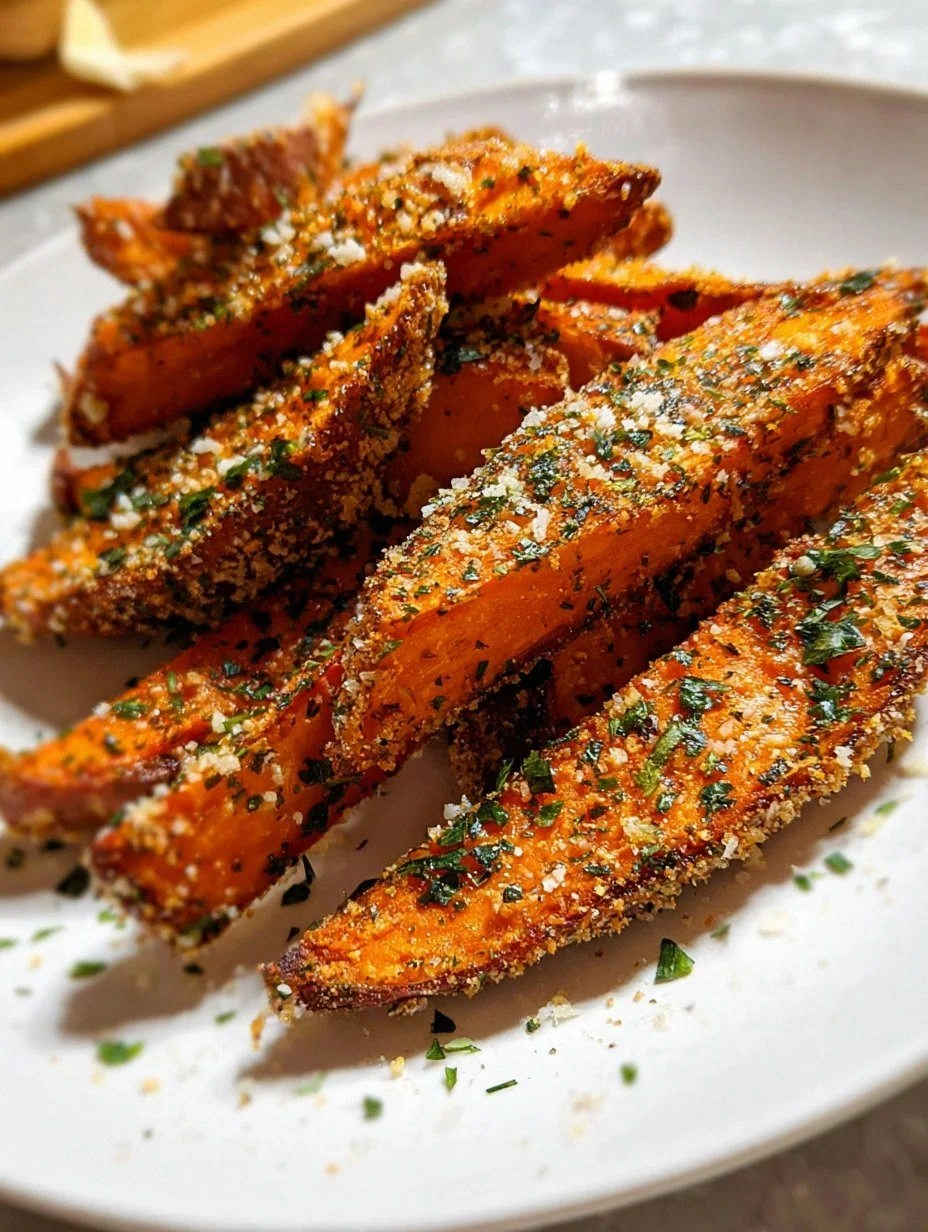
Picture this: the first bite delivers a crisp, caramelized exterior that crackles like fresh snow underfoot, then gives way to a buttery, melt‑in‑your‑mouth interior that’s sweet enough to make a smile spread across your face. The aroma hits you before you even see the golden edges—garlic, paprika, and oregano dancing together in a fragrant waltz, while the Parmesan forms a nutty crust that clings to every curve. The texture contrast is the kind of culinary poetry that makes you pause, close your eyes, and listen to the faint sigh of the oven as it finishes its work. It’s not just food; it’s an experience that turns a simple side into the star of the table.
Most recipes I’ve tried either over‑coat the wedges, drowning them in a soggy slurry, or they under‑season, leaving the natural sweetness to dominate without any balance. This version flips the script by using a thin egg wash that acts like a culinary glue, letting a fine dusting of Parmesan and herbs adhere perfectly without sogging the potato. I also introduced a quick double‑bake technique: a short blast at a high temperature to set the crust, followed by a lower‑heat finish that ensures the interior stays fluffy. The result is a wedge that’s crisp on the outside, tender on the inside, and packed with flavor in every bite.
Okay, ready for the game‑changer? I’m about to walk you through every single step— from selecting the perfect sweet potatoes to mastering the exact oven temperature that creates that coveted crunch. By the end of this guide, you’ll wonder how you ever settled for bland, ordinary wedges. I dare you to taste this and not go back for seconds.
What Makes This Version Stand Out
- Flavor Fusion: The marriage of sweet potato’s natural caramel notes with sharp, salty Parmesan creates a taste profile that feels both familiar and daring, like a well‑timed jazz solo.
- Texture Triumph: A double‑bake method yields a crust that shatters like thin ice while the interior stays soft, airy, and buttery— a contrast that keeps you reaching for more.
- Ingredient Simplicity: You only need eight pantry staples; no exotic spices, no fancy equipment— just a good oven and a bit of love.
- Unique Coating Technique: Using a beaten egg as a binder lets the Parmesan and herbs cling without creating a greasy film, something most recipes get completely wrong.
- Crowd‑Pleaser Factor: Even the pickiest eaters, including kids who claim they “don’t like veggies,” will be lured in by the cheesy crunch and sweet undertones.
- Make‑Ahead Friendly: You can prep the wedges ahead of time, store them uncovered in the fridge, and pop them in the oven when you’re ready— perfect for busy weeknights.
- Seasonal Versatility: Sweet potatoes are a fall favorite, but this recipe shines all year, making it a reliable go‑to whenever you crave comfort food.
- Health‑Conscious Balance: While indulgent, the dish still offers a good dose of fiber and vitamin A from the sweet potatoes, paired with protein from the egg and Parmesan.
Inside the Ingredient List
The Flavor Base
Sweet Potatoes: The star of the show! Their natural sweetness and vibrant orange hue bring joy to every plate. Choose firm, medium‑sized tubers with smooth skins; avoid any that feel soft or have dark spots, as they’ll turn mushy when baked. If you skip them, you lose the caramelized flavor that balances the salty Parmesan. Swap suggestion: Butternut squash works in a pinch, though the texture will be slightly denser.
Garlic Powder: A sprinkle of garlic powder gives these wedges their irresistible garlicky essence that makes them bold and delicious. It distributes evenly without the risk of burning raw garlic pieces. Skipping it will make the flavor flat, so keep it on hand. Swap suggestion: Fresh minced garlic (½ tsp) can be used, but add it after the first bake to avoid bitterness.
The Texture Crew
Egg: Acting as the glue, the beaten egg helps the delicious Parmesan coating stick to the wedges. It also adds a subtle richness that enhances the overall mouthfeel. If you omit the egg, the coating will slide off, leaving you with bland, uncoated wedges. Swap suggestion: Use a flax‑egg (1 tbsp ground flaxseed + 3 tbsp water) for a vegan version, though the crust will be a bit less crisp.
Parmesan Cheese: The secret weapon! Freshly grated Parmesan delivers that savory, cheesy punch we all crave. Its low moisture content ensures a dry, crunchy crust. Skipping it will make the wedges taste like ordinary roasted sweet potatoes. Swap suggestion: Pecorino Romano adds a sharper edge, while Nutritional Yeast can be used for a dairy‑free alternative, but expect a different texture.
The Herb & Spice Ensemble
Dried Parsley: This gives a hint of green freshness, enhancing the overall flavor profile. It also adds a subtle pop of color against the orange wedges. Leaving it out won’t break the dish, but you’ll miss a layer of brightness. Swap suggestion: Fresh parsley (1 tbsp, chopped) added after baking keeps the color vivid.
Dried Oregano: A must‑have herb for adding a rich, earthy flavor to your wedges. Its slightly bitter notes balance the sweet potato’s sugar. If omitted, the flavor can feel one‑dimensional. Swap suggestion: Italian seasoning (½ tsp) works well, as it already contains oregano.
Paprika: Not only does it add a lovely color, but paprika also brings a mild sweetness and smokiness. It creates that inviting reddish hue you see in the finished wedges. Skipping it will make the dish look dull. Swap suggestion: Smoked paprika intensifies the smoky depth, while sweet paprika keeps it milder.
The Final Flourish
Freshly Ground Pepper: For a touch of heat, this elevates all the flavors and adds a satisfying kick. Freshly ground pepper releases aromatic oils that pre‑ground pepper lacks. If you skip it, the dish can feel flat. Swap suggestion: A pinch of cayenne pepper for extra heat, but use sparingly.
Everything's prepped? Good. Let's get into the real action…
The Method — Step by Step
Preheat your oven to a scorching 425°F (220°C). While the oven warms, line two large baking sheets with parchment paper; this prevents sticking and makes cleanup a breeze. The high heat is essential for that instant sizzle that tells you the crust is forming. If your oven has a convection setting, turn it on for even browning.
Wash the sweet potatoes thoroughly, then slice each tuber into wedges about ½‑inch thick. Try to keep the pieces uniform so they cook evenly. Place the wedges in a large bowl of cold water and let them soak for 15 minutes. This step removes excess surface starch, which is the secret to achieving that coveted crunch.
Kitchen Hack: After soaking, pat the wedges dry with a clean kitchen towel or a salad spinner. Moisture is the enemy of crispness.In a separate bowl, whisk one large egg with a splash of water (about 1 tablespoon). This thin egg wash will act as the adhesive for the Parmesan and herbs. Toss the dried wedges into the egg mixture, ensuring each piece gets a light coating— you don’t want it drenched, just a glossy sheen.
Combine the grated Parmesan, dried parsley, dried oregano, paprika, garlic powder, and freshly ground pepper in a shallow dish. Give the mixture a quick stir so the spices are evenly distributed. The aroma at this point should already be making your mouth water.
One by one, roll each egg‑coated wedge in the Parmesan‑herb blend, pressing gently so the mixture adheres. Lay the coated wedges on the prepared baking sheets, making sure they don’t touch— crowding leads to steaming, not crisping.
Slide the sheets into the preheated oven and bake for 12 minutes. This initial blast sets the crust without over‑cooking the interior. You’ll notice the edges beginning to turn a light golden‑brown; that’s the cue to move to the next stage.
Watch Out: If you open the oven door too often, the temperature drops and the crust won’t set properly. Trust the timer.Reduce the oven temperature to 375°F (190°C) and continue baking for another 15‑18 minutes, or until the wedges are deeply caramelized and the cheese has turned a crisp, amber hue. At this point, the edges should start pulling away from the pan, a visual cue that they’re ready.
Remove the wedges from the oven and let them rest on a cooling rack for 3‑4 minutes. This brief rest allows the steam to escape, preserving the crunch while keeping the interior tender. If you’re serving immediately, sprinkle a pinch of extra freshly ground pepper for that final aromatic punch.
Kitchen Hack: For an ultra‑crisp finish, switch the oven to broil for the last 2 minutes— keep a close eye, the cheese can go from perfect to burnt in seconds.Transfer the wedges to a serving platter, drizzle lightly with a touch of olive oil if desired, and serve while still warm. The first bite should deliver that “crackle‑and‑melt” sensation that makes you want to shout, “I’m never going back to regular fries!” Pair with a cool dip like garlic aioli or a tangy yogurt sauce for extra depth.
That's it — you did it. But hold on, I've got a few more tricks that'll take this to another level...
Insider Tricks for Flawless Results
The Temperature Rule Nobody Follows
Most home cooks set the oven to a single temperature and hope for the best. The truth is, a two‑stage bake—high heat to set the crust, then moderate heat to finish the interior—creates a perfect contrast. I once tried baking at 400°F the whole time and ended up with soggy centers. Trust the split‑temp method, and you’ll get that restaurant‑quality crunch every single time.
Why Your Nose Knows Best
Before you even check the timer, inhale deeply. When the kitchen fills with a nutty, toasted aroma, you’re about 2‑3 minutes away from perfection. This sensory cue is more reliable than any clock, especially if your oven runs hot or cool. If you ever doubt the timing, let your nose be the judge.
The 5‑Minute Rest That Changes Everything
After the final bake, resist the urge to dive in immediately. Let the wedges sit for five minutes on a cooling rack; this tiny pause lets the steam escape and the crust solidify. Skipping this step results in a slightly soggy bottom, and that’s the only thing that could ruin this masterpiece.
Seasoning on the Spot
A final dusting of flaky sea salt or a quick grind of fresh pepper right before serving adds a burst of flavor that awakens the palate. I’ve seen people serve these wedges straight from the oven with no finishing salt, and they miss out on that subtle crunch that salt provides. Keep a small shaker handy.
The Flip‑And‑Rotate Trick
Halfway through the second bake, flip each wedge and rotate the pan 180 degrees. This ensures even browning on all sides and prevents one side from becoming overly dark. A friend once tried to skip this step, and the result was a batch of unevenly browned wedges that looked like a culinary crime scene.
Creative Twists and Variations
This recipe is a playground. Here are some of my favorite ways to switch things up:
Spicy Sriracha Glaze
After the final bake, brush the wedges with a mixture of sriracha, honey, and a splash of lime juice. The sweet‑heat combo adds a bold Asian flair that pairs perfectly with the Parmesan base. Ideal for parties where you want a little kick.
Herb‑Infused Parmesan
Swap dried parsley for fresh rosemary and thyme, finely chopped, and add them to the Parmesan coating. The aromatic herbs infuse the crust with a woodland aroma, making the wedges feel more sophisticated— great for a dinner party appetizer.
Cheesy Bacon Crunch
Crumble cooked bacon into the Parmesan mixture and sprinkle a handful of shredded cheddar on top during the last five minutes of baking. The smoky bacon and extra cheese create a decadent, indulgent version that’s perfect for a weekend treat.
Vegan Delight
Replace the egg with a flax‑egg (1 tbsp ground flaxseed + 3 tbsp water) and use nutritional yeast instead of Parmesan. The flavor profile shifts to a nutty, cheesy vibe that still delivers that satisfying crunch without any animal products.
Sweet & Savory Maple
Drizzle a thin stream of pure maple syrup over the wedges right after they come out of the oven, then toss gently. The caramelized maple complements the natural sweetness of the potatoes and adds a glossy finish that looks as good as it tastes.
Storing and Bringing It Back to Life
Fridge Storage
Allow the wedges to cool completely, then transfer them to an airtight container lined with a paper towel to absorb excess moisture. They’ll stay crisp for up to 3 days. When you’re ready to eat, reheat at 425°F for 8‑10 minutes; the high heat revives the crunch.
Freezer Friendly
Arrange the cooled wedges on a baking sheet in a single layer and freeze until solid (about 2 hours). Then pack them into a zip‑top bag, removing as much air as possible. They’ll keep for up to 2 months. To serve, bake straight from frozen at 425°F for 20‑25 minutes; no thawing needed.
Best Reheating Method
For ultimate crispness, use a preheated oven or a toaster oven rather than a microwave. Before reheating, add a tiny splash (about 1 teaspoon) of water to the tray and cover loosely with foil; the steam helps the interior stay fluffy while the oven restores the golden crust.