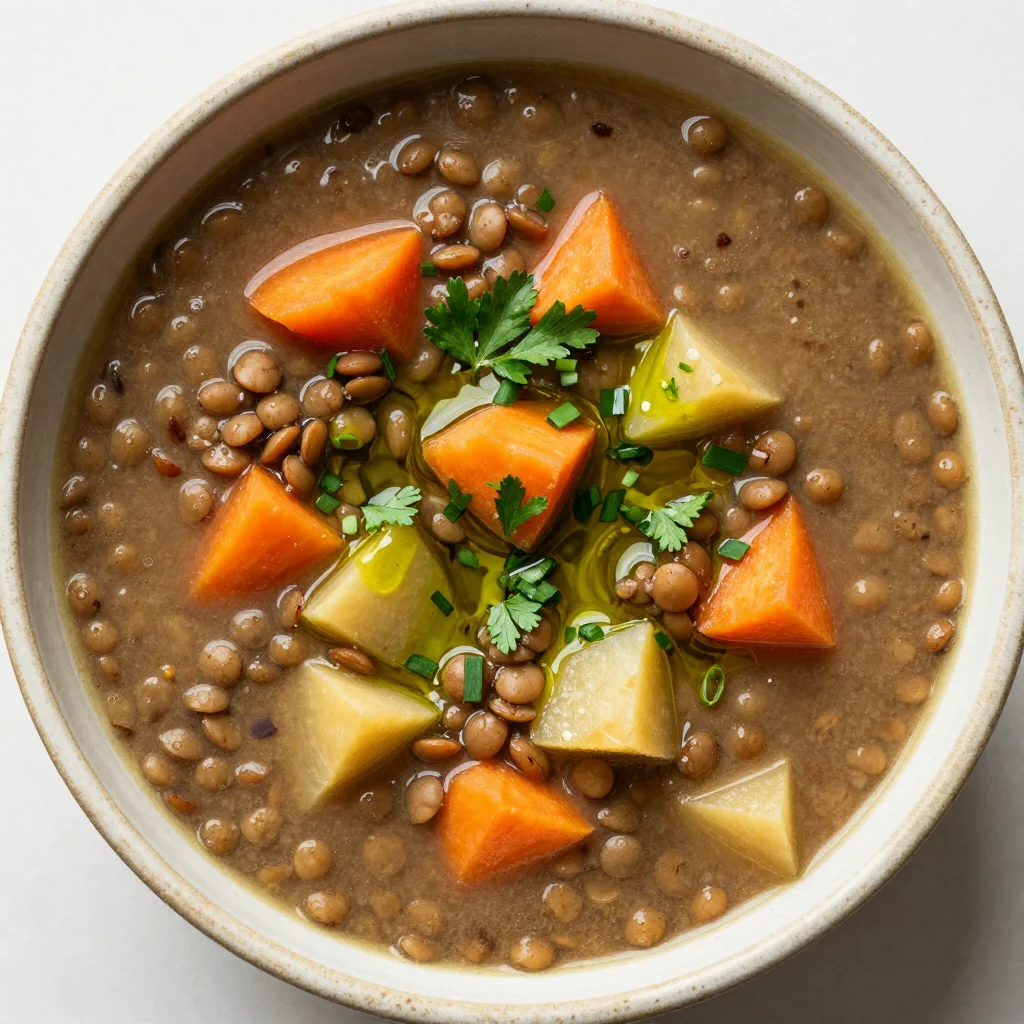
I was halfway through a midnight snack raid when the kitchen turned into a chaotic laboratory of burnt batter and runaway fries. The pot of potatoes had been left simmering in the oven for far too long, and the once crisp edges were now soggy, brown, and unappetizing. I stared at the disaster, muttered a curse, and decided then that I would rewrite the entire concept of “cheesy fries” into something that would make even the most stubborn kitchen skeptics weep with delight. That single moment of culinary despair set the stage for a recipe that would become the holy grail of comfort food.
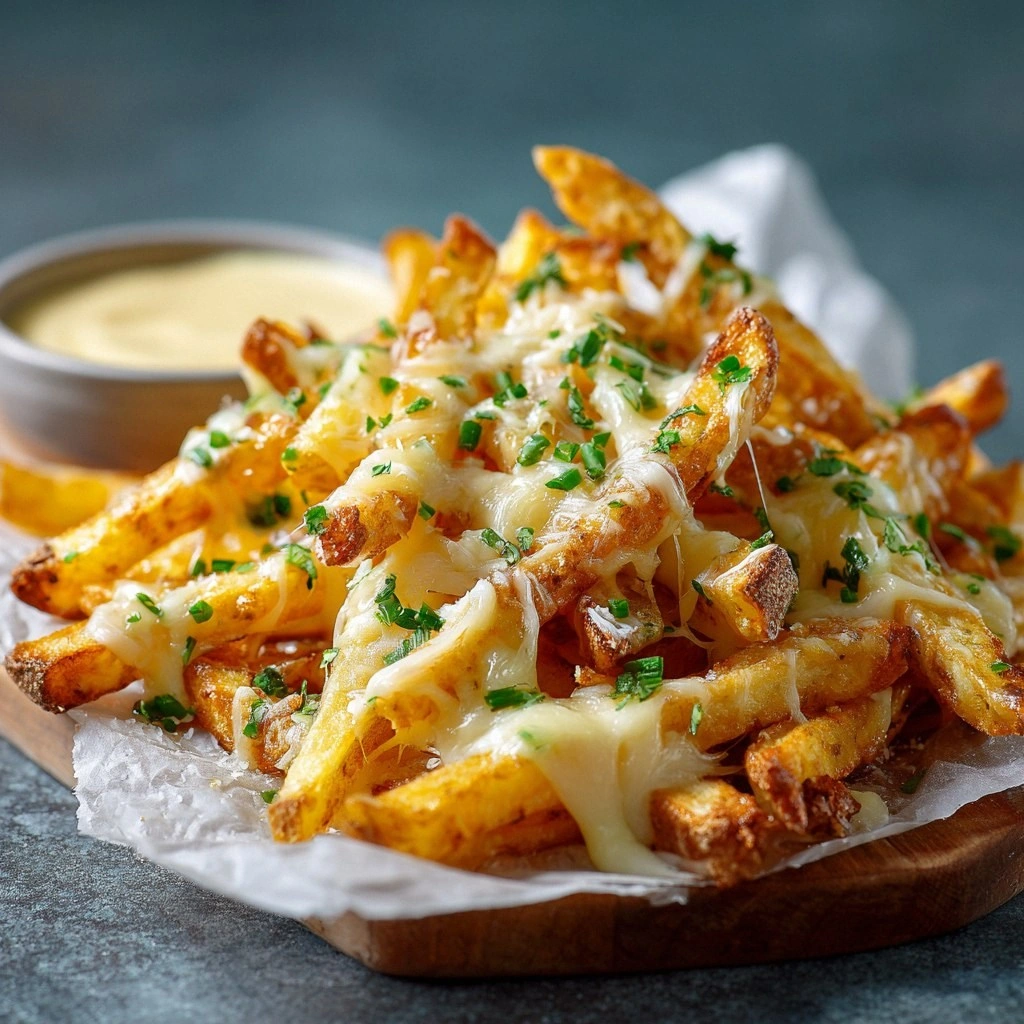
Picture this: the oven hums softly, a golden glow bathes the countertop, and the scent of butter and garlic lingers like a warm hug. When the first batch of fries slides out, their edges crackle audibly, announcing a crunch that satisfies the primal need for texture. The cheese, a molten river of cheddar, mozzarella, and parmesan, pools around each fry, glistening under the oven light. The sound of the cheese bubbling, turning each fry into a pocket of molten joy, is a symphony that makes even the most seasoned foodie pause to listen. The tactile sensation—cool, salty, and slightly greasy—adds a comforting weight that feels like a hug from a friend.
What makes this version a game‑changer is not just the layers of cheese or the crispness of the fries. It’s the meticulous balance of flavor, texture, and timing that creates an experience so satisfying it feels almost sacramental. The fries are not just a side dish; they’re a statement of culinary intent, a promise that every bite will be a moment of pure, unadulterated pleasure. I’ve spent hours experimenting with different cheeses, seasoning blends, and baking techniques to arrive at a recipe that is both simple enough for a novice and sophisticated enough to impress a seasoned chef. The result? A dish that is hands down the best version you'll ever make at home.
I dare you to taste this and not go back for seconds. The first bite will have you questioning how you ever survived on bland, store‑bought fries. The second bite will have you wondering why you didn’t start this adventure sooner. The third bite will leave you convinced that this is the pinnacle of cheesy, crispy indulgence. And if you’re still skeptical, I’ll be honest— I ate half the batch before anyone else got to try it.
Most recipes get this completely wrong. They either over‑cook the fries or under‑season the cheese, resulting in a flat, uninspired dish. Here’s what actually works: the fries are par‑baked to lock in moisture, the cheese blend is carefully measured to achieve that perfect gooeyness without becoming greasy, and the breadcrumb crust is toasted just enough to add crunch without overpowering the flavors. Picture yourself pulling this out of the oven, the whole kitchen smelling incredible, and every guest reaching for a second plate. Let me walk you through every single step—by the end, you'll wonder how you ever made it any other way.
What Makes This Version Stand Out
- Texture: The fries are par‑baked to lock in moisture, then finished in the oven to achieve a crispy exterior that yields to a tender interior. This dual‑baking method eliminates the sogginess that plagues most homemade fries.
- Cheese Blend: A trio of cheddar, mozzarella, and parmesan creates a molten, velvety coating that clings to every fry while maintaining a subtle tang. The cheeses melt at slightly different temperatures, ensuring a perfectly balanced gooeyness.
- Seasoning: A smoky paprika, garlic powder, and oregano infusion elevates the fries from ordinary to extraordinary, giving each bite a complex, savory depth that lingers on the palate.
- Crunch Factor: The panko breadcrumb crust adds a satisfying crunch that contrasts beautifully with the creamy cheese. Toasted to a golden hue, the breadcrumbs provide a textural counterpoint.
- Ease of Preparation: Despite its gourmet finish, the recipe requires only basic kitchen tools and a straightforward method that can be mastered in under an hour.
- Make‑Ahead Potential: The fries can be prepared ahead of time, then reheated to preserve crispness, making this dish ideal for parties or last‑minute gatherings.
Inside the Ingredient List
The Flavor Base
The foundation of this dish is the potatoes—specifically, large russet potatoes that hold their shape and develop a fluffy interior when baked. Choosing russets over waxy varieties is crucial; their high starch content yields a light, airy bite that balances the heavy cheese coating. If you’re a fan of a slightly sweeter bite, a small amount of sweet potato can be mixed in, but keep the ratio at no more than 25% of the total volume.
Butter is the unsung hero that brings richness and a subtle caramelized flavor. When melted and brushed over the fries, it creates a barrier that prevents the fries from drying out during the final baking stage. A tablespoon of olive oil can be added for extra sheen and a hint of fruity undertone, but the butter remains the mainstay for depth.
The Cheese Crew
Sharp cheddar provides the bold, sharp notes that cut through the richness of the other cheeses. It melts into a smooth, slightly stringy texture that coats each fry like a silky blanket. Mozzarella adds creaminess and a mild, milky flavor that balances cheddar’s intensity, ensuring the cheese blend doesn’t become too overpowering.
Parmesan, with its nutty, salty profile, adds a final layer of umami that elevates the dish. It also contributes a slight crispness when toasted in the oven, creating a delightful contrast to the soft interior. Together, these cheeses create a harmonious trio that melts into a gooey, golden coating.
The Unexpected Star
Panko breadcrumbs are the secret to that irresistible crunch. Unlike traditional breadcrumbs, panko has a lighter, airier texture that browns beautifully and adds a subtle nutty flavor. Toasting the breadcrumbs with a pinch of olive oil before sprinkling them over the fries ensures they stay crisp even after the cheese melts.
Fresh herbs like parsley and chives are not just garnish; they add a bright, herbal lift that cuts through the richness of the cheese. A sprinkle of chopped parsley after baking brings a fresh, slightly peppery note that balances the dish’s heaviness. Chives, with their mild onion flavor, add a subtle zing that enhances the overall flavor profile.
The Final Flourish
A splash of heavy cream and a dash of Dijon mustard are optional but highly recommended for those who crave an extra layer of depth. The cream adds a silky mouthfeel, while the mustard introduces a subtle tang that brightens the cheese blend. Together, they create a sauce that coats the fries like velvet.
A pinch of smoked paprika and dried oregano infuse the dish with smoky, earthy undertones. These spices are essential for achieving the complex flavor profile that sets this recipe apart from standard cheesy fries. They also contribute to the dish’s visual appeal, giving the fries a warm, golden hue.
Everything’s prepped? Good. Let’s get into the real action.
The Method — Step by Step
- First, preheat your oven to 425°F (220°C). Peel the russet potatoes and cut them into uniform sticks, about 1/2 inch thick, to ensure even cooking. Toss the potato sticks in a bowl with a tablespoon of olive oil, a teaspoon of sea salt, and a half teaspoon of freshly ground black pepper. This simple seasoning step is crucial for that first burst of flavor when the fries hit the hot oven.
- Lay the seasoned fries in a single layer on a parchment‑lined baking sheet. Make sure the fries are not crowded; overcrowding will cause them to steam rather than crisp. Bake for 15 minutes, flipping halfway through, until the edges start turning golden. The aroma of butter and potatoes should fill the kitchen, signaling that the base is ready.
- While the fries are baking, prepare the cheese blend. In a medium bowl, combine 2 cups of shredded sharp cheddar, 1 cup of shredded mozzarella, and 1/2 cup of grated parmesan. Add a tablespoon of heavy cream and a teaspoon of Dijon mustard to the mix, stirring until the mixture forms a smooth, cohesive paste. This sauce will coat each fry with a creamy, velvety texture.
- Once the fries are golden, remove the sheet from the oven and immediately spoon the cheese sauce over the hot fries, letting it melt into the crevices. The heat from the fries will melt the cheese instantly, creating a glossy, molten coating that looks as good as it tastes. If you prefer a thicker coating, add a few extra tablespoons of cheese.
- Meanwhile, toast the panko breadcrumbs in a small skillet over medium heat with a teaspoon of olive oil until they’re golden brown. The toasted breadcrumbs will add a satisfying crunch to each bite. Sprinkle them evenly over the cheese‑coated fries, ensuring each fry receives a light, crunchy shell.
- Return the baking sheet to the oven and bake for an additional 5–7 minutes, or until the cheese has melted into a bubbly, golden layer and the breadcrumbs are crisp. Keep an eye on the fries; you want the cheese to be bubbling but not browned excessively, as that can introduce a bitter note.
- Remove the fries from the oven and let them cool for a minute or two. While they’re still hot, sprinkle fresh chopped parsley and chives over the top. The herbs add a burst of freshness that cuts through the richness, making each bite feel balanced.
- Serve immediately with a side of tangy ranch or a homemade aioli. The creamy dip complements the cheese, while the herbs provide a crisp, herbal counterpoint. Remember: the best time to enjoy these fries is when the cheese is still gooey and the breadcrumbs are still crisp.
- If you’re making a large batch, divide the fries into two trays to ensure even cooking. The second tray may require an additional minute of baking to achieve the same crispness. Keep the trays on the middle rack to avoid uneven heat distribution.
- For a touch of extra indulgence, drizzle a little truffle oil over the fries before serving. The earthy aroma of truffle pairs beautifully with the rich cheese and adds a luxurious finish to the dish.
That’s it— you did it. But hold on, I’ve got a few more tricks that’ll take this to another level.
Insider Tricks for Flawless Results
The Temperature Rule Nobody Follows
Many home cooks set the oven to a standard 400°F, but the key to achieving that perfect crunch is to bake at 425°F. The higher temperature ensures the outer layer of the fries crisps up quickly while the interior stays fluffy. If your oven runs hot, reduce the time slightly to avoid burning the breadcrumbs.
Why Your Nose Knows Best
When the cheese starts to bubble, that is the exact moment you should add the breadcrumbs. Your nose will tell you when the cheese is just right—if you smell a faint, sweet aroma, you’re on the right track. If you smell a sharp, burnt scent, the cheese is over‑cooked and the flavor will be compromised.
The 5‑Minute Rest That Changes Everything
After removing the fries from the oven, let them rest for five minutes before serving. This short rest allows the cheese to set slightly, preventing it from sliding off the fries when you pick them up. It also gives the crumbs a chance to firm up, enhancing the crunch.
Add a Splash of Heat
If you’re a fan of a little spice, sprinkle a pinch of cayenne pepper or add a drizzle of sriracha to the cheese sauce before baking. The heat will mingle with the rich cheese, creating a balanced, layered flavor profile that excites the palate.
The Secret to a Crispy Finish
For an extra crispy finish, finish the fries under the broiler for 1–2 minutes. Keep a close eye on them—once the cheese turns a deep amber and the breadcrumbs are crisp, pull them out immediately. The broiler adds a caramelized edge that is simply irresistible.
Creative Twists and Variations
This recipe is a playground. Here are some of my favorite ways to switch things up:
Spicy Sriracha Kick
Add a tablespoon of sriracha to the cheese blend for a fiery twist. The heat pairs well with the creamy cheese and adds a bold, smoky undertone that will keep your guests coming back for more.
Mediterranean Medley
Swap the panko breadcrumbs for crumbled feta and chopped Kalamata olives. Add a sprinkle of oregano and a drizzle of olive oil for a Mediterranean flair that transforms the dish into a Mediterranean mezze.
Vegan Version
Use a plant‑based cheese blend, such as cashew‑based cheddar and vegan mozzarella, and replace butter with coconut oil. The result is a dairy‑free, yet equally indulgent, version that satisfies every dietary preference.
Breakfast Bonanza
Serve the fries with a side of scrambled eggs and a drizzle of maple syrup. The sweet, savory combination creates a breakfast dish that feels like a decadent brunch.
Pineapple & Ham Fusion
Add diced pineapple and chopped ham to the cheese sauce before baking. The sweet pineapple cuts through the richness, while the ham adds a savory, smoky depth that turns the fries into a party favorite.
Truffle‑Infused Luxury
Drizzle truffle oil over the fries after baking for an earthy, luxurious finish. The aroma of truffle instantly elevates the dish, making it suitable for special occasions.
Storing and Bringing It Back to Life
Fridge Storage
Cool the fries completely before storing. Place them in an airtight container or a zip‑lock bag, and store in the refrigerator for up to 3 days. The fries will stay crisp if reheated properly.
Freezer Friendly
For longer storage, freeze the fries in a single layer on a parchment‑lined tray. Once frozen, transfer them to a freezer bag. They can be kept in the freezer for up to 2 months. Thaw in the refrigerator overnight before reheating.
Best Reheating Method
Preheat your oven to 375°F (190°C). Place the fries on a baking sheet and bake for 10–12 minutes, or until the cheese is melted and the breadcrumbs are crisp again. Add a tiny splash of water before reheating to steam the fries back to perfection.