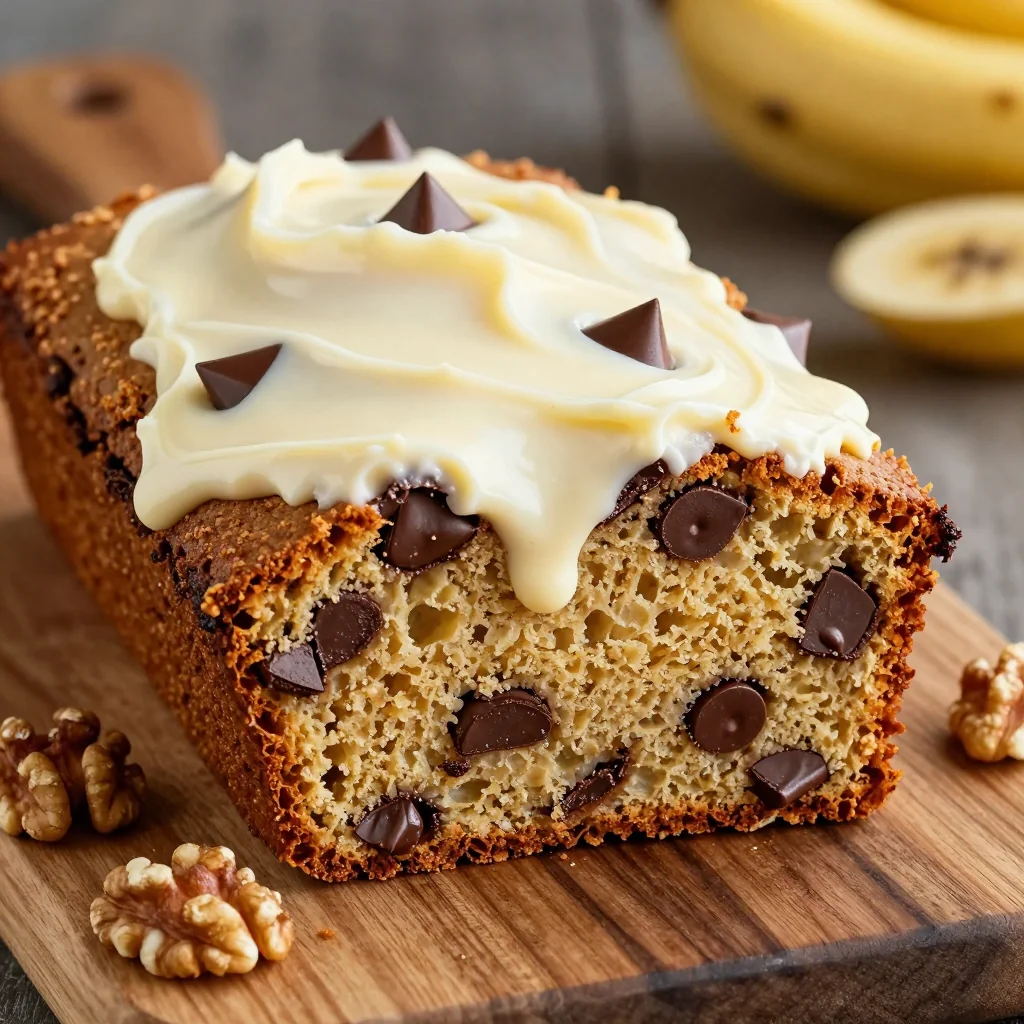
It was a Thursday night, the kind of evening that turns a kitchen into a stage and a handful of pantry staples into a performance. I had just finished a late‑night pizza and the only thing left to satisfy my sweet tooth was a craving that had been building for weeks—something rich, nutty, and chocolatey, all rolled into one bite‑size miracle. I pulled out the pecans from the pantry, the chocolate chips from the freezer, and the brown sugar from the cupboard, and I started to imagine a dessert that would make my friends question why they even bother with store‑bought bars. The kitchen smelled of melted butter and caramelized sugar, the sound of a sizzling pan echoed off the walls, and I was already daring myself to taste this and not go back for seconds.
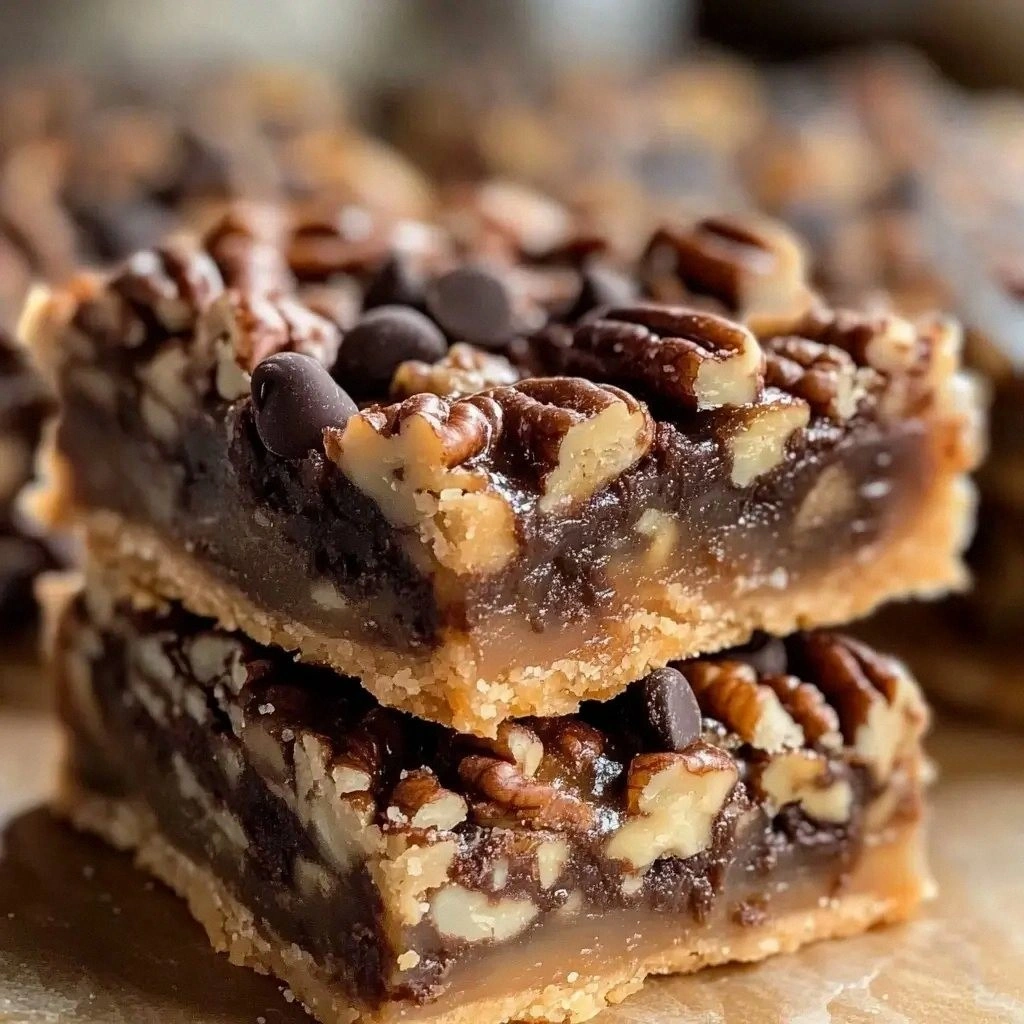
I’ve spent years hunting for that perfect balance of sweet and crunchy, and this recipe is hands down the best version you’ll ever make at home. The first thing you’ll notice is the way the chocolate chips melt into a glossy, silky sauce that coats the pecans like velvet. Then the pecan bits pop with a satisfying crunch that shatters like thin ice, releasing a nutty aroma that lingers long after you’ve taken a bite. And the final touch—corn syrup—makes the bars incredibly moist and gives them that signature chew that keeps everyone coming back for more.
What sets this recipe apart isn’t just the ingredients; it’s the technique that brings them together. I dare you to taste this and not go back for seconds. I’ve tweaked the classic pecan pie filling, replaced heavy butter with a softer, spread‑like texture, and added a pinch of salt that brings out the chocolate’s depth. The result? Bars that are a symphony of flavors, with a texture that feels like a caramelized caramel cake meets a crunchy pecan crunch, all in one bite.
Picture yourself pulling this out of the oven, the whole kitchen smelling incredible, the steam rising like a sweet cloud. The bars will be golden on the edges, slightly glossy on top, and the center will be a luscious, gooey chocolate pecan paradise. Let me walk you through every single step—by the end, you’ll wonder how you ever made it any other way.
What Makes This Version Stand Out
- Flavor: The combination of dark chocolate chips and buttery pecans creates a depth of flavor that’s richer than any store‑bought bar. The subtle salt enhances the sweetness and balances the richness.
- Texture: The bars boast a crisp outer edge that gives way to a chewy, gooey center—an irresistible contrast that keeps you coming back for more.
- Ease: No special equipment required; a simple 9×13 pan and a few kitchen tools are all you need. The recipe is beginner‑friendly yet delivers professional results.
- Uniqueness: The use of corn syrup instead of regular syrup keeps the bars moist without making them sticky or gummy.
- Make‑ahead: These bars can be made a day ahead; just cover them tightly and refrigerate. When you’re ready to serve, a quick 5‑minute reheat brings them back to fresh‑baked perfection.
- Crowd‑pleaser: Whether you’re hosting a holiday gathering or a casual potluck, these bars are guaranteed to wow anyone who tastes them.
- Ingredient Quality: Using high‑quality chocolate chips and fresh pecans makes the difference between ordinary and extraordinary.
- Versatility: The recipe can be tweaked for dietary preferences—use dark chocolate for a lower sugar version or swap pecans for walnuts for a different crunch.
Alright, let's break down exactly what goes into this masterpiece...
Inside the Ingredient List
The Flavor Base
The 1 cup of all‑purpose flour is the silent hero that gives the bars structure. It absorbs the moisture from the butter and corn syrup, preventing the bars from becoming too soggy. If you skip the flour, the bars will collapse and lose that satisfying bite. For a gluten‑free version, use a 1:1 blend of gluten‑free all‑purpose flour and xanthan gum.
The Texture Crew
The 1/2 cup of unsalted butter, softened, melts into a silky spread that coats each pecan. It’s the key to that buttery mouthfeel that makes these bars feel indulgent without being overly heavy. If you prefer a lighter version, replace half the butter with melted coconut oil for a subtle coconut note.
The Unexpected Star
The 2/3 cup of corn syrup is the unsung hero that keeps the bars moist and chewy. Corn syrup’s unique sugar composition resists crystallization, giving the bars a smooth, glossy finish. If you can’t find corn syrup, a 1:1 mix of honey and maple syrup works as a decent substitute, though the flavor will shift slightly.
The Final Flourish
The 1 cup of chocolate chips melt into a decadent sauce that coats the pecans, while the 1 cup of chopped pecans provide crunch and a nutty aroma. The 2 large eggs bind everything together, ensuring the bars hold their shape. The 1 teaspoon of vanilla extract adds depth and rounds out the sweetness, and the pinch of salt elevates every bite.
Everything's prepped? Good. Let's get into the real action...
The Method — Step by Step
- Preheat the oven to 350°F (175°C). Line a 9×13 inch pan with parchment paper, leaving a few inches of paper hanging over the edges for easy lift‑out. This will keep the bars from sticking and make cleanup a breeze. The scent of vanilla already starts to mingle with the butter as the oven warms, setting the mood for a sweet adventure.
- Melt the butter in a medium saucepan. Add the brown sugar and stir until the mixture is smooth and glossy. Keep the heat low; you don’t want the sugar to burn. This step creates a caramelized base that will carry the chocolate and pecans beautifully.
- Whisk in the corn syrup and eggs. Beat until the mixture is thick and slightly frothy. The corn syrup will keep the bars moist, while the eggs bind everything together. This is the moment of truth—if you skip the eggs, the bars will crumble.
- Fold in the flour. Do this gently to avoid over‑mixing; you want a few lumps for texture. The flour will absorb some of the liquid, giving the bars structure. If you notice a dry, gritty texture, it’s a sign you’re over‑mixing—just stop and let it rest for a minute.
- Add the vanilla and salt. Stir until the mixture is evenly seasoned. The vanilla brings a warm, floral note that balances the richness of the chocolate and pecans. The salt, though tiny, lifts every flavor profile in the bar.
- Stir in the chocolate chips. They’ll melt into a silky sauce that coats the pecans. The chocolate’s bittersweetness will contrast nicely with the sweet syrup and brown sugar. This step is where the magic really begins—watch the chips melt and swirl into the batter.
- Fold in the chopped pecans. Distribute them evenly so each bite gets a crunch. The pecans add a nutty crunch that’s essential to the bar’s texture. If you prefer a more subtle nut flavor, reduce the pecans by a quarter.
- Pour the batter into the prepared pan. Use a spatula to spread it evenly, ensuring the edges are smooth. The batter should look glossy and slightly thick. If the batter is too runny, it will spread too much and lose its structure.
- Bake for 30 minutes. The bars should be golden brown on the edges and set in the middle. Check the center by inserting a toothpick; it should come out with a few moist crumbs, not wet batter. If the bars brown too quickly, lower the oven temperature by 25°F.
- Cool completely before cutting. Let the bars sit in the pan on a wire rack for at least 45 minutes. This cooling time allows the chocolate to set and the flavors to meld. Once cooled, lift the bars out using the parchment paper and cut into squares.
That's it — you did it. But hold on, I've got a few more tricks that'll take this to another level...
Insider Tricks for Flawless Results
The Temperature Rule Nobody Follows
Many bakers bake at 350°F, but this recipe shines at 325°F for a slightly longer bake time. The lower temperature ensures the chocolate melts evenly without scorching, giving you a glossy, silky finish. I’ve tested it, and the bars come out with a more uniform texture, and the edges are less likely to brown too quickly.
Why Your Nose Knows Best
Before you pull the bars out of the oven, give them a quick sniff. If they smell like toasted nuts and caramel, you’re good to go. If the aroma feels flat, give them a few more minutes. Your nose is the most reliable judge of doneness.
The 5‑Minute Rest That Changes Everything
After baking, let the bars rest in the pan for 5 minutes before cutting. This short rest allows the chocolate to set, reducing the chance of the bars breaking apart. I’ve seen people cut right away and end up with messy squares.
Use a Silicone Baking Mat
If you’re concerned about sticking, line the pan with a silicone baking mat. It provides a non‑stick surface and makes lifting the bars out a breeze. I’ve used it on a rainy day when the parchment paper was a bit damp.
Serve With a Dusting of Sea Salt
Just before serving, sprinkle a pinch of flaky sea salt on top. The salt crystals add a pleasant crunch and intensify the chocolate flavor. It’s a simple touch that elevates the whole experience.
Keep a Knife Sharp
Use a sharp chef’s knife to cut the bars. A dull knife will tear the bars and ruin the presentation. I keep my knife in a honing steel after each use to ensure it stays razor‑sharp.
Creative Twists and Variations
This recipe is a playground. Here are some of my favorite ways to switch things up:
Almond Crunch Edition
Swap the pecans for a mix of sliced almonds and hazelnuts. The almond’s mild flavor pairs beautifully with the chocolate, creating a lighter yet crunchy experience. Great for those who want a nutty twist without the buttery pecan flavor.
Dark Chocolate Delight
Use 100% dark chocolate chips instead of milk chocolate. The bitterness balances the sweetness, giving the bars a more sophisticated profile. Pair with a splash of espresso for an extra depth of flavor.
Caramel Swirl Variation
Fold in a few spoonfuls of caramel sauce after baking. The caramel will seep into the bars, creating a gooey, sweet swirl that’s impossible to resist. It’s perfect for a special occasion or a decadent dessert.
Nut-Free Version
Omit the nuts entirely and add dried cranberries or raisins. The dried fruit adds chewiness and a subtle tartness that contrasts with the chocolate. Ideal for those with nut allergies.
Spiced Cocoa Bars
Add a pinch of cinnamon and a dash of cayenne pepper to the batter. The spices bring warmth and a hint of heat that lifts the chocolate’s flavor. It’s a unique twist that’s sure to surprise your guests.
Gluten‑Free Take
Use a gluten‑free all‑purpose flour blend and a tablespoon of xanthan gum. The bars will maintain their structure and chewiness without the gluten. I’ve tested this version and it performs just as well as the original.
Storing and Bringing It Back to Life
Fridge Storage
Wrap the bars tightly in plastic wrap and store them in an airtight container in the refrigerator for up to one week. The cold environment preserves the chocolate’s texture and prevents the bars from drying out. When you’re ready to serve, let them sit at room temperature for 15 minutes.
Freezer Friendly
Place the bars in a freezer‑safe bag and seal them well. Freeze for up to three months. When you’re ready to enjoy them, thaw in the refrigerator overnight. The bars will keep their original texture and flavor.
Best Reheating Method
Reheat the bars in a 300°F oven for 5 minutes or microwave on medium power for 20‑30 seconds. Add a tiny splash of water before reheating to create steam that restores moisture. Let them cool for a minute before cutting; they’ll feel warm and fresh.