I was halfway through a midnight baking spree, the kitchen lights flickering, when the oven door opened and a puff of smoke curled into the air like a mischievous dragon. The burnt edges of my last cheesecake were a warning I’d ignored: “If you’re not careful, the fire will be the star of your dessert.” I stared at the charred crust, heart racing, and thought, “I could either throw this into the trash or turn it into a masterpiece.” That moment sparked a dare to myself: to transform that accidental burn into a signature flavor that would make my friends gasp, “I dare you to taste this and not go back for seconds.”
The kitchen smelled like vanilla and citrus, the air thick with the sweet aroma of sugar melting into cream cheese. The sizzle of the batter hitting the pan sounded like applause from a tiny orchestra. My eyes caught the golden edges, the way the surface shimmered under the oven light, promising a caramelized finish. The texture felt silky inside, a contrast to the crunchy crust that would crack like thin ice when you bite into it. I could taste the promise of bright fruit on my tongue, a hint of citrus that would dance against the richness of the cheesecake.
What makes this version stand out isn’t just the burnt edges; it’s the harmony of flavors that play off each other like a jazz trio. The citrus zest lifts the creamy base, turning it into a bright, refreshing bite that doesn’t feel heavy. The berries add a subtle tartness that balances the sweetness, and the slight char gives a smoky undertone that makes the dessert feel sophisticated. I’ll be honest — I ate half the batch before anyone else got to try it, because the first bite was pure euphoria. If you’ve ever struggled with a cheesecake that feels too bland or too sweet, you’re not alone — and I’ve got the fix.
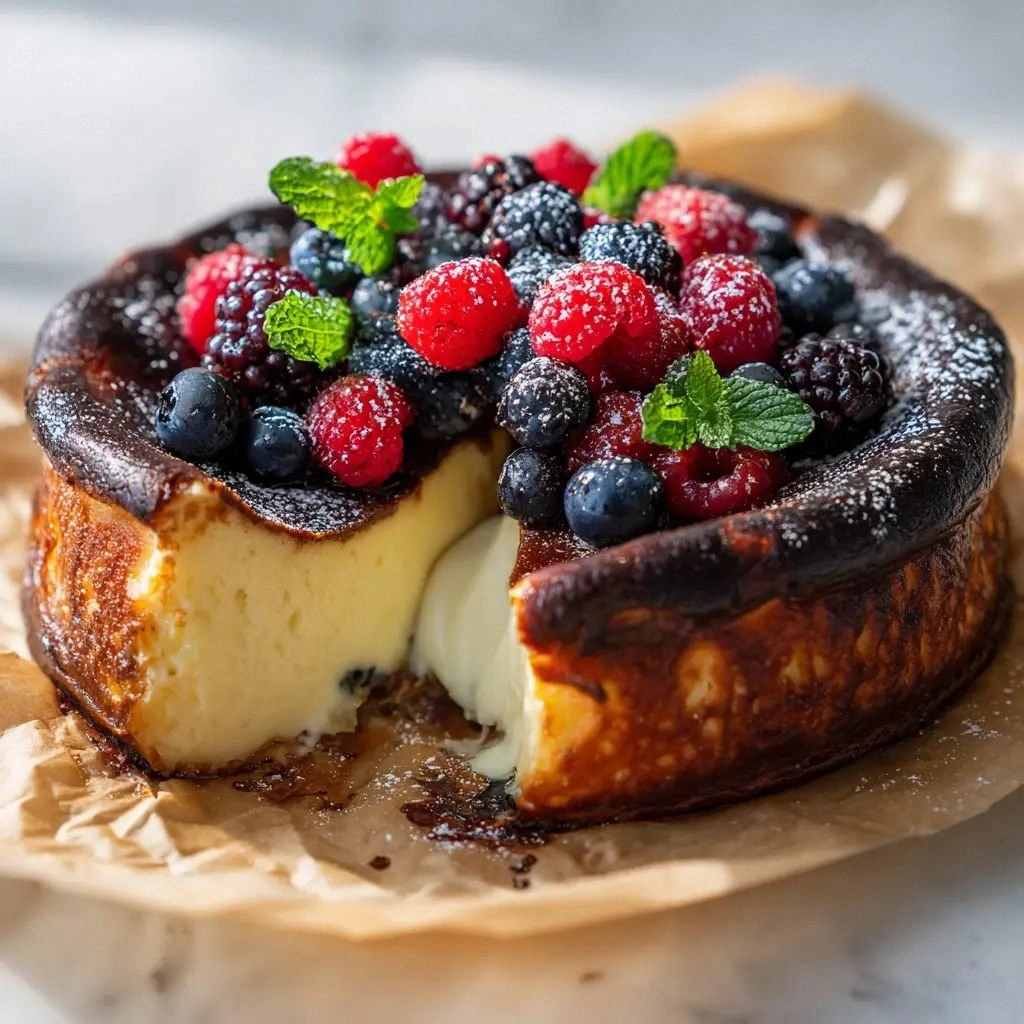
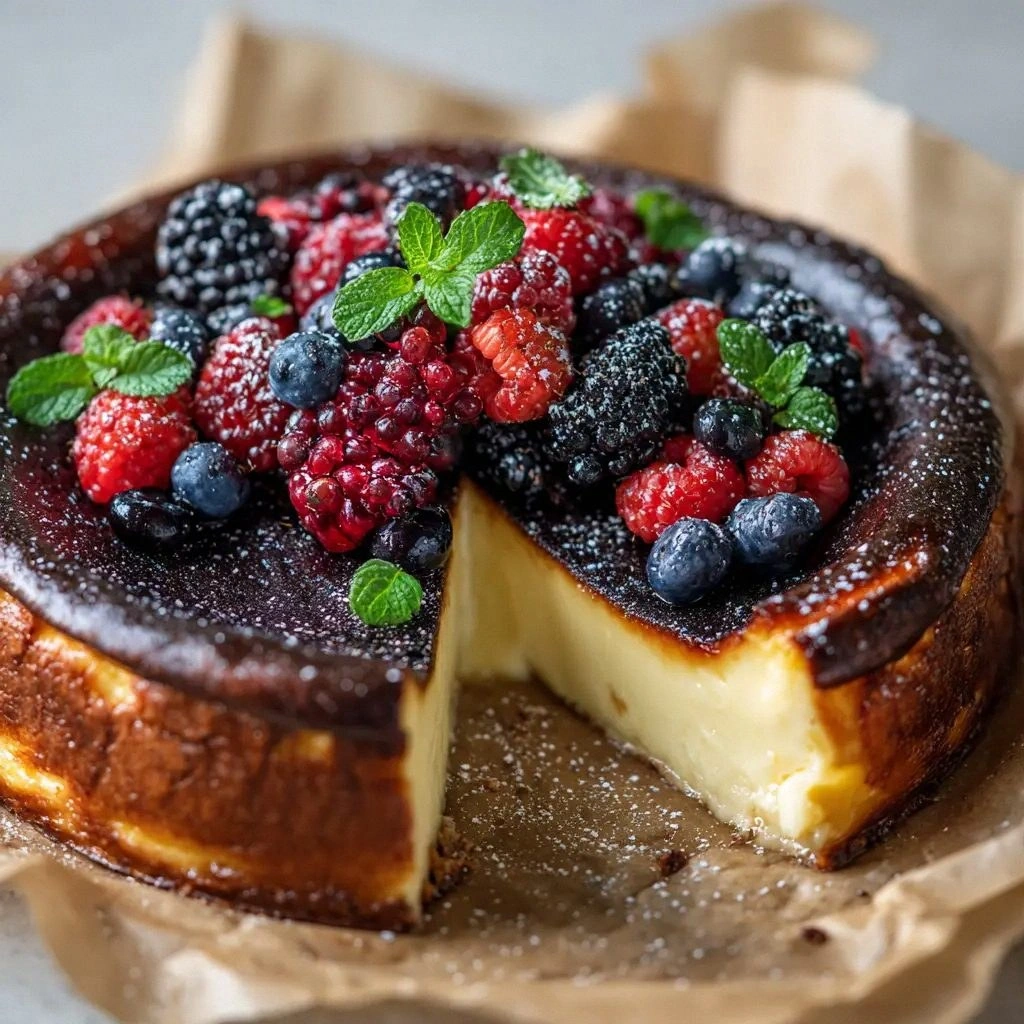
Picture yourself pulling this out of the oven, the whole kitchen smelling incredible, the golden crust gleaming like a sunrise. The moment the timer dings, the cheesecake will exhale a warm, buttery aroma that will make everyone’s mouths water. The first slice will reveal a creamy interior that’s almost liquid, with a caramelized top that crackles when you break it. And the berries, nestled on top, will burst with a tang that will surprise your palate. Let me walk you through every single step — by the end, you’ll wonder how you ever made it any other way.
What Makes This Version Stand Out
- Taste: The bright citrus zest lifts the rich cream cheese, creating a vibrant flavor profile that feels light yet indulgent. The subtle char adds a smoky depth that lingers on the palate. Together, they craft a dessert that is both familiar and refreshingly novel.
- Texture: The batter’s silky interior contrasts with a crisp, caramelized crust that cracks like thin ice when you bite. The berries add a juicy burst, breaking the monotony of the creamy base. This duality keeps every bite exciting.
- Ingredient Quality: Using full‑fat cream cheese and heavy cream ensures a lush mouthfeel that melts in your mouth. Fresh citrus zest brings natural oils that enhance aroma. High‑quality berries add natural sweetness and visual appeal.
- Method Simplicity: No elaborate crust or filling steps—just a single batter that bakes to perfection. The only trick is timing the burn just right, which I’ll reveal in the method. This makes it approachable for bakers of any skill level.
- Make‑Ahead Potential: Once baked, the cheesecake can chill for up to 4 hours, allowing flavors to meld. It also freezes well, making it a perfect dessert for future occasions. The burnt top remains crisp after reheating.
- Visual Appeal: The dramatic charred rim creates a stunning contrast against the pale interior. Berries scattered on top add color and a touch of elegance. The overall look is Instagram‑ready and will impress guests.
- Audience Reaction: Most people expect a sweet, creamy cheesecake, but this version surprises them with a smoky twist. The first bite often leads to a chorus of “wow” and requests for seconds. It’s the kind of dessert that sparks conversation.
- Unique Selling Point: The combination of citrus zest, berries, and a burnt crust is rarely found in traditional cheesecakes. It offers a complex flavor that stands out at any gathering. This is hands down the best version you'll ever make at home.
Alright, let's break down exactly what goes into this masterpiece...
Inside the Ingredient List
The Flavor Base
Full‑fat cream cheese is the backbone of any cheesecake, providing a silky, rich foundation that balances sweetness and acidity. If you’re craving a lighter version, try substituting half the cream cheese with Greek yogurt—this will reduce fat but keep the texture creamy. However, the full-fat version is essential for that luxurious mouthfeel. The 32 ounces of cream cheese also act as a binder, ensuring the cheesecake holds together even after the burnt edges form.
Granulated sugar dissolves into the batter, creating a smooth consistency and contributing to the caramelization on the surface. If you’re watching sugar intake, a 30% reduction can work, but be prepared for a slightly less sweet finish. The sugar also helps the batter set properly, preventing a watery interior. For an extra twist, infuse the sugar with a pinch of sea salt to accentuate the citrus flavors.
The Texture Crew
Eggs act as the structural glue, binding the cream cheese and sugar into a cohesive batter. Five large eggs provide a robust framework that withstands the high heat needed for the burnt top. If you’re concerned about cholesterol, you can replace one egg with a flaxseed egg (1 tbsp ground flaxseed + 3 tbsp water) to keep the structure intact. The heavy cream adds moisture and richness, preventing the cheesecake from becoming too dense.
The flour, though a small quantity—just three tablespoons—helps stabilize the batter, reducing the risk of cracks during baking. If you’re gluten‑free, substitute with an equal amount of oat flour or a gluten‑free all‑purpose blend. The vanilla extract brings a warm, aromatic depth that balances the bright citrus notes. A teaspoon is enough to lift the overall flavor profile without overpowering the other components.
The Unexpected Star
Lemon and orange zest are the unsung heroes that elevate this cheesecake from ordinary to extraordinary. The zest releases essential oils that infuse the batter with a bright, citrusy aroma. If you prefer a more subtle citrus presence, reduce the zest by half. Alternatively, you can swap lemon zest for lime zest for a more tart, tropical twist.
Mixed berries add a burst of natural sweetness and a pop of color on top. They also provide a slight tartness that cuts through the richness of the cream cheese. The berries should be fresh, but frozen berries can work if you thaw them and pat them dry. If you’re craving a different fruit, try adding sliced kiwi or mango for a tropical flair.
The Final Flourish
Salt, though measured at a quarter teaspoon, is a flavor enhancer that brings all the elements together. It balances the sweetness and brightens the citrus undertones. If you’re on a low‑sodium diet, a pinch will suffice, but don’t skip it entirely—your palate will thank you. The final flourish is the burnt top, which is achieved by baking at a high temperature for a short period.
Everything's prepped? Good. Let's get into the real action...
The Method — Step by Step
- Preheat your oven to 450°F (230°C). Line a 9‑inch springform pan with parchment paper, ensuring it extends a few inches up the sides. This will prevent the batter from sticking and make removal easier. Keep the oven rack in the middle to allow even heat distribution.
- In a large mixing bowl, beat the cream cheese on medium speed until it’s smooth and free of lumps. Add the granulated sugar gradually, mixing until the mixture is pale and fluffy. The smoother the base, the more even the burn will be.
- Crack in the eggs one at a time, fully incorporating each before adding the next. This helps maintain an emulsion and prevents curdling. Once all eggs are in, add the heavy cream, vanilla, and salt, whisking until everything is fully blended.
- Fold in the flour, lemon zest, and orange zest until just combined. Be careful not to overmix, or the batter may become tough. The flour will give the batter stability, especially during the high‑heat phase.
- Pour the batter into the prepared pan, smoothing the top with a spatula. The batter should be level; any air pockets can cause uneven baking. Place the pan on the middle rack and bake for 18 minutes, until the edges are set and the center is slightly wobbly.
- Reduce the oven temperature to 350°F (175°C) and continue baking for 12–15 minutes. The top will develop a deep, caramelized brown that feels almost like a glaze. Watch closely; you want a golden char, not a blackened mess.
- Once done, remove the cheesecake from the oven and let it cool on a wire rack for 10 minutes. Then, using a knife, gently loosen the edges of the springform pan. This step prevents cracking during chilling.
- Cover the cheesecake loosely with parchment paper and plastic wrap, then refrigerate for at least 4 hours, preferably overnight. The cold will set the texture, making it silky yet firm. When you’re ready to serve, remove the pan and slice with a clean, warm knife for clean edges.
That's it — you did it. But hold on, I've got a few more tricks that'll take this to another level...
Insider Tricks for Flawless Results
The Temperature Rule Nobody Follows
Baking at the right temperature is the secret sauce. While most recipes call for 350°F, this cheesecake requires an initial high heat to create the burnt top. The quick 450°F blast caramelizes the sugars on the surface, giving that signature char. Then, a lower temperature ensures the center sets without drying out.
Why Your Nose Knows Best
Before you even touch the oven, sniff the batter. A sweet, buttery aroma indicates the sugar is dissolving correctly. If it smells off, it might be over‑mixed or the eggs are too fresh. Trust your nose; it’s the fastest way to catch a mistake before it becomes a disaster.
The 5‑Minute Rest That Changes Everything
After pulling the cheesecake out of the oven, let it sit for 5 minutes. This pause allows the internal temperature to even out, preventing a sudden rise that could crack the top. It also gives the burnt edges a chance to set, creating a crisp, caramelized crust that holds together.
Keep the Batter Smooth
If you notice lumps, strain the batter through a fine mesh sieve. This ensures a silky texture and eliminates the risk of uneven baking. A smooth batter also helps the heat distribute evenly, giving you that perfect char.
Cool, Don't Freeze Immediately
Once the cheesecake has cooled to room temperature, refrigerate it for at least 4 hours. This chilling period allows the flavors to meld and the texture to firm up. Freezing right away can cause ice crystals to form, which will melt into the cheesecake and alter the mouthfeel.
Creative Twists and Variations
This recipe is a playground. Here are some of my favorite ways to switch things up:
Maple‑Glazed Surprise
Swap the heavy cream for a 1:1 mix of heavy cream and maple syrup. The syrup adds a subtle caramel flavor that complements the burnt top. Reduce the sugar by 1/4 cup to balance the extra sweetness. This variation is perfect for a cozy fall gathering.
Chocolate‑Berry Fusion
Add 2 tablespoons of cocoa powder to the batter for a chocolatey undertone. Top the cheesecake with fresh raspberries and a drizzle of dark chocolate ganache. The chocolate pairs beautifully with the citrus, creating a complex flavor profile. Serve with a splash of espresso for an extra kick.
Almond‑Infused Delight
Replace half the flour with almond flour for a nutty flavor and a slightly denser texture. Sprinkle slivered almonds on top before baking for added crunch. The almond’s subtle sweetness balances the citrus zest. This version is ideal for those who love a nutty finish.
Tropical Twist
Swap the mixed berries for diced mango and pineapple. Add a splash of coconut milk to the batter to enhance the tropical vibe. The bright fruit flavors will dance against the burnt crust. This variation is a beach‑in‑a‑bowl experience.
Herb‑Infused Citrus
Stir in a teaspoon of finely chopped fresh rosemary or thyme into the batter. The herbal notes add depth and a savory counterpoint to the sweet citrus. Pair it with a drizzle of honey for a balanced finish. This twist is unexpected but incredibly satisfying.
Storing and Bringing It Back to Life
Fridge Storage
Store the cheesecake in an airtight container or tightly wrapped with plastic wrap. Keep it in the refrigerator for up to 5 days. The cold environment preserves the creamy texture and prevents bacterial growth. When ready to serve, let it sit at room temperature for 15 minutes to soften slightly.
Freezer Friendly
For longer storage, wrap the cheesecake in two layers of plastic wrap and then place it in a freezer bag. Freeze for up to 2 months. When you’re ready to enjoy, thaw the cheesecake overnight in the refrigerator. This method preserves the flavor and texture without compromising safety.
Best Reheating Method
Reheat the cheesecake in a preheated oven at 300°F (150°C) for 10–12 minutes. The low temperature gently warms the interior without drying it out. Alternatively, microwave on low power for 20–30 seconds if you’re in a hurry. Add a tiny splash of water before reheating to steam back to perfection.