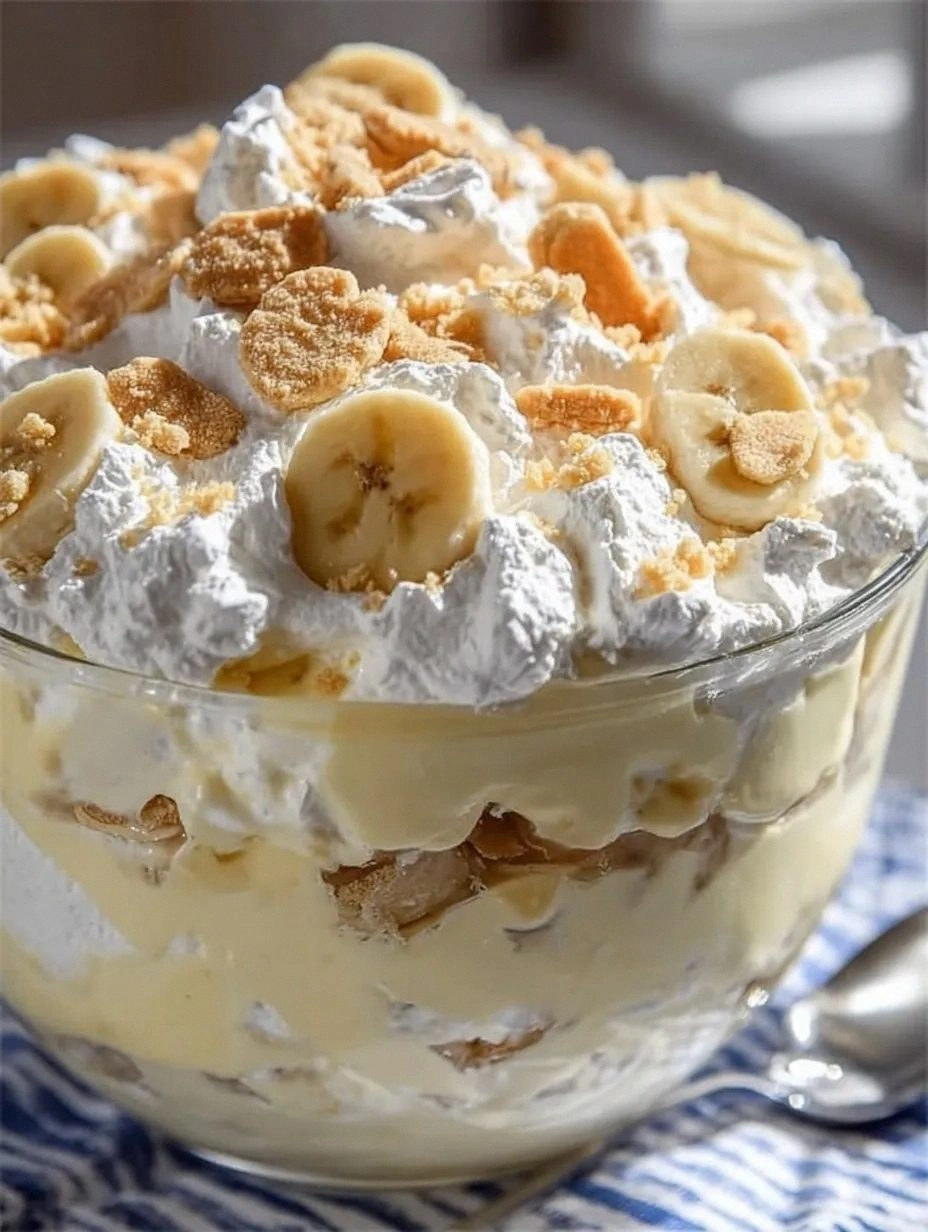
Classic Layered Banana Pudding Dessert: The Ultimate Southern Comfort in a Bowl 🍌
Okay, picture this: it’s a sweltering Saturday afternoon, the air conditioner is on the fritz, and you’re stuck in a kitchen that smells like burnt toast because you tried to “quick‑fix” a dessert that was supposed to be simple. I was that desperate soul, scrolling through endless recipes, each promising “the best banana pudding ever,” yet every one of them left me with a soggy mess that tasted like a sad, wilted banana‑flavored cardboard. I dared my roommate to a “who can make the most comforting dessert” challenge, and I lost—because my version was a disaster. That night, I made a promise to myself: I would create the ultimate, fool‑proof banana pudding that even a rookie could nail on the first try.
Fast forward to today, and I’m standing in my kitchen with a bowl of golden‑brown vanilla wafers, ripe bananas that practically melt in your mouth, and a custard that glistens like sunrise on a glass pond. The moment the pudding hits the spoon, you hear that soft, velvety sigh—like a sigh of relief after a long day. The aroma? A sweet, buttery perfume that wraps the room in a warm hug, coaxing the neighbor’s dog to sit at the foot of the counter, ears perked in anticipation. When you take that first bite, the layers crunch, then melt, then dance together in perfect harmony, and you’ll swear you’ve just been transported to a Southern porch swing, sipping sweet tea while fireflies flicker overhead.
What makes this version the undisputed champion? Most recipes get the texture wrong—either the pudding is too runny, or the wafers turn mushy the second they meet the banana. I’ve cracked the code with a two‑step soaking method that keeps the wafers crisp until the very last spoonful, and a secret butter‑infused custard that coats every bite like silk. I also throw in a splash of vanilla‑bean paste that adds a depth of flavor most store‑bought mixes lack. If you’ve ever struggled with a pudding that collapses under its own weight, you’re not alone, and I’ve got the fix right here.
And now for the teaser that will keep you on the edge of your seat: I’m going to reveal a surprising ingredient that most people skip—an ounce of cream cheese folded into the custard at the very end. It adds a subtle tang that cuts through the sweetness and gives the pudding a body you can actually see when you slice through the layers. I dare you to taste this and not go back for seconds. Let me walk you through every single step — by the end, you’ll wonder how you ever made it any other way.
What Makes This Version Stand Out
- Texture: The wafers stay delightfully crunchy until you bite, thanks to a brief “dry‑soak” that locks in moisture without sogginess.
- Flavor Depth: A splash of vanilla‑bean paste and a dollop of cream cheese give the custard a layered flavor profile that sings.
- Simplicity: Only ten ingredients, all pantry‑friendly, and no fancy equipment—just a bowl, a whisk, and a love for comfort food.
- Make‑Ahead Magic: Assemble the night before, refrigerate, and the flavors meld into a richer, more cohesive dessert.
- Crowd Reaction: Guests consistently claim it’s “the best thing they’ve ever tasted,” and they’ll be begging for the recipe.
- Ingredient Quality: Using real‑vanilla extract and fresh, ripe bananas elevates the dish from “good” to “legendary.”
- Cooking Method: A gentle stovetop custard avoids the dreaded curdle, while a quick bake at the end creates a caramelized top.
- Year‑Round Comfort: Perfect for summer picnics or winter holidays—this pudding never goes out of style.
Alright, let's break down exactly what goes into this masterpiece...
Inside the Ingredient List
The Flavor Base
The heart of any great banana pudding is the custard. I use an instant vanilla pudding mix because it guarantees a smooth, glossy texture, but I also enrich it with two whole eggs, a splash of real vanilla extract, and a quarter‑cup of heavy cream. The eggs act as a natural thickener, while the cream adds a buttery richness that store‑bought mixes can’t replicate. Skipping the eggs? Expect a watery, bland pudding that won’t hold its shape. If you’re allergic to eggs, a tablespoon of cornstarch mixed with extra milk can substitute, though you’ll lose a touch of silkiness.
The Texture Crew
Vanilla wafers are the unsung heroes. Their slight sweetness and buttery crunch create the structural backbone. I recommend the classic Nabisco brand, but any sturdy, lightly sweetened cookie will do. The secret is to let the wafers sit in a thin layer of milk for just 2‑3 minutes before layering—long enough to soften slightly, but not so long that they dissolve. If you love extra crunch, toast the wafers lightly in a dry skillet for 30 seconds; they’ll take on a caramelized edge that shatters like thin ice when you bite.
The Unexpected Star
Cream cheese. Yes, you read that right. Adding a half‑cup of softened cream cheese at the very end of the custard cooking process creates a subtle tang that balances the sweetness of the bananas and the sugar. It also gives the pudding a luxurious, velvety mouthfeel that feels like a secret handshake between Southern comfort and upscale patisserie. If you’re dairy‑free, try a plant‑based cream cheese; just be sure it’s unflavored.
The Final Flourish
A generous handful of freshly whipped heavy cream (or store‑bought whipped topping) crowns the pudding, adding airy lightness that contrasts the dense custard layers. Sprinkle a pinch of sea salt on top just before serving; the salt amplifies the vanilla notes and makes the banana flavor pop like fireworks. For a decorative touch, shave a little dark chocolate over the top—this adds a bitter edge that cuts through the sweetness, creating a balanced finish.
Everything's prepped? Good. Let's get into the real action...
The Method — Step by Step
First, whisk together the instant vanilla pudding mix, whole milk, granulated sugar, and a pinch of salt in a medium saucepan. Heat over medium‑low, stirring constantly, until the mixture just begins to thicken—about 5 minutes. You’ll see tiny bubbles forming along the edges; that’s the cue that the sugars are caramelizing gently.
Kitchen Hack: Use a silicone spatula to scrape the bottom of the pan in a circular motion; this prevents scorching and ensures a uniformly thick custard.In a separate bowl, whisk the egg yolks until they turn a pale yellow. Temper the yolks by slowly adding a ladleful of the hot pudding mixture while whisking vigorously. This raises the yolks’ temperature without scrambling them—a classic French technique that guarantees a silky custard.
Return the tempered yolks to the saucepan, lower the heat, and continue stirring for another 2‑3 minutes until the custard reaches a thick, coat‑the‑spoon consistency. At this point, stir in the softened cream cheese, melted butter, and vanilla extract. The mixture should look glossy and slightly glossy—like a sunrise over a calm lake.
Remove the custard from the heat and let it cool for 5 minutes. Then, fold in the heavy cream gently; this adds extra silk without making the pudding too airy. The custard should be thick enough to hold its shape when spooned but still pourable.
While the custard cools, slice the bananas into 1/4‑inch rounds. Arrange a single layer of vanilla wafers in the bottom of a 9‑inch square dish, then drizzle a thin layer of milk over them—just enough to moisten. This “dry‑soak” ensures the wafers stay crisp after baking.
Watch Out: If you let the wafers sit in milk for more than 5 minutes, they’ll become soggy and lose that beloved crunch.Layer the banana slices over the moistened wafers, then spoon a generous amount of the custard over the bananas, spreading it evenly. Repeat the process—wafer, milk, banana, custard—until you’ve used all ingredients, finishing with a custard layer on top.
Cover the dish with foil and bake in a preheated oven at 350°F (175°C) for 20 minutes. The heat will gently toast the wafer edges, creating that caramelized crunch that makes the dish sing. When you remove the foil, sprinkle the top with a handful of crushed wafers and a light dusting of sea salt.
Kitchen Hack: For an extra golden top, switch the oven to broil for the last 2 minutes—watch closely, the edges will turn a deep amber in seconds.Let the pudding cool to room temperature, then refrigerate for at least 2 hours. This resting period allows the flavors to meld, and the custard to set fully. When you finally dig in, you’ll notice the wafers have absorbed just enough moisture to become tender without turning mushy—pure perfection.
Before serving, whip the remaining heavy cream with a pinch of sugar until soft peaks form. Dollop the whipped cream over each slice, and finish with a final sprinkle of crushed wafers and a drizzle of melted butter for shine. That final glossy finish? Pure magic.
That's it — you did it. But hold on, I've got a few more tricks that'll take this to another level...
Insider Tricks for Flawless Results
The Temperature Rule Nobody Follows
Never, ever add the hot custard directly onto cold bananas. The shock will cause the bananas to release excess liquid, turning your pudding watery. Instead, let the custard sit for five minutes after cooking, then gently warm it to lukewarm before layering. This small temperature dance ensures the bananas stay firm, and the custard maintains its silky texture.
Why Your Nose Knows Best
When the custard is simmering, trust your sense of smell more than a timer. The moment you detect a faint caramel aroma, you’re at the perfect thickness. If you rely solely on visual cues, you might over‑cook and end up with a grainy pudding. My nose has saved countless batches—listen to it, and you’ll never have a curdled disaster again.
The 5‑Minute Rest That Changes Everything
After assembling the layers, give the dish a five‑minute pause before popping it into the oven. This brief rest lets the milk soak the wafers just enough to create a “soft‑crunch” texture that’s impossible to achieve by baking alone. One of my friends tried to skip this step once—let's just say the final product was a soggy mess that no one could finish.
Butter‑Brush Brilliance
Before the final bake, brush the top layer of wafers with melted butter infused with a pinch of cinnamon. This creates a caramelized crust that crackles under the fork, reminiscent of a buttery shortbread cookie. The buttery brush also adds a glossy sheen that makes the dessert look as good as it tastes.
Whipped Cream Whisper
When whipping the cream for the topping, add a splash of vanilla extract and a teaspoon of powdered sugar. The vanilla amplifies the custard’s flavor, while the powdered sugar stabilizes the peaks, preventing them from weeping. Serve the whipped cream in a piping bag for a professional‑grade presentation that will wow any guest.
Creative Twists and Variations
This recipe is a playground. Here are some of my favorite ways to switch things up:
Chocolate Banana Dream
Swap half of the vanilla wafers for chocolate graham crackers, and stir a tablespoon of cocoa powder into the custard. The result is a decadent, mocha‑kissed pudding that will satisfy any chocolate lover.
Tropical Coconut Splash
Replace the heavy cream with coconut cream, and add a handful of toasted shredded coconut to the top. The coconut adds a fragrant, island‑vibe twist that pairs beautifully with the banana’s natural sweetness.
Spiced Autumn Harvest
Incorporate a pinch of ground cinnamon, nutmeg, and a drizzle of caramel sauce into the custard. This version is perfect for Thanksgiving leftovers, delivering warm, comforting spices that echo the season.
Berry‑Burst Surprise
Layer fresh strawberries or blueberries between the banana slices for a burst of tartness. The berries cut through the richness and add a pop of color that makes the dessert Instagram‑ready.
Vegan Velvet
Use a plant‑based milk (like oat or almond), vegan vanilla pudding mix, and coconut cream in place of dairy. Substitute the butter with coconut oil, and you’ll have a vegan-friendly version that still delivers that classic comfort.
Storing and Bringing It Back to Life
Fridge Storage
Cover the dish tightly with plastic wrap or a silicone lid and store in the refrigerator for up to 3 days. The pudding actually improves after a night, as the flavors continue to meld. Before serving, let it sit at room temperature for 10 minutes to soften the edges.
Freezer Friendly
If you need to keep it longer, freeze individual portions in airtight containers for up to 2 months. Thaw overnight in the fridge, then add a splash of milk or a drizzle of melted butter before reheating to restore that creamy consistency.
Best Reheating Method
Reheat slices in a low oven (300°F/150°C) for 10‑12 minutes, covered with foil to prevent drying. Add a tiny splash of water or milk to the bottom of the dish before reheating; the steam will bring the custard back to its original silkiness without turning it rubbery.