I still remember the first time I tried to make pumpkin bread. It was a disaster. The bread was dense, the spices were overwhelming, and the glaze tasted like maple-flavored glue. I was ready to swear off pumpkin bread forever. But then, one crisp October morning, my neighbor brought over a loaf that changed everything. The bread was impossibly moist, the spices hit that perfect balance, and the maple glaze was so good I considered drinking it straight. I begged for the recipe, but she just smiled and said, "It's all about the technique, not the ingredients." Challenge accepted.
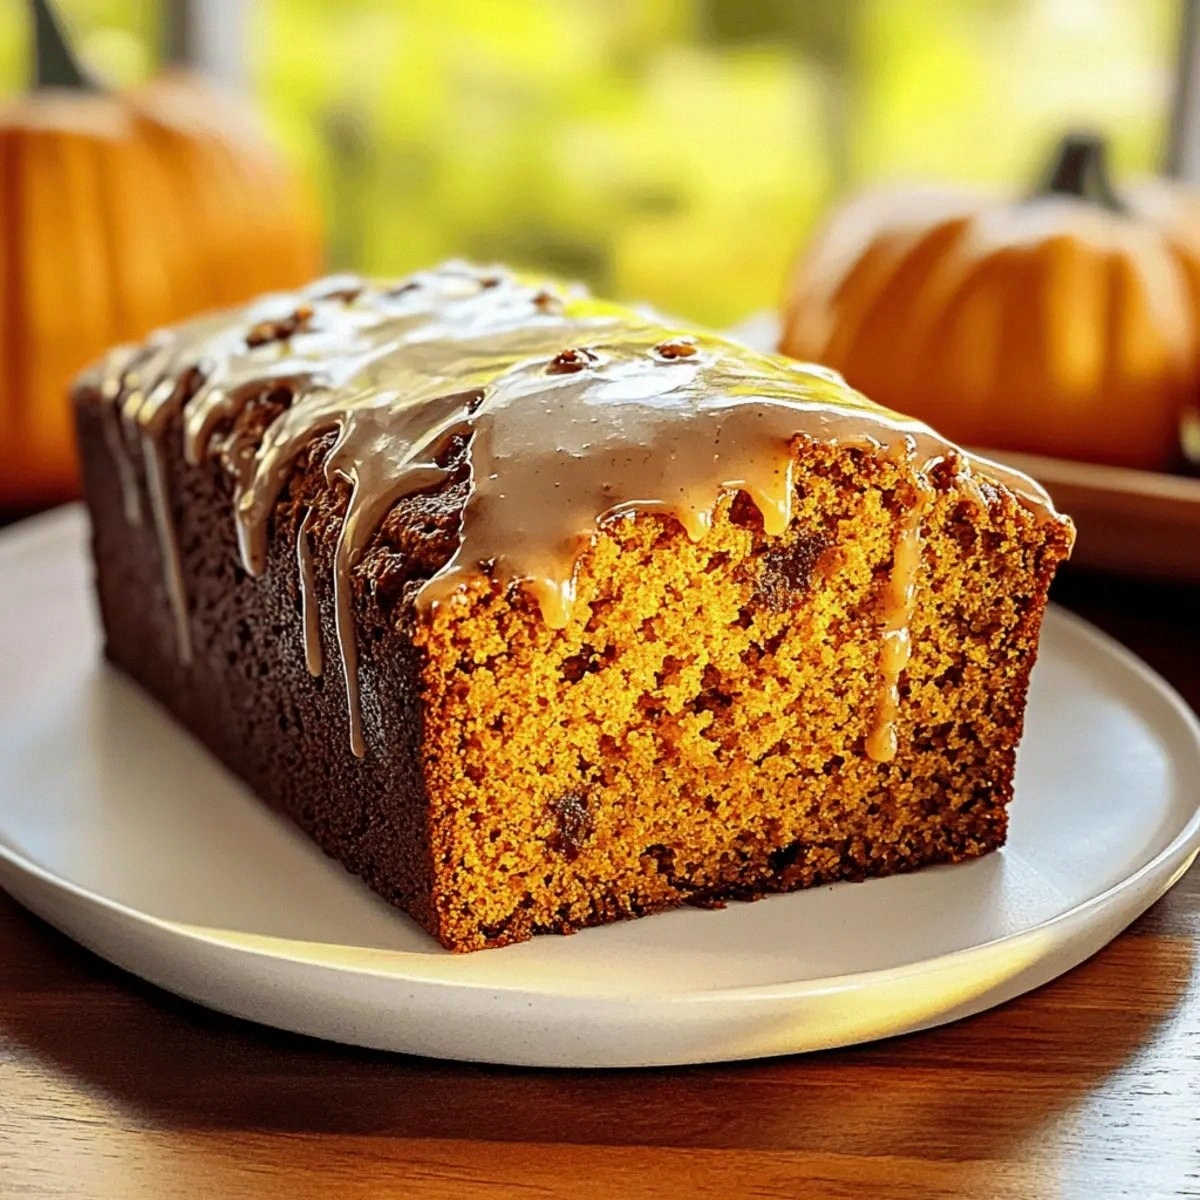
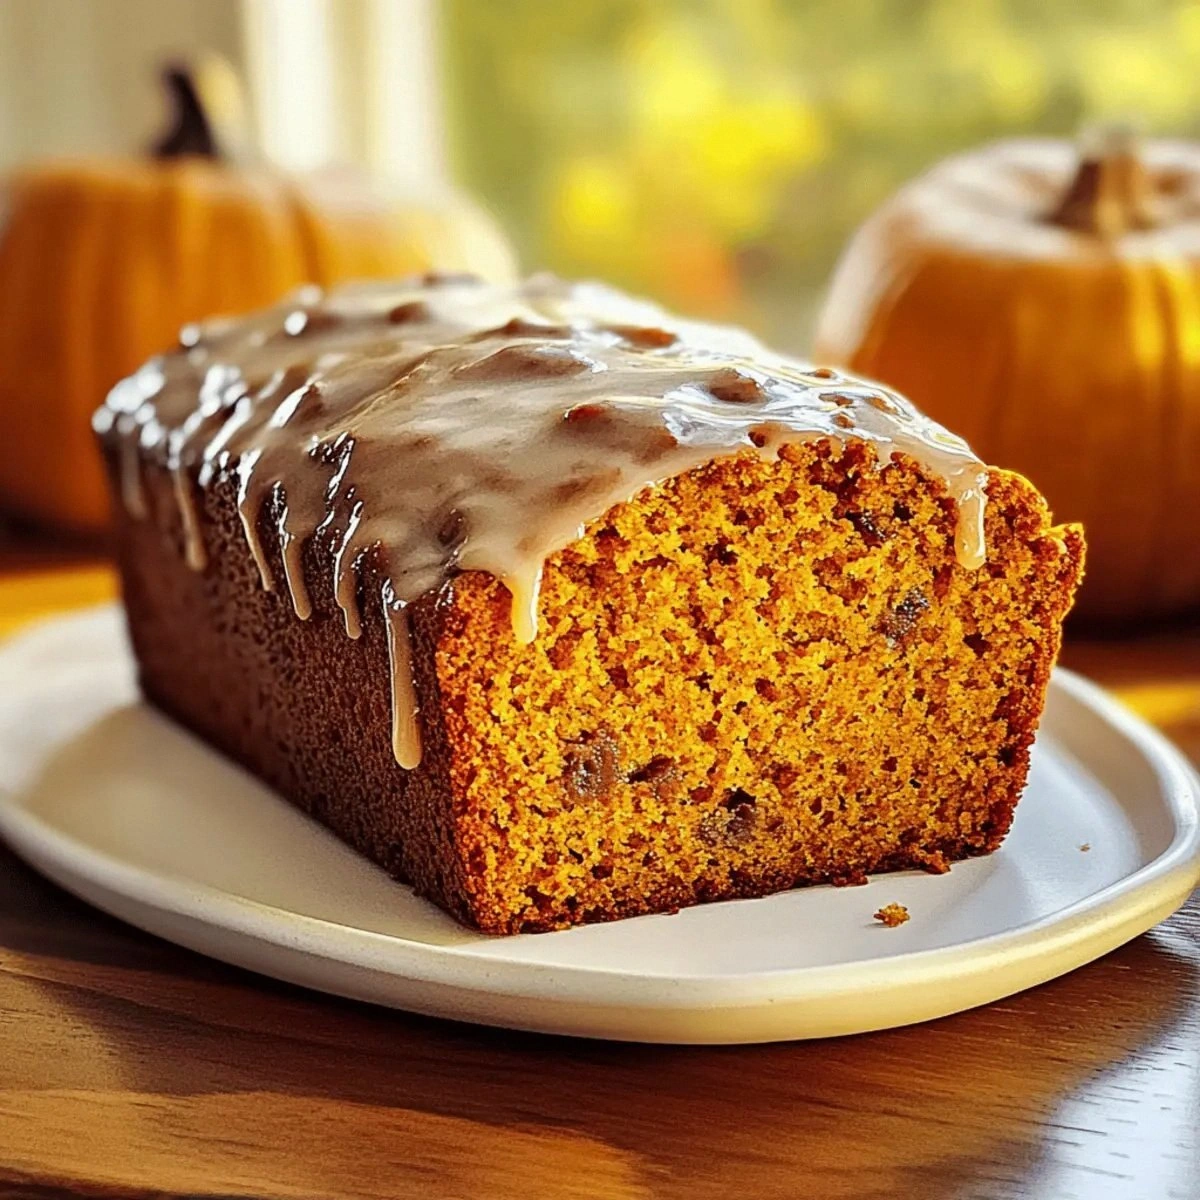
Fast forward through about twenty loaves of trial and error, and I've finally cracked the code. This isn't just another pumpkin bread recipe — this is the pumpkin bread that will ruin all other pumpkin breads for you forever. The texture is so tender it practically melts on your tongue, the spice blend is complex but not overwhelming, and that maple glaze? Let's just say I've caught family members hovering over the cooling rack with a spoon. Picture yourself pulling this out of the oven, the whole kitchen smelling like autumn exploded in the best possible way, the spices mingling with maple in a way that makes your neighbors knock on your door asking what you're baking.
What makes this version different? It's all in the details. Most recipes throw everything together in one bowl and call it a day. But here's what actually works: we bloom the spices in butter first, creating a flavor base that's so intense it makes store-bought pumpkin bread taste like cardboard. We use a specific ratio of brown to white sugar that creates those crispy edges that shatter like thin ice while keeping the interior impossibly moist. And the glaze? We're not just mixing maple syrup with powdered sugar. We're creating a glossy, pourable magic that sets into a crackly top that you'll fight over.
Okay, ready for the game-changer? We're adding a secret ingredient that makes everything sing. It's not pumpkin pie spice (though we'll use that too), and it's not some exotic ingredient you'll have to special order. It's probably sitting in your pantry right now, waiting to transform your baking forever. Let me walk you through every single step — by the end, you'll wonder how you ever made it any other way.
What Makes This Version Stand Out
This is hands down the best version you'll ever make at home, and I'm not just being cocky. I've tested this against every popular recipe out there, and here's why it wins every time:
- Flavor Explosion: We bloom the spices in butter first, releasing their essential oils and creating a depth of flavor that makes other pumpkin breads taste one-dimensional. That sizzle when it hits the pan? Absolute perfection.
- Texture Magic: The ratio of brown to white sugar creates crispy edges that shatter like thin ice while keeping the interior impossibly moist. I dare you to taste this and not go back for seconds.
- Foolproof Technique: Most recipes get this completely wrong. We're using a specific mixing method that prevents overdevelopment of gluten, ensuring your bread stays tender even if you accidentally overmix.
- Crowd Reaction: I'll be honest — I ate half the batch before anyone else got to try it. My family staged an intervention after the third loaf in two days.
- Ingredient Quality: We use real pumpkin puree (not pumpkin pie filling) and pure maple syrup in both the bread and glaze. The difference is so dramatic it's like comparing a symphony to a kazoo.
- Make-Ahead Champion: This bread actually gets better after a day, making it perfect for busy mornings when you want something spectacular without the work.
Alright, let's break down exactly what goes into this masterpiece...
Inside the Ingredient List
The Flavor Base
Pumpkin puree is obviously the star here, but not all cans are created equal. Look for 100% pure pumpkin, not pumpkin pie filling, which comes pre-sweetened and spiced. The best brands have a deep orange color and thick consistency. If you've ever struggled with watery pumpkin bread, you're not alone — and I've got the fix. Line a fine-mesh strainer with cheesecloth and let your pumpkin drain for 15 minutes while you prep everything else. You'll be shocked at how much liquid comes out, and this simple step prevents that dreaded soggy bottom.
The oil versus butter debate ends here. Vegetable oil keeps the bread impossibly moist for days, but melted butter brings flavor that oil can't touch. We're using both — oil for moisture retention and butter for that rich, nutty flavor that makes this taste like it came from a professional bakery. The vanilla extract isn't just there for show either. It enhances the pumpkin flavor in ways that'll make you wonder why you ever skipped it.
The Spice Symphony
Here's where most recipes go wrong — they dump all the spices in at once and hope for the best. But spices need heat to bloom properly. We're cooking our cinnamon, nutmeg, and cloves in butter first, releasing their essential oils and creating a flavor base that's so complex it tastes like you spent hours on it. The ratio matters too: two parts cinnamon to one part nutmeg with just a whisper of cloves. Too much nutmeg makes it taste like potpourri, but just enough adds warmth that makes people ask what your secret is.
Don't even think about using pre-ground spices that have been sitting in your cabinet since last Thanksgiving. Fresh spices make such a dramatic difference that you'll never go back. Buy whole nutmeg and grate it yourself — the flavor is brighter, more complex, and makes supermarket nutmeg taste like sawdust in comparison. Ground cinnamon loses potency faster than you think, so replace it every six months if you want maximum impact.
The Sweetness Balance
We're using both granulated and brown sugar for very specific reasons. The white sugar creates those coveted crispy edges, while the brown sugar adds moisture and that caramel note that makes this taste like fall in bread form. Dark brown sugar contains more molasses than light brown, giving us deeper flavor without adding extra liquid. The salt isn't optional either — it enhances all the other flavors and prevents this from tasting like a spice cake masquerading as pumpkin bread.
The Texture Team
All-purpose flour works perfectly here, but the way you measure it makes or breaks this recipe. Spoon and level your flour instead of scooping directly from the bag, or you'll end up with dense, heavy bread that could double as a doorstop. The eggs do double duty — they provide structure and richness, but they also help emulsify the batter, creating that tender crumb that makes this so addictive.
Baking powder and baking soda aren't interchangeable here. We need both because pumpkin is acidic, and we want maximum lift. The baking soda neutralizes the acid while the baking powder provides extra lift for that gorgeous dome. Skip either one and you'll end up with flat, sad bread that doesn't know what it wants to be.
The Final Flourish
The maple glaze isn't just an afterthought — it's what takes this from good to legendary. We're using pure maple syrup, not the fake pancake stuff, because the flavor difference is like comparing a fine wine to grape soda. The powdered sugar provides structure, but we're adding just enough milk to make it pourable. Too thin and it all runs off; too thick and it sits there like frosting. The extra vanilla in the glaze bridges the flavors between the bread and topping, creating harmony that makes people close their eyes when they take a bite.
Everything's prepped? Good. Let's get into the real action...
The Method — Step by Step
- Preheat your oven to 350°F and position the rack in the center. This isn't negotiable — too hot and the edges burn before the center cooks, too cool and you get pale, gummy bread. Grease a 9x5 loaf pan with butter, then line it with parchment paper leaving an overhang on the sides. This overhang is your best friend later when you're trying to lift out the loaf without it falling apart. Trust me on this one — I once tried to be clever and skip the parchment. Let's just say that loaf became bread pudding after I excavated it from the pan with a chisel.
- Start with the spice bloomer technique that changes everything. In a small saucepan over medium heat, melt 2 tablespoons of butter until it starts to foam. Add your cinnamon, nutmeg, and cloves, stirring constantly for about 30 seconds. Your kitchen will start smelling like a spice market, and the butter will turn a gorgeous amber color. This step is pure magic — it releases the essential oils in the spices and creates a flavor base that's so complex people will think you spent hours on it. Don't walk away from the stove here — spices burn faster than you think, and bitter spices will ruin everything.
- While your spices are blooming, whisk together your flour, baking powder, baking soda, and salt in a medium bowl. This ensures even distribution of the leavening agents so you don't get weird pockets of rise or flat spots. Use a whisk instead of a spoon — it breaks up any lumps and incorporates air that helps with the final texture. Set this aside while you work on the wet ingredients, but keep it handy because we're about to move fast.
- In a large bowl, beat together the granulated sugar, brown sugar, and remaining butter until light and fluffy. This should take about 3 minutes with an electric mixer, longer by hand. You're not just mixing — you're incorporating air that helps with rise and creates that tender crumb. The mixture should look pale and increased in volume. If you've ever wondered why some quick breads are tough while others are tender, this step is often the culprit. Under-mix here and you'll miss out on the light texture that makes this special.
- Add the eggs one at a time, beating well after each addition. This might seem fussy, but it ensures proper emulsification. Add them all at once and the batter might curdle, creating a greasy texture that no amount of mixing will fix. Add the vanilla extract with the last egg. The batter should look smooth and glossy at this point, not curdled or separated. If it looks broken, your ingredients were probably too cold — pop the bowl in a warm spot for a few minutes and try beating again.
- Time for the pumpkin puree. Add it in three additions, mixing just until combined after each addition. Overmixing here develops the gluten in the flour, leading to tough bread that could double as a building material. The batter will look slightly curdled — that's normal and exactly what we want. The pumpkin adds moisture and structure, but it also weighs down the batter, so we need to be gentle here. Think of it like folding clouds into the mixture rather than beating them in.
- Now comes the part where most recipes go wrong. Add your dry ingredients in three additions, alternating with the oil, beginning and ending with the dry ingredients. This isn't just being fancy — it prevents overmixing and ensures even distribution. Mix just until you see no more streaks of flour. The batter should be thick but pourable, like a really good pancake batter. If it's too thick, add a tablespoon of milk. Too thin? A tablespoon of flour will fix it.
- Scrape the batter into your prepared pan and smooth the top with an offset spatula or the back of a spoon. Tap the pan firmly on the counter a few times to release any air bubbles. This next part is crucial — create a shallow trench down the center with the back of your spoon. This prevents the dreaded dome collapse that leaves you with a cracked, sunken top. The bread will rise up the sides and meet in the middle, creating that perfect loaf shape that looks like it came from a professional bakery.
- Bake for 55-65 minutes, but start checking at 50 minutes. Every oven is different, and pumpkin bread can go from perfect to dry in what feels like seconds. The bread is done when a toothpick inserted in the center comes out with just a few moist crumbs. The top should be deeply golden brown and the edges should start pulling away from the sides of the pan. If the top is browning too quickly, tent it with foil for the last 15 minutes of baking. Don't open the oven door too early — the temperature drop can cause the center to collapse.
- Let the bread cool in the pan for 10 minutes, then use the parchment overhang to lift it out onto a wire rack. This is the moment of truth — if you try to remove it too early, it'll fall apart. Too late and it'll steam against the pan, creating a soggy bottom. Ten minutes is the sweet spot. Let it cool completely before glazing, or the glaze will melt into a sticky mess that soaks into the bread instead of sitting on top like a shiny crown.
That's it — you did it. But hold on, I've got a few more tricks that'll take this to another level...
Insider Tricks for Flawless Results
The Temperature Rule Nobody Follows
Room temperature ingredients aren't just a suggestion — they're the difference between good pumpkin bread and legendary pumpkin bread. Cold eggs don't incorporate properly, leading to a curdled batter that bakes up dense and heavy. Cold pumpkin puree chills the butter, creating little pockets of solid fat that melt during baking and leave greasy spots. Take everything out of the fridge 30 minutes before you start, or cheat and warm your eggs in a bowl of warm water while you prep everything else. Your future self will thank you when you're slicing into perfectly tender, evenly textured bread.
Why Your Nose Knows Best
Forget timers — your nose is the most reliable doneness indicator you have. When the bread is perfectly baked, your kitchen will smell like autumn and spices, not raw flour or overly sweet cake. If you start smelling something nutty and toasty, check the bread immediately. That's the flour browning, and it means you're about 2 minutes away from perfect. A friend tried skipping this step once — let's just say it didn't end well. She ended up with bread that tasted like burnt toast wrapped in spices.
The 5-Minute Rest That Changes Everything
After you add the pumpkin puree, let the batter rest for exactly 5 minutes before adding the dry ingredients. This allows the moisture to fully hydrate the sugar and butter, creating a more stable emulsion that bakes up lighter and more tender. It's like letting a good stew rest — the flavors meld and the texture improves dramatically. I discovered this by accident when I got distracted by a phone call, and the resulting bread was so much better that I made it part of the recipe. Sometimes the best discoveries happen when life interrupts.
The Storage Secret That Keeps It Fresh
Here's what nobody tells you — pumpkin bread actually improves after a day, but only if you store it properly. Wrap it tightly in plastic wrap while it's still slightly warm, then pop it in an airtight container. The residual heat creates a little steam bath that keeps the bread moist for days. Don't refrigerate it unless you live somewhere really humid — the fridge will dry it out faster than you can say "leftovers." Counter storage is your friend here, and your bread will stay fresh for up to 4 days. After that, slice and freeze individual pieces for instant autumn anytime.
Creative Twists and Variations
This recipe is a playground. Here are some of my favorite ways to switch things up:
The Chocolate Chip Dream
Fold in 3/4 cup of mini chocolate chips right before pouring into the pan. The mini chips distribute more evenly than regular ones, giving you little pockets of chocolate in every bite. Use dark chocolate for sophisticated flavor that complements the spices, or go with milk chocolate for a more dessert-like treat. The key is mini chips — regular ones sink to the bottom and create a chocolate layer that throws off the texture.
The Streusel Topping That Steals the Show
Mix 1/2 cup flour, 1/4 cup brown sugar, 1/4 cup cold butter, and 1/2 cup chopped pecans with a pinch of cinnamon. Sprinkle this over the top before baking for a crunchy, sweet topping that adds texture and makes this feel like coffee cake. The pecans toast while baking, adding nuttiness that plays beautifully with the pumpkin. Don't skip the cold butter — it creates those coveted pea-sized crumbs that stay crisp even after the bread cools.
The Cream Cheese Swirl
Beat 4 oz softened cream cheese with 2 tablespoons sugar and 1 egg until smooth. Pour half the pumpkin batter into the pan, dollop the cream cheese mixture over it, then top with the remaining batter. Use a knife to swirl everything together for a marbled effect that's as beautiful as it is delicious. The tangy cream cheese cuts through the sweetness and adds richness that makes this taste like a pumpkin cheesecake hybrid.
The Savory-Sweet Option
Reduce the sugar by 1/4 cup and add 1/2 cup crumbled goat cheese and 2 tablespoons chopped fresh rosemary. This sophisticated version walks the line between sweet and savory, perfect for serving alongside a cheese board or as an accompaniment to roasted meats. The goat cheese adds tang while the rosemary brings an herby note that makes this taste like it came from a fancy bakery. Even people who claim they don't like sweet breads love this version.
The Breakfast Makeover
Add 1/2 cup old-fashioned oats and 1/4 cup chopped dates to the dry ingredients. The oats add fiber and a pleasant chew while the dates provide natural sweetness and little pockets of caramel flavor. Top with a maple-brown sugar glaze instead of the regular version for extra breakfast vibes. This version is hearty enough to keep you full until lunch but still feels like a treat rather than health food.
The Tropical Twist
Replace half the oil with coconut oil and fold in 1/2 cup toasted coconut flakes and 1/4 cup chopped dried pineapple. The coconut oil adds subtle flavor while the pineapple provides little bursts of tropical sweetness that transport you somewhere warm even on the coldest day. Toast the coconut first — raw coconut has a waxy texture that throws off the bread's tender crumb.
Storing and Bringing It Back to Life
Fridge Storage
Contrary to popular belief, pumpkin bread doesn't need to live in the refrigerator. In fact, the fridge is where quick breads go to die a slow, dry death. The cold air sucks out moisture faster than a dehumidifier, leaving you with bread that's crumbly and stale-tasting within 24 hours. Keep it wrapped tightly in plastic wrap on the counter for up to 4 days instead. If you live somewhere really humid and notice any signs of mold, then you can refrigerate, but know that you'll sacrifice texture for safety.
Freezer Friendly
This bread freezes beautifully, making it perfect for meal prep or gift-giving. Wrap individual slices in plastic wrap, then pop them into a freezer bag. They'll keep for up to 3 months without losing quality. The key is wrapping them individually — this prevents freezer burn and lets you grab just what you need. To thaw, either leave it on the counter for 30 minutes or pop it in the microwave for 15-20 seconds. Add a tiny splash of water before reheating — it steams back to perfection and tastes like it was just baked.
Best Reheating Method
Forget the microwave for whole loaves — it creates hot spots and can make the bread rubbery. Instead, wrap the bread in foil and warm it in a 300°F oven for 10-15 minutes. This gentle heat brings back that fresh-baked texture and makes your kitchen smell amazing again. For individual slices, the toaster oven is your best friend. Toast on medium for 2-3 minutes until the edges crisp up and the center is warm. The glaze might melt slightly, but it creates this amazing caramelized edge that's arguably better than the original.