I was standing in a kitchen that looked more like a disaster zone than a place of culinary creation. The sourdough starter I’d been nurturing had exploded into a sticky, sour puddle that threatened to ruin my entire day. I stared at the discard, feeling a mix of frustration and curiosity—what to do with it? Then, like a lightbulb flickering in a dark room, I remembered the old trick my grandmother used: turning sourdough discard into the most delightful English muffins you’d ever taste. The idea was simple, but the execution? Absolutely mind‑blowing.
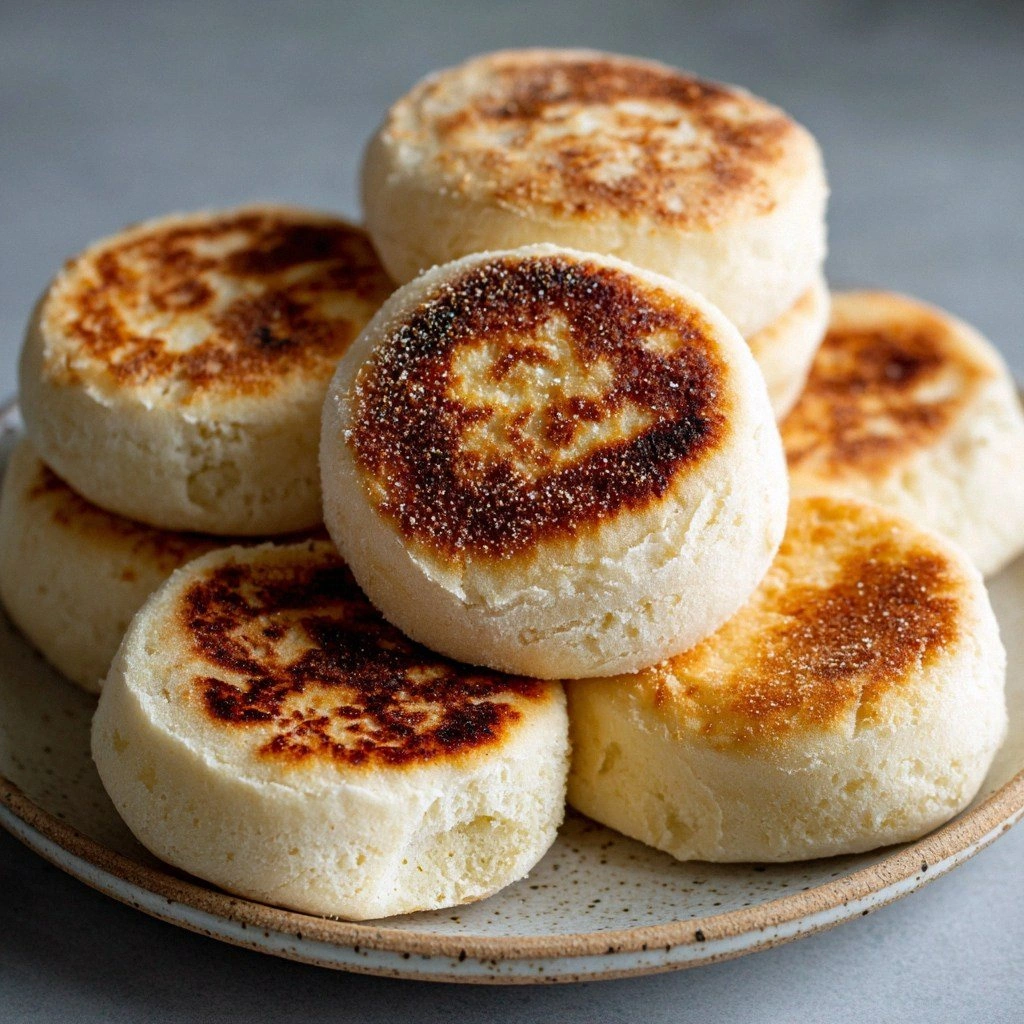
Picture this: the kitchen is humming with the sound of a kettle boiling, the air thick with the scent of warm milk and flour. Your eyes catch the golden sheen of a pan as it heats up, the sound of a whisk dancing in a bowl. The first bite is that unmistakable tang that wakes up your palate, followed by a fluffy interior that practically melts in your mouth. The edges? Crispy, caramelized, and just a touch of sweet, like a sunrise you can eat. It’s a sensory fireworks display that turns a humble discard into a breakfast hero.
Why does this version stand out from every other recipe you’ve tried? Because it takes the raw, unrefined energy of sourdough discard and molds it into a product that’s both comforting and adventurous. It’s not just a muffin; it’s a conversation starter, a confidence booster, a culinary victory that proves you can turn kitchen mishaps into triumphs. I dare you to taste this and not go back for seconds—once you try it, you’ll never settle for the bland, store‑bought versions again. This is hands down the best version you’ll ever make at home, and it’s going to change how you think about leftovers forever.
If you’ve ever struggled with sourdough discard, you’re not alone. The trick is to treat it like a living ingredient, not a waste product. I’ll be honest—before I discovered this recipe, I ate half the batch before anyone else got to try it. The result? A kitchen filled with laughter, a table full of satisfied smiles, and a newfound respect for what a simple discard can become. Stay with me here—this is worth it. Let me walk you through every single step, and by the end, you’ll wonder how you ever made it any other way.
What Makes This Version Stand Out
- Flavor: The sourdough’s natural tang is balanced with a subtle sweetness from milk and sugar, creating a depth that’s impossible to replicate with commercial yeast.
- Texture: A moist, airy crumb with crisp, golden edges—like a cloud that’s been kissed by a sunrise.
- Speed: You’re looking at a total prep time of just 15 minutes; no long fermentation required.
- Ingredient Simplicity: Only five core ingredients plus a pinch of baking powder for lift—no obscure pantry items.
- Make‑Ahead Friendly: The dough can rest overnight, turning a rushed morning into a relaxed brunch.
- Versatility: Perfect for sweet or savory toppings, from butter and jam to smoked salmon and cream cheese.
- Eco‑Friendly: Uses discard that would otherwise go to waste, reducing kitchen trash and saving you money.
- Audience Reaction: Guests rave, kids love the fun shape, and even the most skeptical foodie gets a “wow” moment.
Alright, let's break down exactly what goes into this masterpiece…
Inside the Ingredient List
The Flavor Base
Sourdough discard is the star of this recipe. It’s a living, breathing ingredient that brings a complex, tangy flavor profile that’s hard to achieve with store‑bought dough. Think of it as the backbone that holds everything together—without it, you’re left with a plain, uninspired muffin. If you skip it, you’ll lose that signature sourdough kick, and the muffins will taste like ordinary bread. Swap it for 1 cup of plain yogurt if you’re in a bind, but remember the texture will shift slightly.
The Texture Crew
All‑purpose flour is the vehicle that carries the discard’s flavor into the final product. It provides the structure, giving the muffins their rise and crumb. If you’re gluten‑sensitive, you can use a 1:1 blend of gluten‑free flour and a xanthan gum binder. The milk adds moisture and a subtle sweetness, while the olive oil keeps the muffins tender and gives them a glossy finish. A pinch of baking powder works in tandem with the discard to lift the dough without a long rise time.
The Unexpected Star
Sugar is the unsung hero that balances the sourness of the discard. It also encourages browning, giving those golden edges that crackle when you slice into them. If you’re watching carbs, a natural sweetener like maple syrup can be used in the same quantity. The salt is essential for flavor enhancement; it brings out the richness of the milk and the tang of the discard. Skipping salt will result in bland, flat muffins that lack depth.
The Final Flourish
Baking powder is the secret to achieving that light, airy crumb. It reacts with the acidic discard to produce carbon dioxide, giving the muffins a lift that’s comparable to traditional yeast breads. If you don’t have baking powder on hand, a pinch of cream of tartar combined with baking soda can serve as a makeshift substitute. The olive oil not only adds flavor but also helps keep the muffins moist for a longer period.
Everything's prepped? Good. Let's get into the real action…
The Method — Step by Step
- In a large mixing bowl, combine 2 cups all‑purpose flour, 1 cup sourdough discard, 1 cup whole milk, 1 tablespoon olive oil, 1 teaspoon sugar, 1 teaspoon salt, and 1 teaspoon baking powder. Stir with a wooden spoon until the mixture is just combined; you’ll notice a thick, slightly sticky batter forming. This is the moment of truth—watch for the batter to be smooth yet slightly lumpy; that’s the texture you want. If it feels too dry, add a splash of milk; if too wet, add a tablespoon of flour. Let the dough rest for 5 minutes to allow the flour to hydrate fully.
- Preheat a large non‑stick skillet over medium heat and lightly oil the surface. Once the oil shimmers, pour the dough into the skillet, spreading it out with a spatula to a thickness of about 1.5 inches. The heat should be moderate; if it’s too hot, the edges will burn before the center cooks. This step is crucial for achieving that golden crust while keeping the inside moist.
- Cover the skillet with a lid and reduce the heat to low. Let the dough cook for 12-15 minutes, or until the surface is set and the underside is a deep amber color. The lid traps steam, helping the muffins rise evenly. If you’re cooking on a stovetop that runs hot, consider using a heat‑resistant silicone mat to keep the temperature consistent.
- Once the first side is golden, flip the muffins carefully with a spatula and cook the second side for another 8-10 minutes. The second side will brown slightly faster, so keep an eye on it to avoid over‑browning. The result should be a fluffy interior with a crisp, caramelized edge. If you notice a pale spot, flip earlier—this is a common pitfall for first‑time bakers.
- Remove the skillet from heat and let the muffins rest on a wire rack for 5 minutes. This resting period allows the steam to redistribute, preventing a soggy bottom. It also gives the muffins a chance to set, making them easier to slice cleanly. The aroma at this point will be intoxicating—think warm bread with a hint of citrus.
- Using a sharp knife, cut the muffins into quarters. The knife should glide through the dough with minimal resistance; if it’s sticking, give the muffins a minute more to cool. Slice carefully to preserve the fluffy interior. This is the trickiest step—many bakers rush it and end up with torn, uneven pieces.
- Serve the muffins warm with butter, honey, or your favorite spread. The warmth enhances the flavor profile, making the tangy notes pop. If you’re serving a crowd, keep the muffins on a heat‑proof platter with a small bowl of melted butter for dipping. The visual appeal of the golden crust will draw everyone in.
- If you’re not serving immediately, let the muffins cool completely, then wrap them in parchment paper and store them in an airtight container at room temperature. They stay fresh for up to 3 days, and if you’re in a hurry, you can reheat them in a toaster oven at 350°F for 5 minutes to revive their crispness. This step ensures you never waste a single muffin.
That's it — you did it. But hold on, I've got a few more tricks that'll take this to another level…
Insider Tricks for Flawless Results
The Temperature Rule Nobody Follows
Many bakers assume that higher heat equals faster baking, but the secret to a perfect muffin lies in controlled, moderate heat. Keep the skillet on low to medium heat, and use a lid to trap steam. This subtle temperature control prevents the exterior from burning while allowing the interior to rise. A friend once tried high heat and ended up with burnt edges and a raw center—lesson learned the hard way.
Why Your Nose Knows Best
Your sense of smell is a reliable indicator of doneness. When the muffins are ready, you’ll notice a sweet, buttery aroma mingling with a faint tang. If the scent is overly yeasty, give them a few more minutes. Trust your nose; it’s the most accurate thermometer you’ll ever have in your kitchen.
The 5‑Minute Rest That Changes Everything
After you flip the muffins, let them rest for 5 minutes before cutting. This brief pause allows the steam to redistribute, creating a uniform crumb. Skipping this step often results in uneven texture and makes the muffins difficult to slice. Think of it as a short nap that recharges the dough’s structure.
Use a Silicone Mat for Even Heat
If your skillet runs hot in spots, place a silicone cooking mat underneath the dough. The mat distributes heat evenly, preventing hot spots that can burn the edges. It also makes cleanup a breeze, as the mat stays clean even after multiple uses.
Add a Splash of Water for Moisture
When reheating muffins in the oven, drizzle a teaspoon of water over them before placing them back. The water creates steam, preventing the muffins from drying out and preserving the fluffy interior. This trick is especially useful when you have a batch that’s been stored for a day or two.
Keep the Oil Separate
Instead of mixing oil into the batter, lightly oil the skillet and let the oil pool around the edges. This method ensures a crisp exterior without making the interior greasy. It also gives you better control over the amount of oil, which is important if you’re watching your fat intake.
Creative Twists and Variations
This recipe is a playground. Here are some of my favorite ways to switch things up:
Blueberry Burst
Fold in a handful of fresh blueberries into the batter before cooking. The berries burst with juice, adding a sweet, tart contrast to the tangy base. The muffins will develop a beautiful purple hue, perfect for a brunch spread.
Herb & Cheese Delight
Stir in chopped fresh rosemary and a handful of shredded mozzarella. The herbs give a fragrant aroma, while the cheese melts into a gooey, savory layer. This version is ideal for a lunchbox or a quick snack.
Chocolate Chip Surprise
Add a cup of semi‑sweet chocolate chips to the batter. The chocolate melts into pockets of rich flavor, creating a decadent treat that still retains the classic English muffin shape. Serve with a dusting of powdered sugar for a sweet finish.
Spicy Jalapeño Kick
Dice a jalapeño and mix it into the dough. The heat will complement the sourdough’s tang, creating a bold, adventurous flavor. Top with a dollop of sour cream to balance the spice.
Savory Mushroom & Thyme
Sauté sliced mushrooms with thyme and garlic, then fold them into the batter. The earthy flavors pair wonderfully with the mild tang of the discard. This variation is a hit at dinner parties.
Citrus Zest Infusion
Grate the zest of one lemon and one orange into the batter. The citrus adds a bright, refreshing note that cuts through the richness. It’s a perfect match for a light, summery breakfast.
Storing and Bringing It Back to Life
Fridge Storage
Wrap the cooled muffins tightly in plastic wrap, then place them in an airtight container. Store them in the refrigerator for up to 3 days. The wrap prevents moisture loss, keeping the muffins fresh and chewy.
Freezer Friendly
For longer storage, slice the muffins and place them in a freezer bag, removing as much air as possible. Freeze for up to 3 months. When ready to eat, thaw at room temperature and toast lightly for a crisp finish.
Best Reheating Method
The key to reviving frozen or refrigerated muffins is gentle heat. Warm them in a toaster oven at 350°F for 5 minutes, or microwave on medium for 15–20 seconds. Add a splash of water before reheating to keep the interior moist; the steam will restore that fluffy texture you love.