I remember the night it all started, a frantic scramble to salvage a ruined brunch spread that had gone horribly awry. The pancakes had overcooked into a leathery slab, the scrambled eggs had turned into a rubbery mess, and the fruit platter was a sad, soggy heap of berries that had lost all their vibrancy. I stared at the ruined blackberries, feeling the sting of disappointment, and thought, “There has to be a way to turn this into something spectacular.” That moment of culinary desperation sparked a discovery that would change the way I view jam forever.
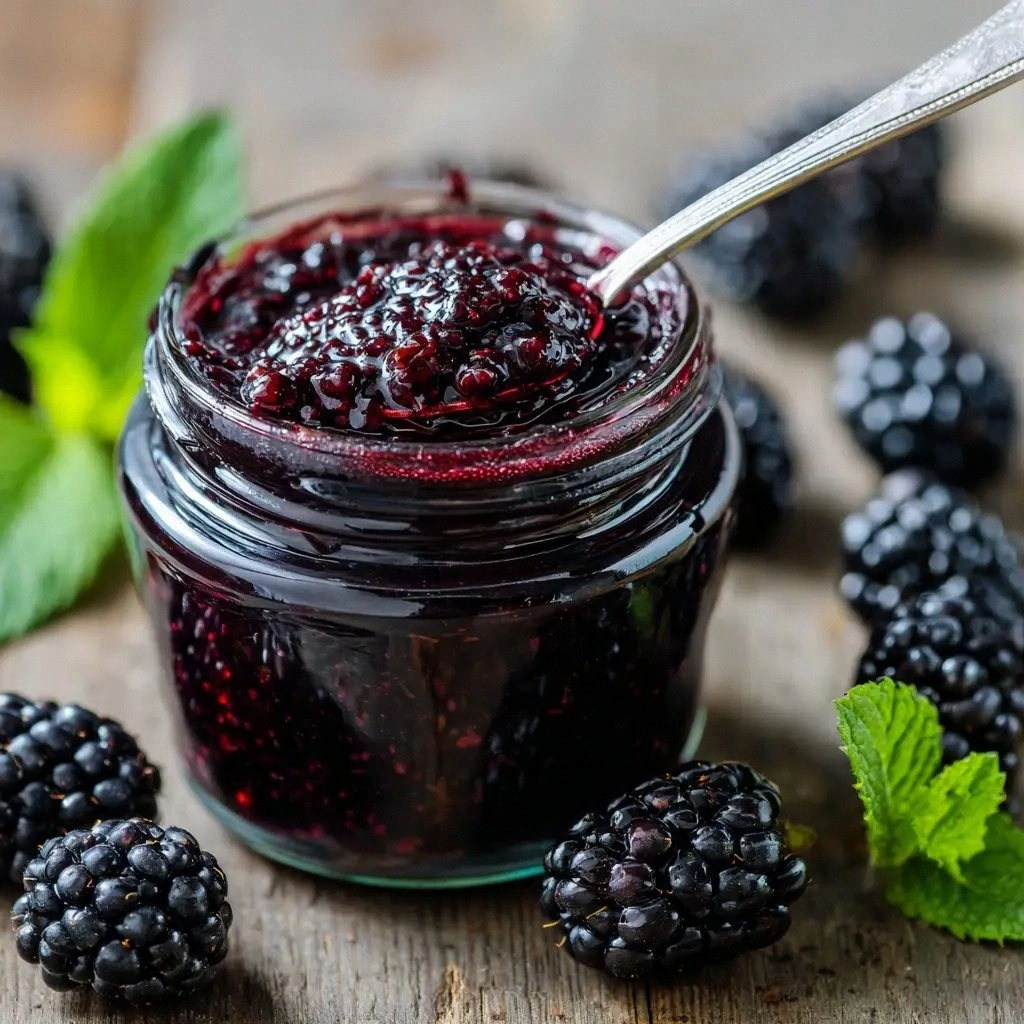
Picture this: a bright, glossy jar of blackberry jam, its deep purple hue glinting like a midnight jewel. The scent that escapes the lid is a sweet, tart perfume that lingers on the air, like a promise of indulgence. The first spoonful melts on your tongue, the berries burst with juicy sweetness, and the lemon’s bright zing cuts through the sweetness like a fresh breath. The butter adds a subtle, silky richness that coats your palate, leaving a lingering, buttery aftertaste that makes you crave more.
This jam is not just a spread; it’s a symphony of flavors, textures, and aromas. The blackberries provide a robust, deep sweetness; the lemon juice injects a bright, almost citrusy lift; the butter brings a silky mouthfeel; and the mint adds a whisper of herbaceous coolness. Together, they create a jam that is simultaneously simple and sophisticated, rustic and refined. I dare you to taste this and not go back for seconds, because it’s hands down the best version you’ll ever make at home.
What sets this recipe apart from the countless others you’ve seen? It’s the deliberate layering of flavors, the precise timing of the simmer, the subtle use of butter, and the final touch of mint that elevates the jam from ordinary to extraordinary. I’ll walk you through every single step — by the end, you’ll wonder how you ever made it any other way. So grab your ingredients, set your timer, and let’s dive into a jam-making adventure that will leave your taste buds singing.
What Makes This Version Stand Out
- Flavor Depth: The blackberries are left whole, preserving their natural burst of juice and allowing the jam to carry a complex berry profile that’s far richer than a puree.
- Texture Precision: A controlled simmer ensures that the jam thickens without becoming gummy, giving it a smooth yet slightly chunky mouthfeel that’s perfect on toast.
- Minimalist Ingredients: Only six ingredients, each chosen for a specific role, keep the process straightforward while delivering maximum impact.
- Butter Infusion: The small amount of butter melts into the jam, creating a glossy sheen and a silky finish that sets this spread apart from the usual watery jellies.
- Mint Magic: Fresh mint leaves release a gentle, aromatic oil that balances the sweetness and adds a refreshing note that surprises the palate.
- Make‑Ahead Friendly: Once cooled, the jam can be sealed and stored for up to a month, making it a convenient, long‑lasting treat for busy weeks.
Inside the Ingredient List
The Flavor Base
Blackberries are the heart of this jam. Fresh, ripe berries provide the natural sweetness, acidity, and body. If you’re using frozen berries, thaw them fully and drain excess liquid to prevent a watery jam. Avoid over‑mashing; leaving whole berries preserves their texture and keeps the jam lively. The berries’ natural pectin is essential for achieving a firm, set consistency without needing artificial additives.
The Sweetness Engine
Granulated sugar is the primary sweetener and the key to setting the jam. It dissolves into the berries, creating a syrupy base that helps the mixture thicken. The sugar also acts as a preservative, extending the jam’s shelf life. If you’re watching your sugar intake, you can experiment with a 50/50 sugar‑honey blend, but keep in mind the texture may shift slightly.
The Unexpected Star
Lemon juice is the secret weapon that brightens the jam’s flavor profile. Its acidity balances the sugar, prevents over‑sweetness, and enhances the natural berry taste. The juice also helps the jam set by increasing pectin activity. If you’re allergic to citrus, a splash of apple cider vinegar can provide a similar acidic punch, but use it sparingly.
The Final Flourish
Unsalted butter adds a luxurious sheen and a subtle richness that elevates the jam’s mouthfeel. It also helps prevent crystallization, ensuring a smooth finish. The butter melts into the jam at the end of cooking, creating a glossy coating that glistens like a polished gem. Fresh mint leaves release a gentle, aromatic oil that gives the jam a refreshing undertone. The leaves are added at the end to preserve their bright flavor and avoid bitterness.
Everything’s prepped? Good. Let’s get into the real action…

The Method — Step by Step
- Begin by placing the fresh blackberries in a heavy‑bottomed saucepan. Cover with a lid and let them sit for 10 minutes; this helps the berries release their juice naturally. Stir gently after the 10 minutes, then add the granulated sugar. The sugar will start to melt into the berries, creating a sweet, syrupy base. Keep the heat on medium so the mixture doesn’t scorch.
- Add the fresh lemon juice to the pot, stirring to combine. The acidity will react with the sugar, helping the jam set. Watch the mixture as it begins to bubble; this is the moment of truth. The aroma will shift from sweet to tangy, signaling that the flavor is developing. This step is crucial—don’t skip the lemon or the jam will taste flat.
- Turn the heat down to medium‑low and let the mixture simmer gently. Stir frequently to prevent the berries from sticking to the bottom. The jam should thicken gradually, taking about 20 minutes. Use a spoon to test thickness; it should coat the back of the spoon and leave a slight indentation. If it’s still runny, let it cook a bit longer.
- When the jam has reached the desired thickness, fold in the unsalted butter. The butter should melt instantly, creating a glossy sheen across the surface. Stir until fully incorporated; the jam should look glossy and silky. This step also adds a subtle buttery richness that balances the sweetness. If you’re vegan, substitute a tablespoon of coconut oil for butter.
- Add the fresh mint leaves to the pot, stirring to release their aromatic oils. The mint will infuse the jam with a cool, herbaceous note that cuts through the sweetness. Let the jam simmer for an additional 2 minutes, then remove from heat. The mint should be fragrant, not bitter.
- At this point, the jam is ready for the final step: sterilized jars. Use a ladle to fill each jar, leaving about ½ inch of headspace. Wipe the rims with a clean, damp cloth, then seal with the lids. Let the jars cool at room temperature; the jam will set as it cools. If you’re short on time, you can place the jars in a pot of boiling water for 10 minutes to ensure sterility.
- Once the jars are sealed and cooled, store them in a cool, dark place for up to a month. For longer storage, keep the jars in the refrigerator and consume within 3 weeks. When you’re ready to enjoy, simply open a jar and spread a generous amount on toast or scones. The jam will retain its bright flavor and silky texture.
That’s it — you did it. But hold on, I've got a few more tricks that'll take this to another level. Keep reading for insider tips that will make your jam even more irresistible.
Insider Tricks for Flawless Results
The Temperature Rule Nobody Follows
Many people believe that a high heat is necessary for thickening jam, but that can actually scorch the berries and ruin the flavor. Instead, maintain a steady medium‑low heat, letting the jam simmer gently for 20 minutes. This slow cooking allows the natural pectin in the blackberries to dissolve and bind, creating a smooth, glossy consistency. If you’re new to jam, try a thermometer: the jam is ready when it reaches 220°F (104°C).
Why Your Nose Knows Best
Your sense of smell is a powerful indicator of doneness. As the jam cooks, it will release a sweet, slightly tart aroma that lingers in the air. If the scent becomes overwhelmingly sweet or starts to smell burnt, it’s time to reduce the heat or remove the pot from the stove. Trusting your nose will prevent over‑cooking and preserve the jam’s fresh, bright character.
The 5‑Minute Rest That Changes Everything
After adding the butter, give the jam a five‑minute rest off the heat before pouring into jars. This pause allows the butter to fully integrate, creating a richer, more cohesive texture. If you rush the process, the butter may separate, leaving a greasy layer on top. The rest also lets the flavors meld, deepening the overall taste profile.
Avoiding Seed Clumps
Blackberry seeds can create a gritty texture if left in the jam. To remove them, use a fine-mesh sieve after the jam has cooled slightly. Gently press the jam through the sieve, using a spoon to push the liquid through. This simple step results in a silky, seedless jam that’s perfect for spreading.
The Mint Timing Trick
Mint can become bitter if cooked for too long. Add the mint leaves only in the final two minutes of simmering to preserve their bright, fresh flavor. If you prefer a stronger mint presence, you can also infuse a small sprig of mint in the jam for 10 minutes before straining it out. This method gives you a subtle, lingering mint note without bitterness.
The Final Touch
Once the jam is cooled, drizzle a tiny splash of water over the surface before sealing the jar. This small trick creates steam when the jar is sealed, helping the jam set more uniformly. It also prevents the jam from drying out during storage. A quick swirl before sealing ensures an even distribution of the glossy butter coating.
Creative Twists and Variations
This recipe is a playground. Here are some of my favorite ways to switch things up:
Spiced Blackberry Jam
Add a pinch of ground ginger or a splash of bourbon to the simmering jam for a warm, adult twist. The spices deepen the flavor profile, making it ideal for topping scones or pairing with sharp cheddar. The bourbon adds a subtle caramel note that complements the berry sweetness.
Citrus‑Infused Jam
Replace the lemon juice with orange or grapefruit juice for a brighter, more complex citrus profile. The new citrus will add a subtle bitterness that balances the sugar, creating a jam that’s both sweet and tart. This version pairs beautifully with goat cheese on crackers.
Mint‑Honey Jam
Swap the granulated sugar for honey and keep the mint leaves. The honey adds a floral sweetness that works wonderfully with the mint’s coolness. This variation is perfect for a light breakfast spread or a refreshing dessert topping.
Chocolate‑Blackberry Fusion
Stir in a tablespoon of cocoa powder during the final simmer for a mocha‑infused jam. The chocolate adds depth and a slightly bitter counterpoint to the berries. This jam is a decadent topping for ice cream or a luxurious spread on croissants.
Spicy Blackberries
Add a pinch of cayenne pepper or a sliced jalapeño to the simmering pot for a subtle heat. The heat cuts through the sweetness, creating a bold, adventurous jam that’s great on grilled chicken or pork. The spice adds an exciting dimension that keeps the jam from feeling one‑dimensional.
Storing and Bringing It Back to Life
Fridge Storage
Once the jars are sealed, store them in the refrigerator for up to three weeks. Keep the jar tightly closed to prevent air from entering, which can cause spoilage. If you notice any off‑smell or mold, discard the jar immediately. For best flavor, consume the jam within the first week of refrigeration.
Freezer Friendly
For longer storage, transfer the jam into freezer‑safe containers, leaving a bit of headspace for expansion. Freeze for up to six months. When ready to use, thaw in the refrigerator overnight, then stir to restore the glossy texture. The jam’s flavor remains intact, making it a convenient pantry staple.
Best Reheating Method
To reheat the jam, place a small amount in a microwave‑safe bowl and heat on medium for 20–30 seconds. Stir and repeat if needed until the jam is warm and pourable. If you prefer stovetop, gently warm the jam in a saucepan over low heat, stirring occasionally. Add a splash of water or milk to achieve the desired consistency.