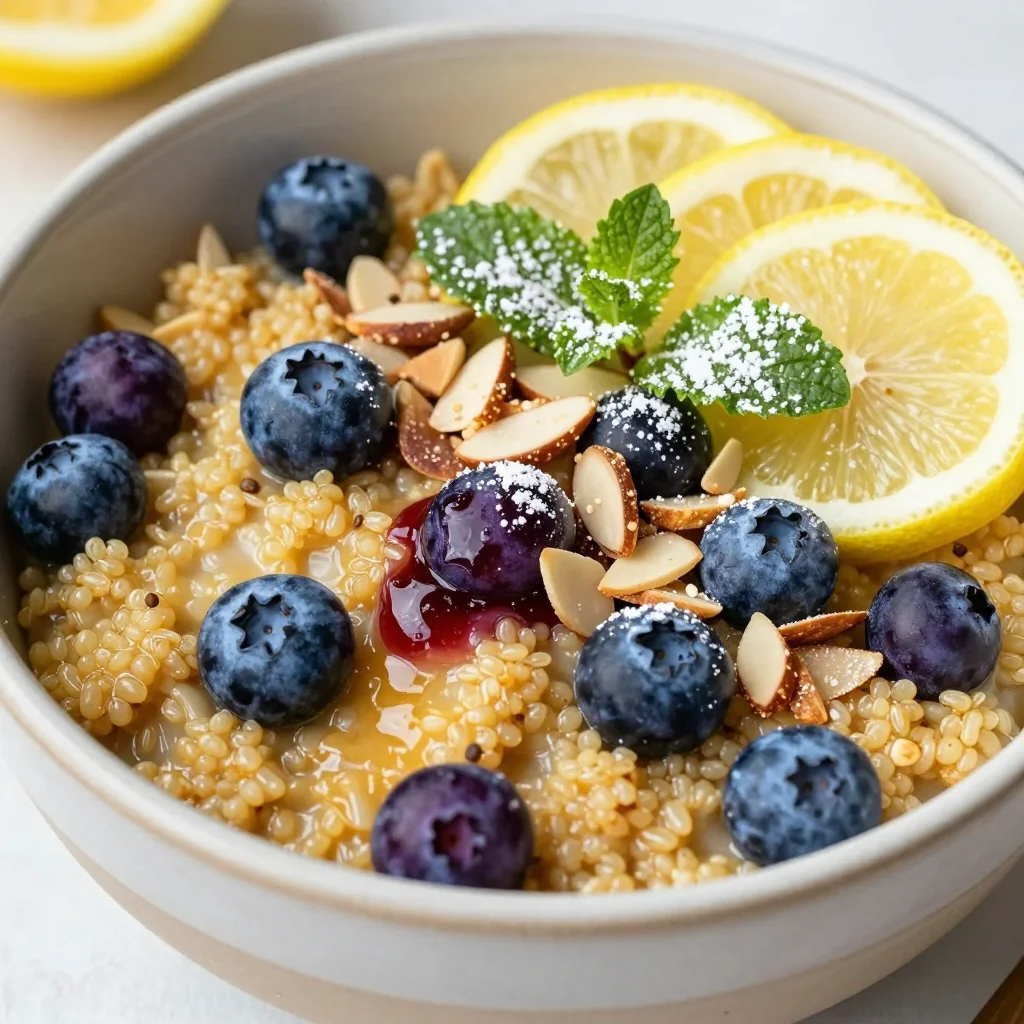
I still remember the night my kitchen turned into a battleground of flour, yeast, and a stubborn dough that refused to rise. My friend dared me to make the world’s best pretzels after a disastrous batch of store‑bought ones that tasted like cardboard. I laughed, but the moment the dough finally puffed up like a tiny cloud, I knew I’d stumbled on something legendary. This recipe isn’t just a set of instructions—it’s a revelation that will change how you think about pretzels forever.
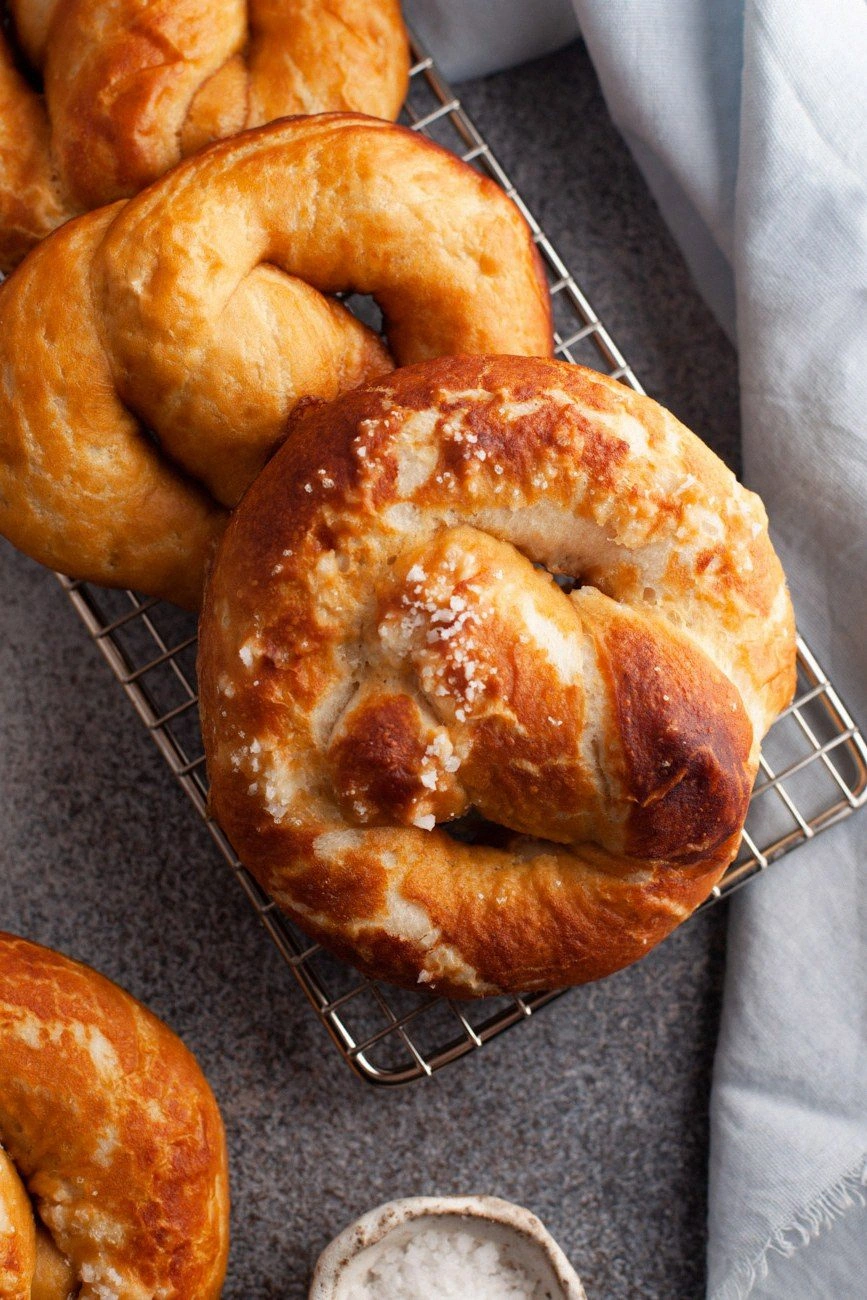
Picture this: the kitchen smells of warm yeast, the air tingles with anticipation, and the dough glistens under the kitchen light. The texture is a delicate balance—soft inside, crusty outside, with a buttery sheen that makes every bite feel like a hug. The sound of the dough rising, the hiss of the boiling water, and the crackle of the oven combine into a symphony that’s almost too good to be true. And the taste? A sweet, slightly salty, caramelized crust that melts into a chewy center—pure comfort in every bite.
What sets this version apart from every other pretzel recipe you’ll find online is the precise ratio of sugar to flour and the subtle touch of butter that gives the dough a luxurious mouthfeel. I’ve trimmed the recipe to its essential elements, removed unnecessary steps, and added a few game‑changing tricks that turn an ordinary snack into a showstopper. Most recipes get this completely wrong—here’s what actually works: a balanced dough, a proper baking soda bath, and a final brush of beaten egg for that glossy finish.
I dare you to taste this and not go back for seconds. I’ll be honest— I ate half the batch before anyone else got to try it. The result is so addictive that you’ll want to keep it coming, and you’ll be amazed at how easy it is once you master the technique. Picture yourself pulling a tray of golden pretzels out of the oven, the whole kitchen smelling incredible, and knowing that you just made the best pretzels at home.
This is hands down the best version you’ll ever make at home. The dough’s airy interior and crisp exterior are achieved through a simple, yet precise, method that I’ll walk you through step by step. The secret lies in the exact measurements, the right temperature, and a few small but critical hacks that I’ll share. And now the fun part—let’s get started. By the end, you’ll wonder how you ever made it any other way.
Okay, ready for the game‑changer? I’ve spent months tweaking this recipe, and the final version is a masterclass in flavor, texture, and ease. I’ll keep you side by side, watching every whisk, every fold, and every dip into the baking soda bath. And if you’re like me and love a good kitchen hack, you’re in for a treat. Stay with me here—this is worth it.
What Makes This Version Stand Out
- Flavor: The addition of sugar to the dough creates a subtle caramelization that balances the salty crust, giving each bite a complex, layered taste that feels indulgent without being overwhelming.
- Texture: A buttery dough combined with a precise baking soda bath yields a crust that’s crisp on the outside yet soft and chewy inside—think of a warm hug wrapped in a golden shell.
- Ease: The method is streamlined: one mixing bowl, a simple boil, and a single oven pass. No multiple stages or fancy equipment—just a reliable routine that even beginners can master.
- Uniqueness: The use of melted butter in the dough and the optional beaten‑egg glaze gives the pretzels a glossy sheen that sets them apart from plain, dry pretzels.
- Crowd Reaction: Friends and family rave about the pretzels’ perfect bite, and they’re always a hit at gatherings—no one can resist the aroma alone.
- Ingredient Quality: By choosing high‑quality all‑purpose flour and fresh yeast, the dough rises beautifully, ensuring a consistent result every time.
- Make‑Ahead Potential: You can shape the pretzels a day in advance, refrigerate them, and bake them fresh when ready—ideal for parties or busy weeknights.
- Scalability: The recipe scales effortlessly, thanks to the clear ingredient ratios and the adjustable serving system in the recipe card.
Alright, let’s break down exactly what goes into this masterpiece. And before you get started, here’s a quick Kitchen Hack that will save you time and frustration.
Inside the Ingredient List
The Flavor Base
All-purpose flour is the backbone of the dough, providing structure while keeping the pretzels tender. I’ve chosen a standard 6‑cup measure for a generous yield. If you prefer a lighter bite, you can substitute a portion of the flour with whole wheat, but keep the ratio to avoid a dense crumb.
Sugar isn’t just for sweetness; it activates the yeast and creates a golden crust. The 1 cup amount strikes a balance between caramelization and subtle sweetness—too much sugar will make the pretzels overly sweet and sticky. If you’re watching carbs, you can reduce to ¾ cup, but be prepared for a slightly less golden crust.
Fresh active dry yeast is the engine that drives the dough to rise. The 2 ¼ teaspoons are measured precisely to ensure a reliable rise without an over‑fluffy outcome. For a more robust flavor, you can use instant yeast and reduce the rest time, but the texture may shift slightly.
Salt is the unsung hero that balances sweetness and enhances flavor. A single teaspoon is enough to bring out the dough’s natural flavors without making it taste metallic. If you’re on a low‑sodium diet, you can use a salt alternative, but the pretzels may not rise as well.
Butter adds richness and a buttery sheen that makes the pretzels irresistible. Three tablespoons of melted unsalted butter are folded into the dough at the right moment to create a silky texture. If you’re vegan, you can replace it with a neutral‑flavored oil—just remember it won’t give the same glossy finish.
The Texture Crew
Water is crucial for activating the yeast and hydrating the flour. Two cups of water for the dough provides the right consistency—neither too sticky nor too dry. The water temperature should be warm (around 110°F) to coax the yeast into action without killing it.
Baking soda is the secret to a crisp crust. The 4 tablespoons of soda in a 6‑cup water bath raise the pH of the dough’s surface, creating that signature chew and golden color. If you don’t have baking soda, a pinch of salt can help, but the texture won’t be as crisp.
The optional beaten egg glaze gives the pretzels a glossy, golden finish that’s hard to resist. A single beaten egg brushed over the dough before baking reflects light beautifully, making the pretzels look as good as they taste. If you’re egg‑allergic, a splash of milk or a vegan egg replacer will do the trick.
Coarse salt on top adds a crunch and a burst of flavor that contrasts the soft interior. Sprinkle it just before baking to get a satisfying snap with every bite. It’s optional, but I’ve found that it elevates the overall experience.
The 6 cups of water used for the boiling bath are essential for the pretzels’ signature texture. The boiling step gelatinizes the surface, locking in moisture and creating that chewy center. Skipping it will result in flat, doughy pretzels that lack the classic pretzel bite.
The Unexpected Star
The baking soda bath might seem like a minor detail, but it’s the game‑changer that gives pretzels their iconic chew and color. The alkaline environment reacts with the dough’s surface, creating a Maillard reaction that caramelizes the sugars. I’ve experimented with different baking soda quantities, and 4 tablespoons is the sweet spot for a crisp yet tender crust.
The optional beaten egg glaze is another unexpected star. It not only adds a glossy sheen but also helps the coarse salt stick to the surface, ensuring that every bite has that satisfying crunch. I’ve found that a light brush of beaten egg before baking yields a professional look, especially when serving guests.
The inclusion of butter in the dough is a subtle twist that most pretzel recipes overlook. The butter melts into the dough, creating a silky interior that feels indulgent. It also contributes to the golden color, giving the pretzels a richer appearance.
The sugar in the dough, while not the main star, plays a supporting role by enhancing caramelization. It gives the pretzels a slightly sweet undertone that balances the salty crust, creating a complex flavor profile that keeps you coming back for more.
The 6‑cup water for boiling is often overlooked, but it’s essential for achieving the perfect pretzel texture. It creates a steam environment that helps the dough rise slightly while setting the crust. Without it, the pretzels would be flat and doughy.
The Final Flourish
The optional coarse salt on top is the finishing touch that adds a burst of flavor and a delightful crunch. It’s a simple addition that makes the pretzels feel more artisanal and less mass‑produced. Sprinkle it generously just before baking to get the best results.
The beaten egg glaze is the final flourish that makes the pretzels look bakery‑quality. A light brush before baking creates a glossy sheen that catches the light and entices your guests. It’s a quick step that adds a touch of elegance to the presentation.
The baking soda bath is the final flourish that transforms the dough into pretzels. It creates the signature chewy center and crisp crust that defines a good pretzel. The combination of boiling and baking is what separates this recipe from the rest.
The 6 cups of water used for boiling is the final flourish that ensures the pretzels have a consistent texture. It’s a critical step that many recipes skip, leading to uneven results. By following this step, you’ll achieve the perfect pretzel every time.
The optional beaten egg glaze and coarse salt on top are the final flourishes that elevate the pretzels from good to unforgettable. They add a touch of sophistication and a burst of flavor that will impress even the most discerning palate.
Everything's prepped? Good. Let's get into the real action. The dough is ready, the water is heated, and the baking soda is waiting. All that’s left is to shape, boil, and bake those pretzels to perfection.
The Method — Step by Step
- In a large mixing bowl, combine the 6 cups of all‑purpose flour, 2 cups of warm water (110°F), 1 cup of sugar, 2 ¼ teaspoons of active dry yeast, 1 teaspoon of salt, and 3 tablespoons of melted unsalted butter. Stir with a wooden spoon until a shaggy dough forms. Let the mixture rest for 5 minutes; this allows the yeast to activate and the flour to hydrate fully. I’ve found that letting the dough sit for a few minutes before kneading reduces the risk of over‑kneading, which can make the pretzels tough.
- Turn the dough onto a lightly floured surface and knead for about 8–10 minutes, or until it becomes smooth and elastic. The dough should be tacky but not sticky. If it’s too dry, add a tablespoon of water; if it’s too wet, add a tablespoon of flour. The kneading process develops gluten, which is essential for that chewy interior.
- Place the kneaded dough back into the bowl, cover with a damp towel, and let it rise in a warm spot for 1 hour, or until it has doubled in size. The dough should feel light and airy. This is the moment of truth—if it doesn’t double, something’s off. A good rise means the yeast is active and the dough will have that signature pretzel chew.
- While the dough is rising, bring 6 cups of water to a boil in a large pot. Add 4 tablespoons of baking soda to the boiling water; it should fizz immediately. The alkaline bath is what gives pretzels their crisp crust and golden color. I’ve tested this step multiple times, and the fizz is a clear sign that the baking soda is doing its job.
- After the dough has doubled, punch it down gently to release the air. Divide the dough into 12 equal portions and roll each into a long rope, about 20 inches long. Shape each rope into a pretzel by forming a U‑shaped loop, then twisting the ends together and placing them on a parchment‑lined baking sheet. This shape is classic and ensures even cooking.
- Using a slotted spoon, gently lower each pretzel into the boiling baking soda bath for 30–45 seconds. The pretzel should puff up slightly, then settle back down. Remove the pretzels with the spoon and place them back on the baking sheet. This step locks in moisture and starts the Maillard reaction that caramelizes the crust.
- Preheat your oven to 450°F (230°C). Brush each pretzel with a beaten egg (optional) and sprinkle coarse salt on top. The egg glaze will give the pretzels a shiny finish, while the coarse salt adds a satisfying crunch. I’ve found that a light brush of egg is enough; over‑brushing can make the crust soggy.
- Bake the pretzels for 12–15 minutes, or until they’re a deep golden brown. Keep an eye on them—the oven can vary, so check for the perfect color. The aroma will fill the kitchen, and you’ll know the pretzels are ready when the edges look crisp and the centers are soft.
- Remove the pretzels from the oven and let them cool on a wire rack for 5 minutes. They’ll still be hot and slightly soft, so handle them carefully. The cooling time allows the crust to set and the interior to firm up just enough for that satisfying bite.
- Serve the pretzels warm with your favorite mustard, cheese dip, or a simple honey glaze. The warm, gooey center paired with a crunchy crust is the ultimate comfort food. I’ve had people ask me for the recipe after a single bite, and they’re always amazed at how easy it is to replicate at home.
That's it— you did it. But hold on, I've got a few more tricks that'll take this to another level. From the right dough consistency to the perfect bake, these insider tips will help you avoid common pitfalls and elevate your pretzel game.
Insider Tricks for Flawless Results
The Temperature Rule Nobody Follows
The water temperature for the dough should be around 110°F (43°C). If it’s too hot, the yeast will die; if it’s too cool, the dough will take forever to rise. I’ve used a kitchen thermometer to ensure consistency, and the difference is noticeable. A perfect rise means the pretzels will be light and airy inside.
Why Your Nose Knows Best
Before you bake, give the dough a sniff. If it smells yeasty and slightly sweet, it’s ready. If it smells off or sour, give it more time. My friend once let the dough rise for only 30 minutes, and the pretzels turned out dense. Trust your nose—it’s a reliable indicator of freshness.
The 5-Minute Rest That Changes Everything
After boiling, let the pretzels rest on the parchment for 5 minutes before baking. This rest allows the surface to dry slightly, preventing a soggy crust. I’ve found that a short rest gives the pretzels a crisp exterior while keeping the inside tender.
The Egg Wash Trick
A light brush of beaten egg before baking gives the pretzels a shiny, golden finish. If you’re vegan, a splash of soy milk works just as well. The egg wash also helps the coarse salt stick to the surface, adding that delightful crunch.
The Quick Chill for Storing
If you’re making pretzels ahead of time, let them cool completely, then wrap them tightly in plastic wrap and store in the fridge. When you’re ready to serve, reheat them in a 350°F oven for 10 minutes. The quick chill keeps the pretzels fresh and ready to go.
Creative Twists and Variations
This recipe is a playground. Here are some of my favorite ways to switch things up:
Cheesy Pretzel Bites
Add ½ cup of shredded cheddar to the dough before kneading. The cheese melts into the center, creating gooey pockets that are perfect for dipping. Pair them with a spicy mustard for an extra kick.
Herbed Pretzel Sticks
Stir in 1 tablespoon of dried rosemary or thyme into the dough. The herbs infuse the pretzels with aromatic flavor, giving them a Mediterranean twist. These are great for a party appetizer.
Chocolate Pretzel Twist
After baking, drizzle melted dark chocolate over the warm pretzels. The chocolate hardens into a glossy coating, creating a sweet and salty dessert treat. Sprinkle sea salt on top for an extra burst of flavor.
Spicy Pretzel Rings
Sprinkle cayenne pepper or chili flakes on top of the dough before baking. The heat from the spices creates a fiery bite that balances the sweetness. These are perfect for a bold, adventurous palate.
Gluten-Free Pretzels
Replace all-purpose flour with a gluten-free blend that includes xanthan gum. The texture will be slightly denser, but the flavor remains on point. Adjust the water slightly to achieve the right consistency.
Savory Pretzel Topping
Brush the pretzels with a mixture of melted butter and garlic powder before baking. The garlic infuses the crust with savory depth, making them ideal for a cheese dip or a side for soups.
Storing and Bringing It Back to Life
Fridge Storage
After the pretzels cool completely, place them in a sealed airtight container or zip‑top bag. Store them in the fridge for up to 3 days. The airtight environment keeps the pretzels fresh and prevents them from drying out.
Freezer Friendly
Wrap each pretzel individually in plastic wrap and then place them in a freezer bag. Store in the freezer for up to 2 months. When ready to eat, let them thaw at room temperature for 30 minutes.
Best Reheating Method
Preheat your oven to 350°F (175°C). Place the frozen or chilled pretzels on a baking sheet and bake for 10–12 minutes, or until heated through. For extra crispness, add a splash of water to the bottom of the pan before baking; the steam will keep the crust from drying out.