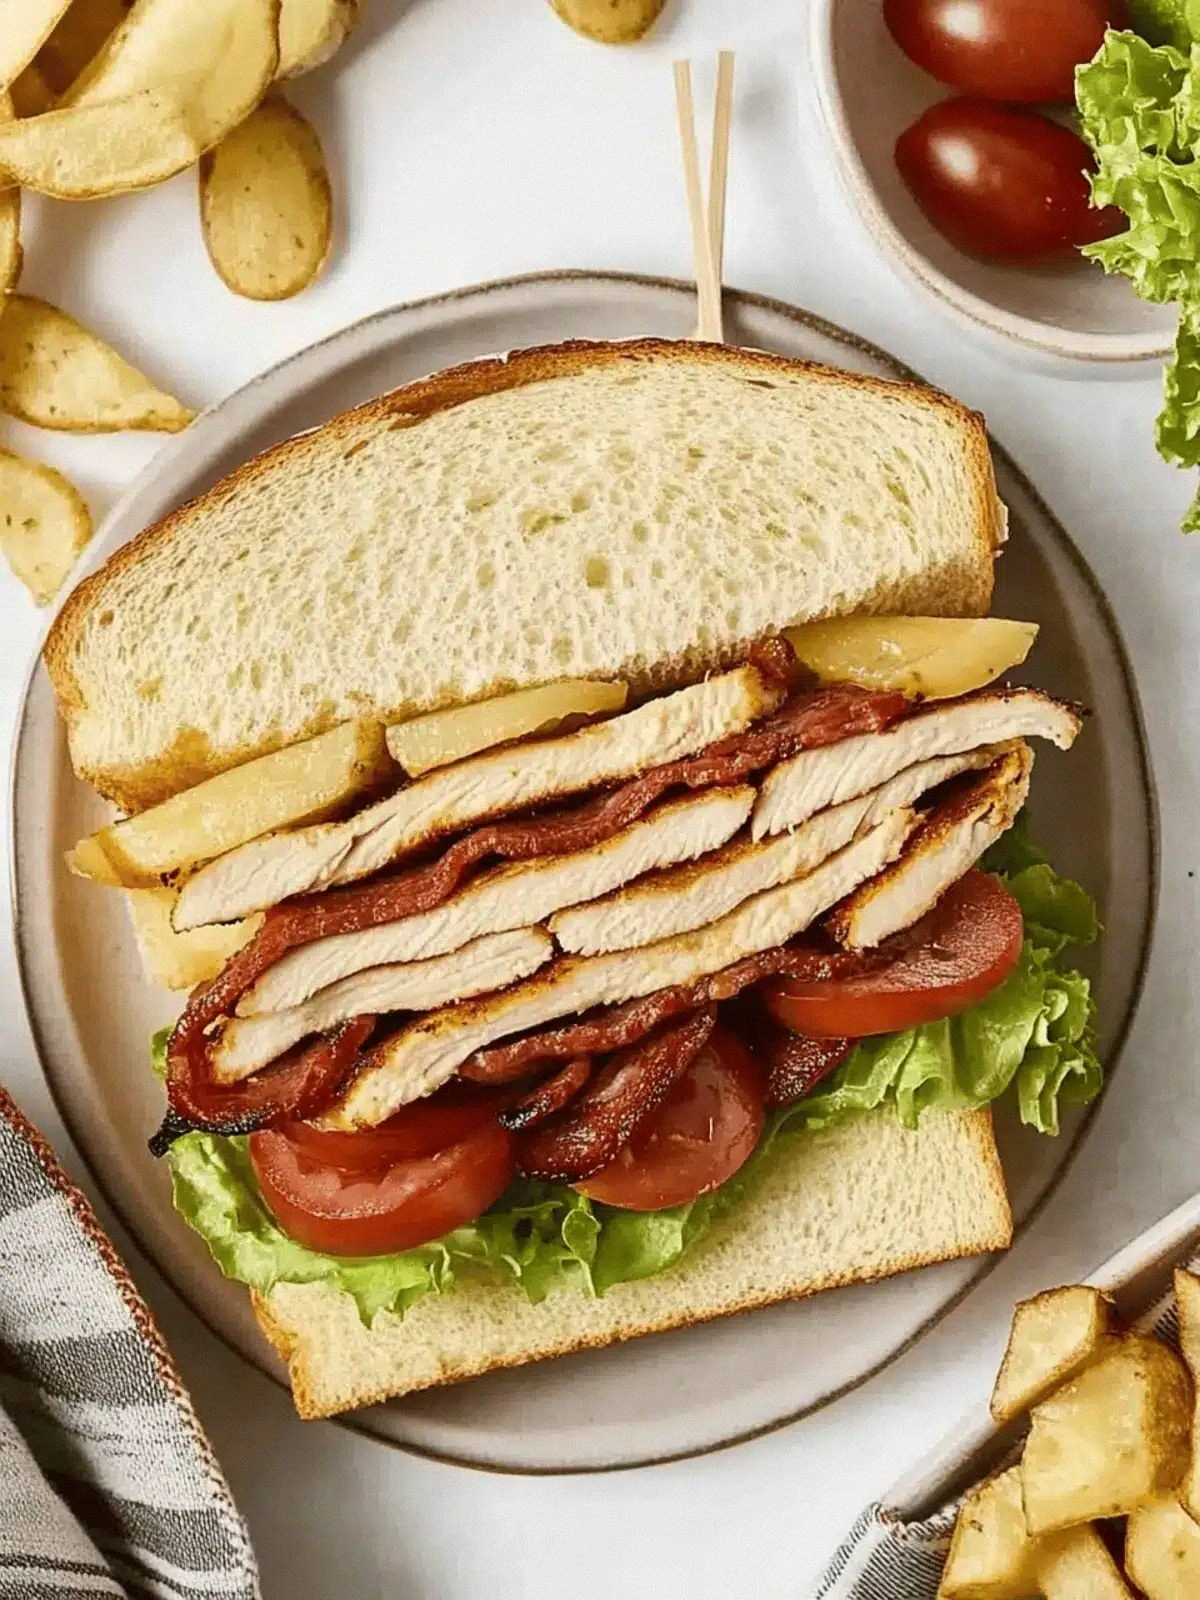
I was in a frantic rush, the kitchen smelling like a burnt toast disaster, when my friend dared me to create the ultimate club sandwich that would make even the most seasoned foodie swoon. I had just finished a week of bland lunches and the craving for something bold and comforting was screaming louder than any alarm clock. The idea hit me like a lightning bolt: a loaded chicken club that marries crispy bacon, melty cheese, fresh veggies, and a buttery, seasoned chicken breast, all nestled between perfectly toasted white bread. Picture the moment when the first bite hits your tongue—warm, savory, and with a crunch that shatters like thin ice, instantly turning any ordinary meal into a headline-worthy feast. I know you’re probably thinking, “Can I really pull this off?” Let me walk you through every single step — by the end, you’ll wonder how you ever made it any other way.
The first time I tried a club sandwich, it felt like a sad, soggy disappointment. The bread was soggy, the chicken was dry, and the bacon was a greasy mess. That disaster taught me the power of balance: crisp, moist, and layered with flavor. This version is not just a sandwich; it’s a culinary triumph that turns a simple lunch into a mouth‑watering celebration. I dare you to taste this and not go back for seconds. If you’ve ever struggled with the classic club, you’re not alone — and I’ve got the fix.
I’ve spent countless evenings experimenting with bread, meats, and sauces, and this one hit the sweet spot. The chicken, seasoned with garlic powder and pepper, is juicy and packed with protein. The bacon adds smoky crunch, while the Colby‑Jack melts into a gooey, cheese‑y delight. The fresh lettuce and tomatoes bring a bright, crisp contrast that lifts the entire sandwich. And the mayo? It coats the bread like velvet, sealing in the flavors and preventing sogginess. Picture yourself pulling this out of the oven, the whole kitchen smelling incredible, and knowing you’ve mastered the art of the loaded club.
Most recipes get this completely wrong. They either over‑cook the chicken, under‑season the bacon, or forget the importance of a good bread base. Here’s what actually works: a quick sear on the chicken, a crisp bake for the bacon, and a generous spread of mayo that locks in moisture. This sandwich is hands down the best version you’ll ever make at home, and it’s simple enough to pull off in under an hour. The secret lies in the layering, the seasoning, and a few small hacks that make the difference. Stay with me here — this is worth it.
What Makes This Version Stand Out
- Flavor: The garlic‑pepper chicken is the star, delivering savory depth that lingers on the palate. It’s balanced by the creamy mayo and the sharp bite of Colby‑Jack, creating a complex taste profile. The freshness of lettuce and tomato cuts through the richness, giving each bite a bright lift.
- Texture: Crispy bacon meets buttery bread, while the cheese melts into a silky layer. The chicken’s tender interior contrasts with the crunch of fresh veggies. Every component feels distinct yet cohesive.
- Simplicity: With just ten ingredients and a straightforward method, you can achieve a restaurant‑level sandwich without a culinary degree. The prep is quick, and the assembly is almost play‑as‑you‑go.
- Uniqueness: The combination of Colby‑Jack and mayo creates a creamy, slightly tangy sauce that isn’t found in typical club recipes. The use of white bread gives a clean canvas that lets each layer shine.
- Crowd Reaction: Friends who try this will immediately ask for the recipe, and they’ll keep asking for it at every gathering. The sandwich is both comforting and show‑stopping.
- Ingredient Quality: Fresh, high‑quality bacon and ripe tomatoes make all the difference. Choose a good white bread that can hold the fillings without falling apart.
- Cooking Method: The chicken is seared to lock in juices, then finished in the oven for even cooking. Bacon is baked for perfect crispness, and the bread is toasted in a skillet for a buttery finish.
- Make‑Ahead Potential: The chicken and bacon can be pre‑cooked and stored, making this sandwich a go‑to for busy days.
Inside the Ingredient List
The Flavor Base
The chicken breast is the heart of this sandwich. Seasoned with salt, black pepper, and garlic powder, it delivers a savory, aromatic core. If you skip the garlic powder, the chicken will taste flat and less complex. A quick sear in olive oil locks in juices and creates a golden crust that enhances flavor.
The Texture Crew
Bacon is the crunch factor. Baking it until crispy gives a satisfying snap that contrasts with the tender chicken. Colby‑Jack cheese melts into a silky, creamy layer that binds the fillings together. White sandwich bread provides a neutral backdrop, its softness balancing the crisp bacon and chewy chicken.
The Unexpected Star
Mayonnaise is more than just a spread—it’s the moisture keeper. It coats the bread like velvet, preventing sogginess and adding a subtle tang. The mayo’s thickness also creates a barrier that keeps the lettuce crisp. If you’re watching calories, you can swap mayo for Greek yogurt, though the texture will change slightly.
The Final Flourish
Fresh tomatoes and lettuce add a burst of color and a refreshing bite. They cut through the richness of the chicken, bacon, and cheese. Choose ripe, firm tomatoes for maximum juiciness, and use iceberg or romaine for crispness. A squeeze of lemon juice over the lettuce before assembling can elevate the freshness.
Everything's prepped? Good. Let's get into the real action.
The Method — Step by Step
- Prep the Chicken: Pat the chicken breasts dry with paper towels to ensure a good sear. Season both sides generously with salt, black pepper, and garlic powder, letting the spices adhere. This step is crucial for flavor; a lightly seasoned surface will lock in juices when seared. If you’re short on time, use a pre‑seasoned blend to save a few minutes.
- Sear the Chicken: Heat a tablespoon of olive oil in a cast‑iron skillet over medium‑high heat. Once hot, add the chicken breasts and sear each side for 2–3 minutes until golden brown. The sear creates a caramelized crust that adds depth. Flip only once to keep the interior moist.
- Finish in the Oven: Transfer the skillet to a pre‑heated oven at 375°F (190°C). Bake for 8–10 minutes, or until the internal temperature reaches 165°F (74°C). The oven finishes the cooking, ensuring even heat distribution. Keep an eye on the chicken; overcooking will dry it out.
- Bake the Bacon: While the chicken rests, lay bacon slices on a baking sheet lined with parchment. Bake at 400°F (200°C) for 15–18 minutes until crisp. The bacon’s fat renders, creating a perfect crunch. Once done, let it cool slightly before slicing into smaller pieces.
- Toast the Bread: Spread a thin layer of butter on the cut sides of each bread slice. Place them in a dry skillet over medium heat, pressing gently until golden brown on both sides. This buttered toast adds a buttery crunch that balances the sandwich’s richness. A quick flip ensures even browning.
- Assemble the First Layer: Spread a generous amount of mayonnaise on the bottom slice of bread. Layer half of the lettuce, a few tomato slices, and a few strips of bacon. Place the seared chicken on top, letting the juices seep into the bread for extra flavor. This first layer builds the foundation of the sandwich.
- Add Cheese and Second Layer: Place the Colby‑Jack cheese slices over the chicken, allowing them to melt slightly from the heat. Add the remaining bacon, lettuce, and tomatoes. Spread another thin coat of mayo on the top slice of bread before placing it on the stack. The cheese acts as a bridge, holding everything together.
- Final Touches: Press the sandwich gently to compact the layers, ensuring each bite delivers a balanced mix. Slice the sandwich diagonally for a classic club presentation. Serve immediately while the bacon is still crisp and the cheese is delightfully melty.
That's it — you did it. But hold on, I've got a few more tricks that'll take this to another level.
Insider Tricks for Flawless Results
The Temperature Rule Nobody Follows
Many cooks think any oven temperature will do, but a precise 375°F (190°C) gives the chicken a tender interior while keeping the exterior crisp. If you’re using a convection oven, reduce the temperature by 25°F to avoid over‑browning. Always let the chicken rest for 5 minutes before slicing to retain juices.
Why Your Nose Knows Best
A well‑seasoned chicken will emit a savory aroma that signals readiness. Trust your senses: when the aroma is rich and the surface is golden, it’s time to move on. If the smell is bland, give it a minute more on the heat.
The 5-Minute Rest That Changes Everything
After baking, let the chicken rest for exactly five minutes. This allows the juices to redistribute, making each bite succulent. Skipping this step will result in a dry, tough texture that defeats the sandwich’s purpose.
Butter the Bread, Not the Pan
Butter on the bread creates a crisp, golden exterior without the risk of burning the pan. The butter also adds a subtle richness that complements the bacon’s saltiness. If you prefer a lighter option, use a small amount of olive oil instead.
Layering Order Matters
Place the cheese on top of the chicken rather than between the bread slices. This positioning allows the cheese to melt into the chicken, creating a gooey bridge that holds the sandwich together. A misordered layer can cause the sandwich to fall apart.
The Mayo Mix‑Up
Stir a splash of Dijon mustard into the mayo for a subtle tang that balances the richness. If you’re lactose intolerant, switch to a dairy‑free mayo. A touch of honey can also add a hint of sweetness that pairs well with the bacon.
Creative Twists and Variations
This recipe is a playground. Here are some of my favorite ways to switch things up:
Spicy Sriracha Mayo
Swap regular mayo for a spicy sriracha mayo to add heat. The fiery kick complements the bacon’s smokiness. It’s perfect for those who like a bit of burn with their comfort food.
Avocado Cream
Replace mayo with mashed avocado for a creamy, nutrient‑dense spread. The avocado’s subtle flavor pairs well with the cheese. This variant is great for a lighter, heart‑healthy twist.
Pesto Layer
Spread a thin layer of basil pesto on the bread before adding other layers. The herbaceous aroma elevates the sandwich’s flavor profile. It’s a refreshing change for pesto lovers.
Smoked Salmon Upgrade
Add a few slices of smoked salmon to the first layer. The delicate, smoky flavor adds sophistication. This version is ideal for brunch or a special occasion.
Cheddar Melt
Swap Colby‑Jack for sharp cheddar to intensify the cheese flavor. The cheddar melts beautifully, giving a richer, more robust taste. This is a great option for cheddar aficionados.
Sweet Corn Crunch
Sprinkle roasted sweet corn kernels between the layers for a sweet, crunchy texture. The corn’s sweetness balances the savory elements. It’s a fun twist that adds a pop of color.
Storing and Bringing It Back to Life
Fridge Storage
Store the assembled sandwich in an airtight container for up to 2 days. Wrap it tightly in parchment paper to keep the bread from becoming soggy. When ready to eat, reheat in a toaster oven for a few minutes to restore crispness.
Freezer Friendly
Wrap the sandwich in foil and place it in a freezer bag. It can be frozen for up to 3 months. Thaw overnight in the refrigerator before reheating.
Best Reheating Method
Reheat the sandwich in a skillet over medium heat, pressing lightly with a spatula. Add a splash of water to the pan, cover, and let steam for 2 minutes. This technique keeps the sandwich moist and the cheese melty.