I was in the middle of a rainy Saturday when my roommate dared me to turn a plain old batch of store‑bought donuts into something that would make the entire neighborhood beg for a second helping. I laughed, I scoffed, and then I thought, “What if I could take the soft, pillowy heart of a donut, drench it in pure maple, and serve it up as a bar that practically melts in your mouth?” The kitchen turned into a battlefield of butter, flour, and maple syrup, and the whole house was filled with the kind of sweet, caramel‑rich perfume that makes you want to hug the oven. I’ll be honest — I ate half the batch before anyone else got a chance, and the look on my friends’ faces when I offered them a bite was priceless.
Picture this: a golden‑brown crust that cracks just enough to reveal a tender, maple‑kissed interior that’s as soft as a cloud on a crisp autumn afternoon. The first bite releases a cascade of buttery, caramel notes that hug your tongue, while the glaze on top adds a glossy finish that catches the light like a fresh‑fallen leaf catching a sunrise. You hear the faint sigh of the batter as it hits the hot pan, the faint pop of butter melting, and the subtle crackle of the edges turning crisp. Your fingertips feel the warm pan, the weight of the batter, and the anticipation building as the timer ticks down. It’s a full‑sensory experience that feels like a hug from your favorite sweater.
What sets this version apart from every other maple‑infused treat you’ve ever tried is the balance between simplicity and decadence. Most recipes either drown you in syrup or leave you with a dry, cakey texture. I cracked the code by combining the right ratio of maple syrup to butter, a dash of vanilla, and a secret splash of maple extract that amplifies the flavor without making it syrupy. The result is a bar that’s crisp on the outside, melt‑in‑your‑mouth on the inside, and sweet enough to satisfy without overwhelming. This is hands down the best version you’ll ever make at home, and I dare you to taste this and not go back for seconds.
There’s a little twist that most bakers completely miss: a quick, buttery glaze brushed on just before the final bake, which creates that glossy, caramelized finish you see in bakery windows. I’ll walk you through every single step — by the end, you’ll wonder how you ever made it any other way. Okay, ready for the game‑changer? Let’s dive in.
What Makes This Version Stand Out
- Flavor Explosion: The combination of real maple syrup, maple extract, and a hint of vanilla creates a depth that mimics a maple‑infused caramel without the stickiness.
- Texture Harmony: A crisp, golden edge meets a soft, pillowy center, delivering that “melt‑in‑your‑mouth” sensation with every bite.
- Simplicity: Only eleven pantry staples are needed, and you won’t have to hunt for obscure spices or specialty flours.
- Unique Glaze: A quick brush of maple‑sweetened butter right before the final minutes of baking gives a glossy finish that looks as good as it tastes.
- Crowd‑Pleaser: Whether it’s a family brunch, a fall potluck, or a midnight snack, these bars disappear faster than you can say “one more bite.”
- Ingredient Quality: Using pure maple syrup (grade A) and real butter ensures every component shines without artificial shortcuts.
- Cooking Method: Baking in a single sheet pan means uniform heat, no need for deep‑fried oil, and a cleaner kitchen.
- Make‑Ahead Potential: Store them in an airtight container, and they stay fresh for up to three days, making them perfect for meal‑prep or gifting.
Inside the Ingredient List
The Flavor Base
Maple syrup is the star of the show, providing natural sweetness and that unmistakable amber hue. Using a grade‑A, 100% pure maple syrup ensures you get the full-bodied, woody notes that artificial syrups simply can’t match. If you skip it, you’ll lose the deep caramel undertone that makes these bars feel like a celebration of autumn. As a swap, you could use a high‑quality honey, but expect a floral twist instead of the classic maple depth.
The Texture Crew
All‑purpose flour gives structure while the butter adds richness and a tender crumb. The butter should be melted but not scorching, which helps coat the flour particles for a short‑bread‑like texture. If you substitute margarine, the bars will lose that buttery melt‑in‑the‑mouth quality and become more cake‑like. For a gluten‑free version, use a 1‑to‑1 blend of rice flour and tapioca starch, but be prepared for a slightly denser bite.
The Unexpected Star
Maple extract is the secret weapon that amplifies the maple flavor without adding extra liquid. A half‑cup may sound excessive, but the extract is highly concentrated, so a little goes a long way. Skipping it will make the bars taste like plain sweet dough rather than a maple masterpiece. If you can’t find maple extract, a splash of bourbon (about a teaspoon) can add a complementary warmth, though it will shift the flavor profile.
The Final Flourish
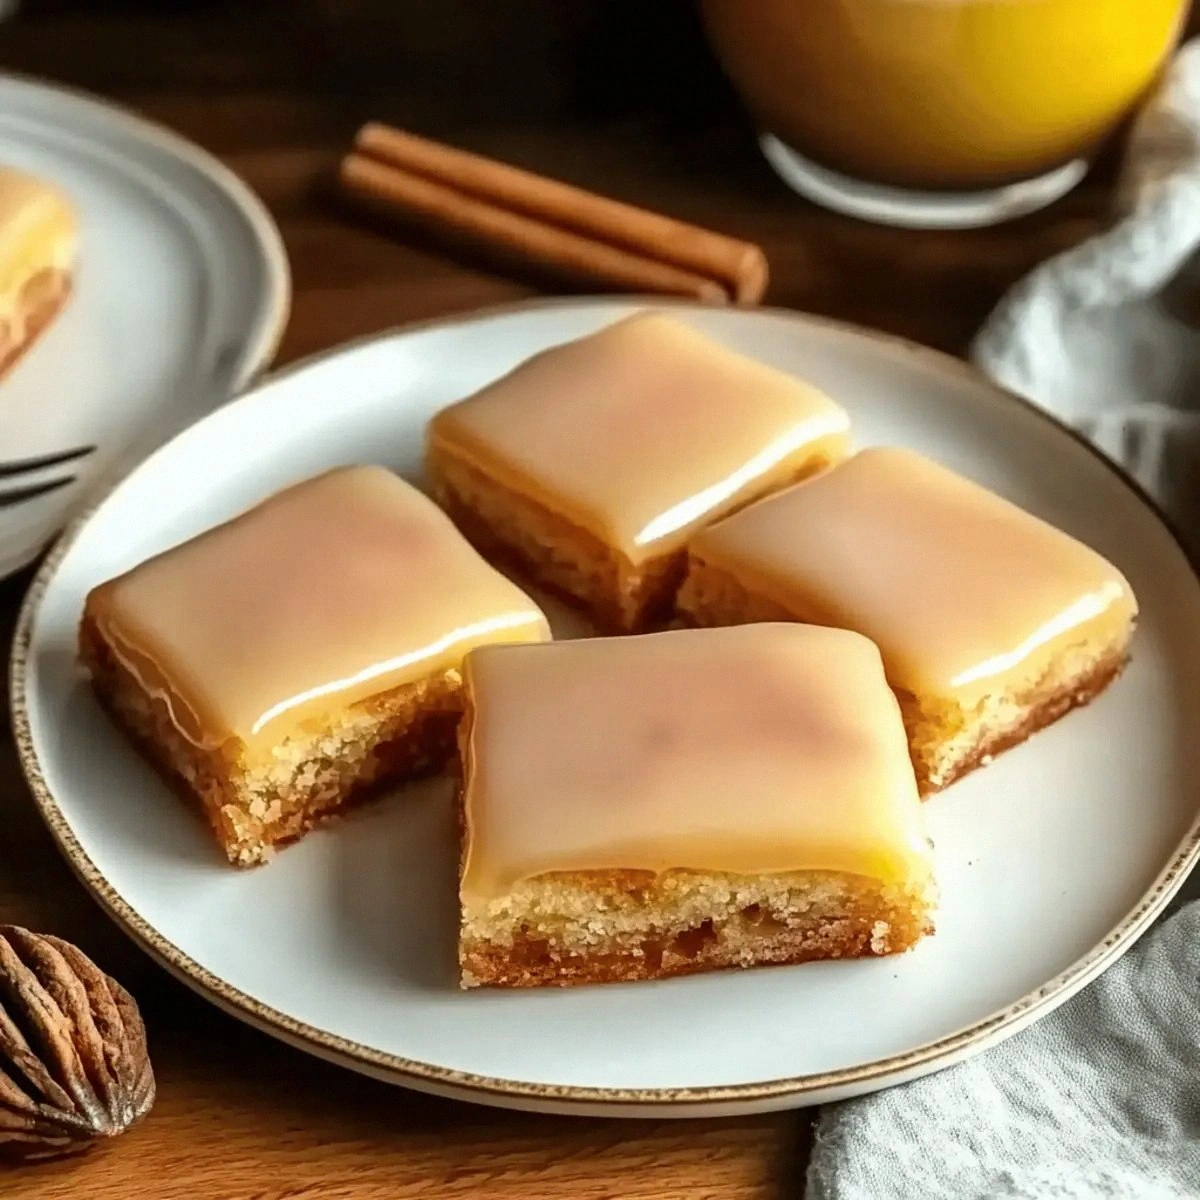
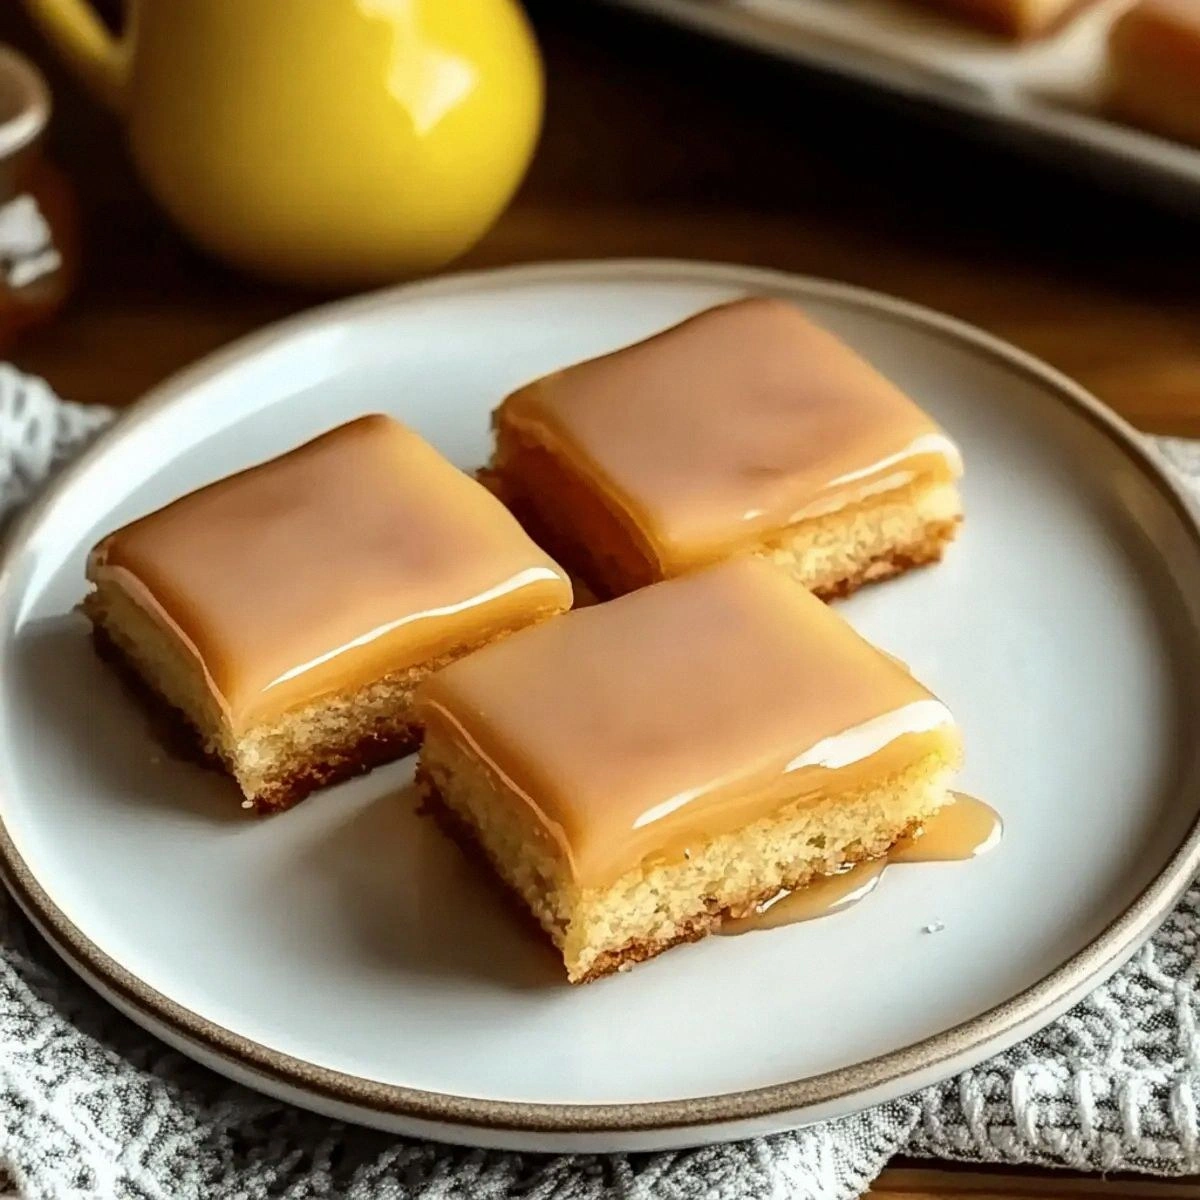
Powdered sugar and a drizzle of extra maple syrup create the glossy glaze that turns these bars into a visual masterpiece. The powdered sugar dissolves quickly, forming a smooth coating that hardens just enough to give a subtle snap. If you’re watching sugar, you can reduce the powdered sugar by a quarter and still retain the shine, but the glaze will be a tad less sweet.
Everything's prepped? Good. Let’s get into the real action…
The Method — Step by Step
Preheat your oven to 350°F (175°C) and line a 9×13‑inch baking pan with parchment paper, letting the edges hang over for easy removal. While the oven warms, melt the butter in a saucepan over low heat, then whisk in the maple syrup, brown sugar, and maple extract until the mixture is smooth and glossy. That sizzle when it hits the pan? Absolute perfection. Let this liquid gold cool just enough so it doesn’t scramble the eggs later.
In a large mixing bowl, whisk together the flour, baking powder, and a pinch of salt (if you like). The dry ingredients should be evenly distributed, creating a pale, powdery cloud that will soon become a golden masterpiece. I dare you to taste this flour mixture raw — you’ll notice the subtle nutty aroma of the maple extract lingering in the air.
In a separate bowl, beat the eggs with the vanilla extract until they’re light and frothy. This is the moment where the batter starts to come alive; the eggs act as a bridge between the wet and dry components, ensuring a uniform crumb. Add the cooled maple‑butter mixture to the eggs, whisking constantly to avoid any curdling. If you see any lumps, give it a quick hand‑mix with a spatula.
Now for the grand unification: pour the wet mixture into the dry ingredients and fold gently with a rubber spatula. The batter should be thick but pourable, resembling a soft pancake batter. Over‑mixing is the enemy here — you’ll develop gluten and the bars will turn tough. Stop mixing the moment the flour is just incorporated.
Spread the batter evenly across the prepared pan, smoothing the top with a spatula. The surface should be level, but don’t press it down too hard — you want those airy pockets to form during baking. As the batter settles, you’ll notice a faint sweet aroma rising, hinting at the caramelization to come.
Slide the pan into the oven and bake for 20 minutes. Around the 15‑minute mark, peek through the oven window: the edges should be turning a deep amber, and the surface will start to set with a slight sheen. This is the moment of truth — if you see any wobbling, give it another 2‑3 minutes.
While the bars are finishing, prepare the glaze: melt ¼ cup butter, stir in 2‑3 tablespoons of maple syrup, and whisk until glossy. Brush this glaze over the hot bars in the final 5 minutes of baking; the heat will caramelize the glaze, giving it that irresistible crackle. The glaze should bubble lightly, creating a thin, amber‑colored crust that glistens.
Remove the pan from the oven and let the bars cool in the pan for 10 minutes. Then, using the parchment overhang, lift the whole slab onto a cutting board and dust generously with powdered sugar. The powdered sugar will melt slightly into the warm glaze, forming a delicate, sweet veil that adds both visual appeal and a subtle vanilla‑maple finish.
Finally, cut the slab into 12 even bars. Each piece should have a crisp edge that pulls away from the pan and a soft, maple‑infused center that yields to the bite. Serve warm, or let them come to room temperature for that perfect melt‑in‑your‑mouth texture. And now the fun part — watch your friends’ faces light up as they take that first bite. That’s the payoff for all the love you poured into this batch.
That's it — you did it. But hold on, I've got a few more tricks that'll take this to another level...
Insider Tricks for Flawless Results
The Temperature Rule Nobody Follows
Never bake these bars on a cold pan. Warm your pan in the oven for a minute before adding the batter; this jump‑starts the caramelization, giving you that coveted crisp edge. I once tried a room‑temperature pan and the bars turned out soggy in the middle. Trust me, the extra minute of pre‑heating makes a world of difference.
Why Your Nose Knows Best
Your nose is the ultimate timer. When the aroma shifts from buttery sweet to a deep, toasted caramel, you know the bars are done. Don’t rely solely on the timer; let your senses guide you. A friend once pulled the pan out too early and got a gummy center — a clear lesson that the nose never lies.
The 5‑Minute Rest That Changes Everything
Allow the bars to rest for exactly five minutes after removing them from the oven before glazing. This short pause lets the steam settle, preventing the glaze from soaking in too quickly and turning soggy. It’s a tiny window, but it creates that perfect glossy finish that looks like a bakery masterpiece.
Glaze Timing is Everything
Brush the glaze on during the last five minutes of baking, not after. The residual heat caramelizes the sugars instantly, giving you that snap‑crackle‑pop texture. If you glaze after cooling, you’ll end up with a sticky, under‑cooked coating that never sets.
Cool, Then Slice
If you cut the bars while they’re still hot, they’ll crumble and lose that perfect edge. Let them sit for ten minutes, then lift them out with the parchment and slice on a cool cutting board. This small patience step preserves the structural integrity and keeps each bar looking picture‑perfect.
Storage Savvy
When storing, place a sheet of parchment between layers to prevent them from sticking together. A tight‑sealing container keeps the moisture in, ensuring the bars stay soft inside while the exterior remains lightly crisp. If you’re reheating, a quick 10‑second burst in the microwave with a splash of water revives that melt‑in‑your‑mouth texture.
Creative Twists and Variations
This recipe is a playground. Here are some of my favorite ways to switch things up:
Pumpkin Spice Maple Bars
Add ½ cup pumpkin puree to the wet mix and a teaspoon of pumpkin pie spice. The earthy pumpkin balances the sweet maple, turning these bars into a quintessential fall treat that pairs perfectly with a cup of chai.
Chocolate‑Swirl Delight
Melt ¼ cup dark chocolate and swirl it into the batter before baking. The bitter chocolate ribbons contrast the sweet maple, creating a sophisticated flavor duo that will impress even the most discerning chocolate lovers.
Nutty Crunch Variation
Fold in ½ cup toasted pecans or walnuts just before spreading the batter. The nuts add a satisfying crunch and a buttery depth that complements the maple’s sweetness.
Cinnamon‑Maple Twist
Stir a teaspoon of ground cinnamon into the dry ingredients and sprinkle a light dusting over the glaze before the final bake. This subtle spice adds warmth and a hint of holiday cheer.
Vegan Friendly Version
Swap the eggs for a flax‑egg mixture (2 tbsp ground flaxseed + 6 tbsp water) and use coconut oil instead of butter. The texture remains tender, and the maple flavor shines just as brightly.
Storing and Bringing It Back to Life
Fridge Storage
Place the bars in an airtight container lined with parchment paper and store them in the refrigerator for up to three days. The cool environment keeps the glaze firm while the interior stays soft. When ready to serve, let them sit at room temperature for 10 minutes to regain that melt‑in‑your‑mouth feel.
Freezer Friendly
Wrap each bar individually in plastic wrap, then place them in a zip‑top freezer bag. They’ll keep for up to two months. To reheat, unwrap and microwave for 15‑20 seconds, or pop them in a 300°F oven for 5 minutes. The key is a quick blast of heat to revive the glaze without drying out the interior.
Best Reheating Method
Add a tiny splash of water (about a teaspoon) to the pan before reheating in the oven; the steam generated will bring back that soft, gooey center while the glaze regains its shine. This trick works wonders for any baked good that has a sugary coating.