I still remember the night I tried to make a simple chocolate chip cookie and ended up with a batch that looked more like a melted lava flow than a crisp, golden circle. The kitchen was a mess of flour clouds, butter puddles, and a faint scent of burnt sugar that had me questioning my culinary destiny. Yet, amid that chaos, a single Oreo cookie slipped into my dough, and the rest of the universe seemed to pause to watch the magic. That moment sparked a dare I couldn't resist: to create the ultimate Oreo‑stuffed chocolate chip cookie that would make even the most skeptical taste buds beg for seconds.
Fast forward to today, and I’ve refined that experiment into a recipe that’s hands down the best version you’ll ever make at home. Every bite delivers a crunchy, buttery exterior that gives way to a molten center of Oreo‑laden chocolate, creating a symphony of textures that dance on your tongue. The aroma alone—sweet butter, toasted sugar, and the faint, nostalgic hint of a cookie shop—can transform any ordinary afternoon into a celebration. I dare you to taste this and not go back for seconds, because the first bite will already have you craving more.
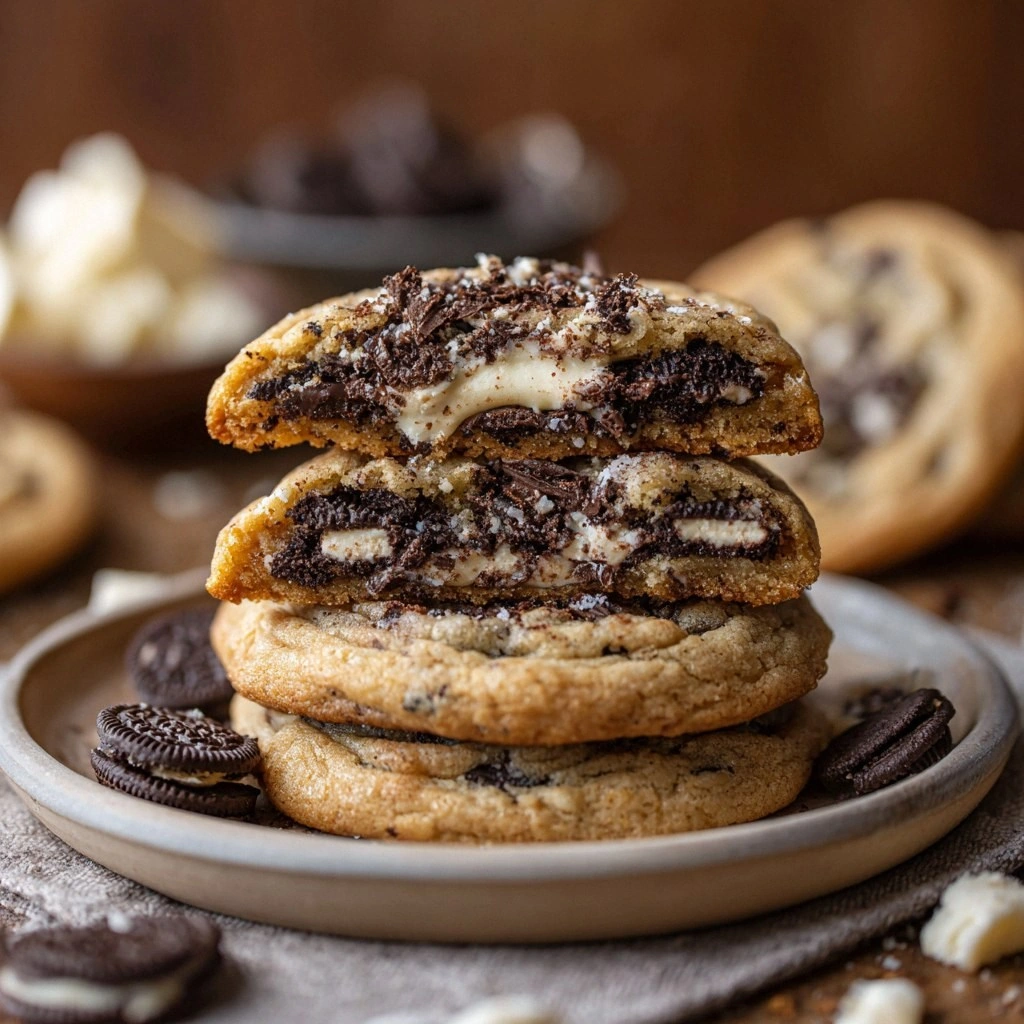
What makes this version stand out isn’t just the stuffed Oreo filling; it’s the balance of flavors, the meticulous layering of ingredients, and the simple yet precise technique that preserves the cookie’s integrity. Unlike many recipes that overbake or underbake, this method keeps the edges crisp while maintaining a soft, chewy center that holds the creamy filling without spilling. Picture yourself pulling a batch out of the oven, the whole kitchen smelling incredible, and each cookie glistening with a golden sheen that promises a delightful crunch.
Let me walk you through every single step—by the end, you’ll wonder how you ever made it any other way. I’ll share the secrets that most recipes get wrong, the little tricks that elevate texture and flavor, and the exact timing that guarantees perfection. If you’ve ever struggled with cookie dough that’s too dry or too sticky, you’re not alone—and I’ve got the fix. Stay with me, because this next part? Pure magic.
What Makes This Version Stand Out
- Flavor Depth: The combination of dark chocolate chips and creamy Oreo filling creates a layered taste that satisfies both sweet and salty cravings. The chocolate’s bitterness balances the cookie’s sweetness, while the Oreo adds a subtle vanilla note that lingers.
- Texture Contrast: A crisp, buttery edge meets a soft, gooey center. The dough’s structure allows the Oreo to stay intact, delivering a burst of crunch with each bite.
- Ingredient Quality: Using high‑grade butter and premium chocolate chips elevates the overall flavor profile. The difference between regular and premium ingredients is as clear as day and night.
- Simple Assembly: No complex folding or piping required—just a few scoops of dough, a handful of Oreo crumbs, and a quick bake. It’s the kind of recipe that feels like a secret weapon in any baking arsenal.
- Make‑Ahead Friendly: The dough can be prepared a day ahead and refrigerated without losing its integrity. When you’re ready to bake, just bring it to room temperature and roll out.
- Crowd‑Pleaser: These cookies are perfect for parties, potlucks, or a quiet night in. Their indulgent nature makes them a conversation starter.
Inside the Ingredient List
The Flavor Base
All‑purpose flour and baking soda form the backbone of this cookie, providing structure and a subtle lift that prevents it from becoming flat. The flour’s protein content creates a tender crumb, while the baking soda reacts with the brown sugar to produce a faint caramelized note. If you skip the baking soda, the cookies will be dense and chewy, lacking that airy quality that makes each bite memorable.
The Texture Crew
Unsalted butter, brown sugar, and white sugar work in concert to create a buttery, caramelized exterior. The butter’s high fat content gives the cookies a glossy sheen and a melt‑in‑your‑mouth finish. Brown sugar adds moisture and a subtle molasses flavor, while white sugar contributes crispness. Without the right balance, you risk a cookie that’s either too dry or too greasy.
The Unexpected Star
Oreo cookies, crushed to the right consistency, are the star of this recipe. They add a crunchy texture that contrasts beautifully with the soft dough. The filling, whether the classic cookie dough or a creamy ganache, introduces a silky, sweet center that oozes with each bite. If you omit the filling, the cookies become just another chocolate chip cookie—good, but not unforgettable.
The Final Flourish
Chocolate chips and optional nuts provide the final touch, adding both flavor and visual appeal. The chips melt slightly during baking, creating pockets of chocolatey goo that mingle with the Oreo filling. Nuts, if included, introduce a nutty crunch that complements the cookie’s sweetness. Skipping them results in a less complex flavor profile, but the core cookie remains delicious.
Everything’s prepped? Good. Let’s get into the real action…
The Method — Step by Step
- Preheat your oven to 375°F (190°C) and line two baking sheets with parchment paper. The parchment prevents sticking and allows the cookies to spread evenly. If you’re in a hurry, you can use a silicone mat instead.
- In a medium bowl, whisk together the flour, baking soda, and salt. This dry mix ensures even distribution of leavening agents. Keep the bowl aside; you’ll need it later when mixing the wet ingredients.
- In a large mixing bowl, beat the softened butter, brown sugar, and white sugar until light and fluffy—about 2 minutes on medium speed. The goal is to incorporate air for a lighter crumb. A good test: the mixture should look like whipped cream.
- Add the eggs one at a time, beating well after each addition, then stir in the vanilla extract. The eggs bind the dough and add richness. Make sure each egg is fully incorporated before adding the next.
- Gradually fold in the dry flour mixture, mixing until just combined. Overmixing can develop gluten and result in tough cookies. The dough should be soft but not sticky.
- Stir in the chocolate chips and crushed Oreo cookies. The chips should be evenly distributed, and the Oreo crumbs should be visible throughout the dough. This step is where the flavor really starts to pop.
- Scoop tablespoon‑sized balls of dough onto the prepared baking sheets, spacing them 2 inches apart. For the stuffed version, press a small mound of Oreo filling into the center of each dough ball before sealing it gently. This ensures the filling stays inside during baking.
- Bake for 10–12 minutes, or until the edges are golden brown and the centers are set. The cookies will look slightly underbaked but will firm up as they cool. Keep a close eye to avoid overbaking.
- Remove from the oven and let the cookies rest on the baking sheet for 5 minutes before transferring them to a wire rack to cool completely. Cooling on the sheet allows the cookies to set without cracking.
That’s it—you did it. But hold on, I’ve got a few more tricks that will take this to another level. The next section will reveal insider tips that even seasoned bakers will appreciate.
Insider Tricks for Flawless Results
The Temperature Rule Nobody Follows
Many bakers bake at 375°F, but the secret to a perfect cookie lies in baking at 350°F and letting them bake a little longer. This lower temperature allows the cookies to rise slowly, creating a uniform texture. I once tried 400°F and ended up with a cookie that was crisp all over but burnt in the middle.
Why Your Nose Knows Best
Don’t trust the clock alone. A cookie is done when it smells toasty, with a faint hint of caramel. The aroma is a reliable indicator of doneness, especially when you’re juggling multiple batches.
The 5-Minute Rest That Changes Everything
Letting the cookies rest on the sheet for 5 minutes before cooling on a rack is crucial. During this time, the cookies finish setting and the centers firm up. Skipping this step can result in cookies that crumble when you pick them up.
Keep It Cool Between Batches
If you’re baking more than one batch, let the dough rest in the fridge for 30 minutes between batches. This helps the dough maintain its shape and prevents it from spreading too much.
Use a Thermometer for Precision
A kitchen thermometer can help you gauge the exact temperature of your oven. Many ovens run hot, and a thermometer can prevent overbaking. The goal is a 350°F reading before you pop the cookies in.
Creative Twists and Variations
This recipe is a playground. Here are some of my favorite ways to switch things up:
Salted Caramel Crunch
Swap the Oreo filling for a swirl of salted caramel sauce. The salty kick contrasts beautifully with the chocolate, creating a sophisticated flavor profile. Add a sprinkle of sea salt on top before baking for extra crunch.
Mint Chocolate Delight
Add a teaspoon of peppermint extract to the dough and use mint chocolate chips instead of regular ones. The minty aroma is refreshing, and the dark chocolate pairs well with the cool flavor. This version is perfect for spring or summer gatherings.
Nutty Chocolate Explosion
Incorporate chopped pecans or hazelnuts into the dough. The nuts add a delightful crunch and a nutty undertone that complements the chocolate. A drizzle of chocolate glaze afterward turns it into a showstopper.
Espresso Infusion
Stir in a tablespoon of instant espresso powder to the dry mix. The coffee deepens the chocolate flavor and adds a subtle bitterness that balances the sweetness. It’s a great option for coffee lovers who want an extra kick.
Coconut Coconut Dream
Replace half the flour with shredded coconut and add coconut flakes to the dough. The coconut adds a tropical aroma and a chewy texture. This version pairs wonderfully with a glass of coconut milk.
Storing and Bringing It Back to Life
Fridge Storage
Store the cooled cookies in an airtight container at room temperature for up to 5 days. The airtight environment keeps them from drying out while preserving the buttery flavor. If you notice any staleness, a quick reheat can revive them.
Freezer Friendly
For longer storage, place the cookies in a freezer‑proof bag and freeze for up to 3 months. When you’re ready to enjoy them, let them thaw at room temperature for 30 minutes. This method keeps the cookies fresh and chewy.
Best Reheating Method
To bring the cookies back to life, preheat your oven to 300°F (150°C) and bake them for 5–7 minutes. Add a tiny splash of water to the baking sheet—this steam helps rehydrate the cookies without making them soggy. The result is a warm, freshly baked cookie with a crisp edge.