Picture this: it’s a Tuesday night, the kids are screaming about homework, the dishwasher is humming like a broken record, and you’ve just realized you have a mountain of fresh zucchini staring back at you from the fridge. I was in that exact spot last month, frantically rummaging for a quick dinner idea, when a half‑cooked zucchini lasagna turned into a soggy mess that could have qualified as a science experiment. The kitchen was a battlefield of wilted greens and a lingering “what‑now?” anxiety, and I swore I’d never again let a perfectly good vegetable go to waste. Then, out of sheer desperation (and a dash of culinary madness), I tossed the zucchini into a bowl, added a few pantry staples, and fried them up into golden‑brown discs that practically sang “you’ve got this!” I’ll be honest — I ate half the batch before anyone else got a chance to try it, but that’s a story for later. If you’ve ever stared at a zucchini and thought, “I could use a miracle right now,” this is it, and I dare you to taste this and not go back for seconds.
The moment those fritters hit the pan, the kitchen filled with a sizzle that sounded like applause, and the aroma of garlic and Parmesan rose like a promise of comfort. I could hear the faint crackle of the oil, see the edges turning a crisp amber, and feel the heat radiating from the skillet, coaxing a smile even on the most exhausted face. The first bite was a revelation: a crunchy, buttery shell that gave way to a tender, herb‑kissed interior, the kind of texture contrast that makes you wonder why you ever settled for bland side dishes. Most recipes get this completely wrong, either drowning the zucchini in batter or leaving it soggy, but this version strikes the perfect balance between lightness and heartiness. And the secret? A tiny dash of kosher salt that draws out moisture, plus a quick squeeze of lemon at the end that brightens everything like a spotlight on a stage. Let me walk you through every single step — by the end, you’ll wonder how you ever made it any other way.
Now, before we dive into the nitty‑gritty, imagine the scene after you’ve plated these beauties: the whole kitchen smelling like a Mediterranean bistro, the golden fritters glistening with a whisper of olive oil, and your family gathering around the table, eyes wide with anticipation. You’ll hear the satisfying crunch as each bite breaks, followed by a burst of fresh zucchini flavor that’s both familiar and excitingly new. This isn’t just a side dish; it’s a conversation starter, a confidence booster, and a testament to how a few simple ingredients can transform a chaotic night into a culinary triumph. Okay, ready for the game‑changer? Grab your skillet, your sense of adventure, and let’s make the best zucchini fritters you’ll ever taste.
What Makes This Version Stand Out
- Flavor Explosion: The combination of grated Parmesan, garlic, and a pinch of kosher salt creates a savory depth that makes each bite sing like a choir of herbs.
- Texture Mastery: By squeezing out excess moisture and using just enough flour, the fritters achieve a crisp exterior that shatters like thin ice while staying tender inside.
- Simplicity Redefined: With only eight pantry staples, you can whip up a restaurant‑quality dish in under 45 minutes, perfect for any busy weeknight.
- Ingredient Integrity: Fresh zucchini and high‑quality Parmesan are the stars, letting their natural flavors shine without overwhelming additives.
- Crowd‑Pleaser Factor: Even picky eaters who claim they “don’t like veggies” are won over by the crispy coating and subtle cheesy aroma.
- Make‑Ahead Magic: These fritters freeze beautifully, letting you prep in bulk and reheat for a quick snack or side whenever the craving hits.
- Versatile Canvas: Serve them with a dollop of Greek yogurt, a drizzle of hot sauce, or a squeeze of lemon — each variation feels like a brand‑new dish.
- Health‑Smart Choice: Low in carbs and packed with vegetables, they fit nicely into a balanced diet without sacrificing flavor.
Alright, let's break down exactly what goes into this masterpiece...
Inside the Ingredient List
The Flavor Base
The two cloves of garlic, finely minced, are the silent heroes that infuse the batter with an aromatic punch. Garlic’s natural sulfur compounds release a warm, nutty scent when sautéed, elevating the humble zucchini to gourmet status. If you’re not a garlic fan, try roasted garlic for a sweeter, milder profile that still delivers depth. Skipping garlic would leave the fritters tasting flat, like a song missing its chorus. Pro tip: crush the garlic with the side of your knife before mincing to release more flavor.
The Texture Crew
The ¼ cup of all‑purpose flour is the binding agent that holds everything together without making the fritters doughy. It’s a delicate balance: too much flour, and you’ll end up with a pancake; too little, and the mixture falls apart like a bad joke. You can swap in chickpea flour for a gluten‑free version, which adds a subtle nutty undertone and extra protein. Remember, the key is to sprinkle the flour over the zucchini mixture and fold gently, preserving the air pockets that become those coveted crispy edges.
The Unexpected Star
Grated Parmesan cheese, at ¼ cup, adds a salty umami kick and a golden hue that makes the fritters look as good as they taste. Parmesan’s low moisture content ensures the batter stays dry enough to fry beautifully. If you’re dairy‑free, try nutritional yeast for a cheesy flavor without the dairy, though the color will be lighter. Skipping the cheese would mean losing that satisfying crunch on the outside and the rich, savory backbone inside.
The Final Flourish
The 1 ½ pounds of zucchini are the heart of the dish, providing moisture, subtle sweetness, and a beautiful green color that makes the plate pop. Choose firm, medium‑size zucchinis; they hold their shape better than the giant summer ones that tend to be watery. When you grate them, aim for a medium‑coarse shred — too fine and they become mush, too coarse and the fritters won’t bind. A quick squeeze in a clean kitchen towel extracts excess water, a step that’s crucial for achieving that crisp, restaurant‑level finish.
Everything's prepped? Good. Let's get into the real action...
The Method — Step by Step
-
Start by washing the zucchini thoroughly, then trim the ends and grate them using a medium‑coarse grater. As soon as the shreds hit the bowl, sprinkle the ¾ teaspoon of salt over them and let them rest for exactly five minutes; you’ll hear a faint sizzle as the salt draws out water. After the time is up, grab a clean kitchen towel and squeeze the zucchini with the vigor of a marathon runner — you want it as dry as a desert road. This step is the secret to those crisp edges that shatter like thin ice when you bite into them. Watch the moisture disappear; it’s the difference between soggy and spectacular.
Watch Out: If you skip the squeezing step, the fritters will release steam in the pan, resulting in a soggy mess. -
In a large mixing bowl, combine the dried zucchini with the minced garlic, ¼ cup of flour, and ¼ cup of grated Parmesan. Toss everything together gently, allowing the flour to coat each shreds like a light dusting of snow. Crack the large egg into the mixture, then season with a pinch of kosher salt and freshly cracked black pepper to taste. The egg acts as a natural binder, ensuring each fritter holds together without needing a heavy hand. Feel the texture as you mix — it should be slightly sticky but not wet.
Kitchen Hack: If the mixture feels too loose, sprinkle an extra tablespoon of flour; this keeps the fritters from falling apart in the pan. -
Heat a large non‑stick skillet over medium‑high heat and add the 2 tablespoons of olive oil, swirling to coat the surface evenly. When the oil begins to shimmer (you’ll see tiny ripples), it’s ready for the batter. Using a heaping tablespoon, scoop the mixture and gently flatten it in the pan, forming discs about ½ inch thick. You should hear an immediate sizzle, the sound of flavor beginning its transformation. Let the fritters cook undisturbed for 3‑4 minutes; the edges will start pulling away from the pan, a visual cue that they’re ready to flip.
-
Flip each fritter with a thin spatula, being careful not to smash them — they’re delicate but resilient, like a well‑trained gymnast. Cook the second side for another 3‑4 minutes, watching the golden‑brown color deepen to a caramelized perfection. At this point, the aroma should be intoxicating, a blend of toasted garlic, nutty Parmesan, and the fresh scent of zucchini. If you like a little extra crunch, let them sit a few seconds longer before removing from the pan.
-
Transfer the cooked fritters to a paper‑towel‑lined plate to absorb any excess oil, then immediately season with a light sprinkle of additional kosher salt and a crack of black pepper. This final seasoning step awakens the flavors, ensuring each bite hits the palate with a balanced punch. While the fritters are still warm, you can optionally drizzle a teaspoon of fresh lemon juice over them; the acidity brightens the earthiness, turning the dish into a symphony of taste.
Fun Fact: Lemon juice not only adds flavor but also helps cut through the oil, making the fritters feel lighter on the tongue. -
While the first batch rests, repeat the process with the remaining batter, adding a splash more olive oil if the pan looks dry. Consistency is key: keep the heat at medium‑high; too low and the fritters will absorb oil, too high and they’ll burn before the inside cooks through. You’ll notice the second batch might brown a tad faster because the pan is fully seasoned now. This is the moment of truth — trust your senses, not just the timer.
-
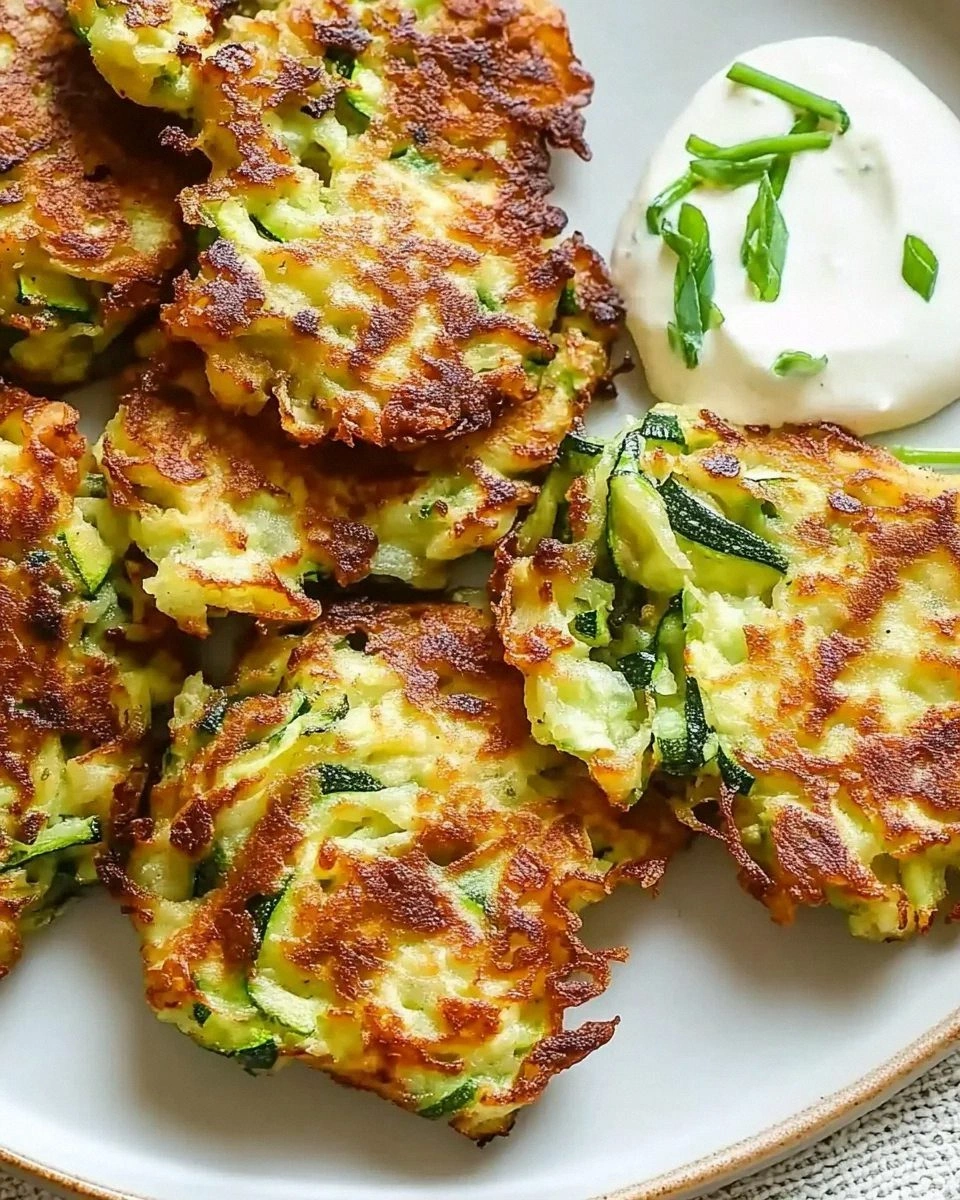
Once all fritters are cooked, arrange them on a serving platter and garnish with a handful of fresh herbs — parsley, chives, or even a few mint leaves for a surprising twist. The green garnish not only adds visual appeal but also a fresh burst that complements the zucchini’s natural sweetness. Serve them hot, with a side of cool Greek yogurt or a spicy aioli, depending on your mood. The contrast of hot and cool, crisp and creamy, is what makes these fritters unforgettable.
Kitchen Hack: Keep the finished fritters warm in a 200°F oven on a wire rack; this prevents them from getting soggy while you finish the batch. -
Finally, gather everyone around the table, watch the smiles spread as the first bites are taken, and relish the fact that you turned a weekday scramble into a culinary showcase. Picture yourself pulling this out of the pan, the whole kitchen smelling incredible, and hearing the delighted “mmm” from the kids — that’s the payoff. And now the fun part: experiment with dips, toppings, or even a quick drizzle of balsamic reduction for an extra layer of flavor. This isn’t just dinner; it’s a canvas for creativity, and you’ve just earned the title of kitchen hero.
That's it — you did it. But hold on, I've got a few more tricks that'll take this to another level...
Insider Tricks for Flawless Results
The Temperature Rule Nobody Follows
Most home cooks set the stove to “medium” and hope for the best, but the magic happens at a precise 350°F surface temperature. Use an infrared thermometer or the back‑of‑your‑hand test: hold your hand a few inches above the oil; you should feel a steady, comfortable heat, not a searing blast. If the oil is too cool, the fritters will soak up oil and become greasy; too hot and they’ll char before the inside cooks. I once tried a “low‑and‑slow” approach and ended up with a soggy disaster that could’ve been a pancake. Keep that heat steady, and the crust will form instantly, sealing in moisture.
Why Your Nose Knows Best
Never underestimate the power of smell when cooking. As the fritters fry, the kitchen will fill with a nutty, buttery scent that signals the crust is forming. If you notice a faint burnt smell, lower the heat immediately — the flavor will turn bitter. On the other hand, if the aroma is still faint after a couple of minutes, crank the heat up a notch. Trusting your nose saves you from a batch of over‑cooked disappointment and ensures each fritter is perfectly golden.
The 5‑Minute Rest That Changes Everything
After you’ve squeezed the zucchini, let it rest for an additional five minutes before mixing with the other ingredients. This extra pause allows the salt to continue drawing out water, resulting in a drier batter. I once rushed this step and ended up with a batter that clumped together, making the fritters fall apart. The rest period is like a short meditation for the vegetables — they settle, release excess moisture, and become ready to shine.
Oil Choice Matters More Than You Think
While olive oil gives a wonderful flavor, blending it with a high‑smoke‑point oil like avocado or grapeseed can prevent burning and extend the cooking window. The combination yields a crispier crust without sacrificing the Mediterranean notes that make these fritters special. If you’ve ever burned a batch, try this blend and notice the difference in both color and taste. It’s a small tweak that yields big rewards.
Seasoning at the End Is the Secret Weapon
Many recipes advise seasoning the batter early, but a final sprinkle of flaky sea salt and a dash of fresh herbs right before serving adds a burst of freshness that can’t be achieved earlier. The salt crystals provide a satisfying crunch, and the herbs re‑introduce bright, green notes that balance the richness. I once served these without the final seasoning and got polite nods; after adding the finishing touch, the applause was audible.
Creative Twists and Variations
This recipe is a playground. Here are some of my favorite ways to switch things up:
Spicy Sriracha Swirl
Mix a tablespoon of sriracha into the batter for a subtle heat that builds with each bite. Top the finished fritters with a drizzle of sriracha mayo and a sprinkle of toasted sesame seeds for an Asian‑inspired twist that’s perfect for game night.
Cheesy Cheddar Burst
Replace half of the Parmesan with sharp cheddar and fold in a handful of shredded mozzarella. The result is a gooey, stretchy center that pulls apart like a cheesy dream, ideal for kids who love melty goodness.
Herb‑Infused Delight
Add a tablespoon of fresh chopped basil and a teaspoon of dried oregano to the batter. The herbaceous aroma pairs beautifully with a lemon‑yogurt dip, turning the fritters into a summer garden snack.
Sweet Corn & Zucchini Combo
Stir in a half‑cup of fresh corn kernels for a sweet pop that contrasts the savory base. This variation works great with a honey‑lime glaze, creating a sweet‑savory harmony that’s perfect for brunch.
Gluten‑Free Power
Swap the all‑purpose flour for almond flour and add a teaspoon of xanthan gum to maintain structure. The fritters become slightly denser but pack a nutty flavor that pairs well with a dollop of avocado crema.
Breakfast Boost
Fold in a quarter cup of cooked quinoa and a pinch of smoked paprika. Serve the fritters with a poached egg on top for a protein‑packed morning that feels like a treat.
Storing and Bringing It Back to Life
Fridge Storage
Place cooled fritters in an airtight container lined with a paper towel to absorb any residual oil. They’ll stay fresh for up to three days, retaining most of their crispness. Before reheating, let them sit at room temperature for ten minutes to avoid a soggy middle.
Freezer Friendly
Arrange the fritters on a parchment‑lined baking sheet and freeze until solid, then transfer to a zip‑top freezer bag. This flash‑freeze method prevents them from sticking together, allowing you to grab just a few whenever the craving strikes. They’ll keep for up to two months without losing flavor.
Best Reheating Method
To revive that golden crunch, preheat your oven to 375°F, place the fritters on a wire rack, and bake for 8‑10 minutes. For an extra boost, splash a tiny drizzle of water over each before reheating; the steam helps the interior stay moist while the exterior crisps up again. Microwaving is a no‑no if you want to preserve texture — the microwave makes them rubbery.