I was standing in my kitchen, half‑asleep, staring at a half‑filled jar of sourdough discard and a can of pumpkin puree that had been staring me down like a guilty secret. My roommate had dared me to bake something that could survive a coffee‑driven brunch and still be the star of a post‑dinner dessert table. I thought, “Why not a coffee cake that smells like fall, but has the tangy depth of sourdough?” The first attempt was a disaster – the batter was as flat as a pancake, the crumb dry, and the flavor missing that magical “wow” factor. I spent the next week tweaking, tasting, and, yes, eating half the batch before anyone else could even sniff it.
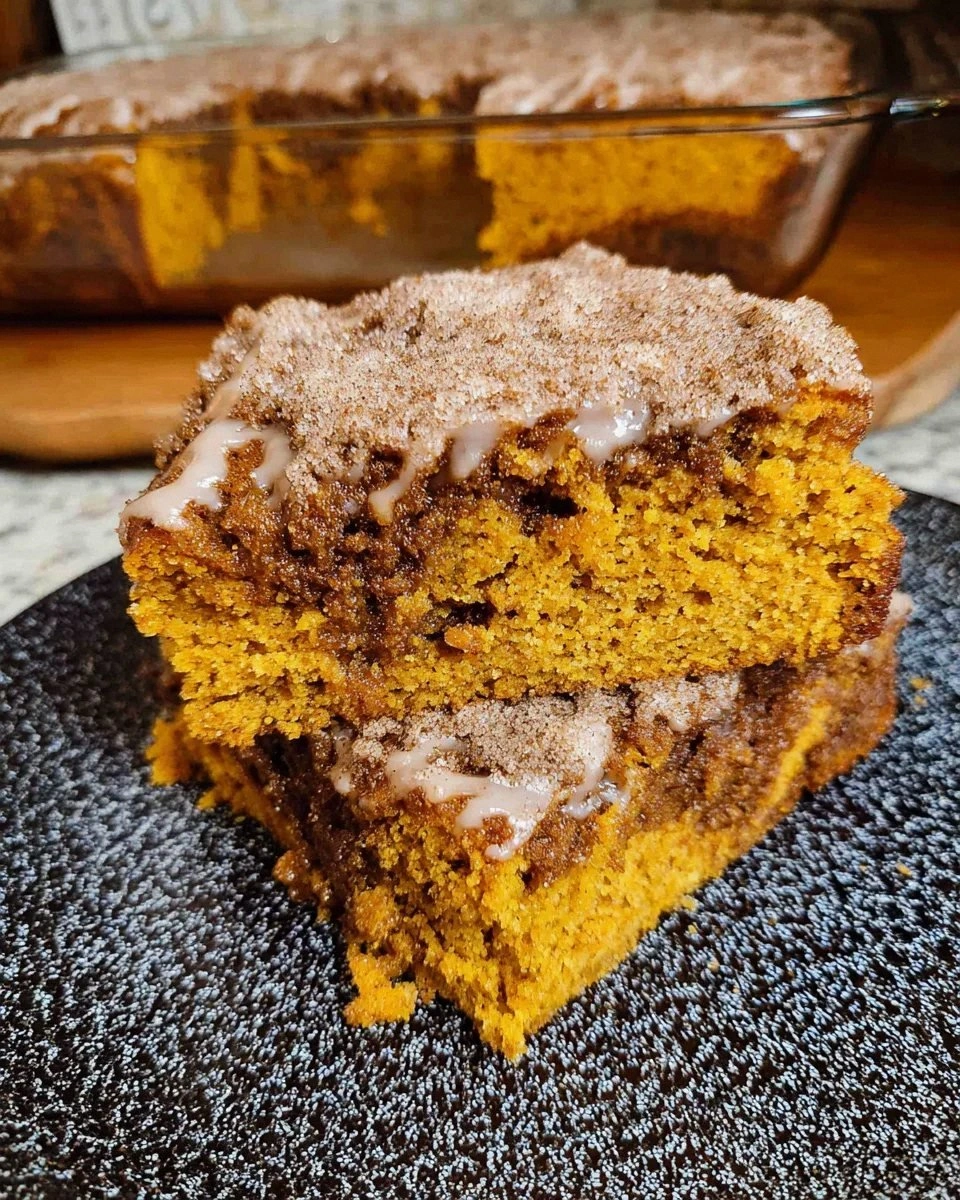
Picture this: the oven door swings open and a wave of caramelized pumpkin, toasted cinnamon, and a faint, buttery tang rolls out, wrapping the kitchen in a hug that feels like a soft blanket on a crisp October morning. The cake itself boasts a golden crust that cracks just enough to reveal a moist, tender interior that practically melts in your mouth. When you slice through, the steam rises like a cloud of sweet perfume, and the glaze glistens like a freshly fallen leaf after a rain. Every bite delivers a perfect balance of sweet, spice, and that subtle sourdough bite that makes you sit up and say, “Whoa, that’s actually good!”
Most pumpkin coffee cake recipes either drown you in sugar or forget the essential texture that makes a cake feel like a hug. This version stands out because it harnesses the natural moisture of pumpkin puree, the lift of a reliable starter, and a clever butter‑melt combo that keeps the crumb buttery without being greasy. The secret weapon? A pinch of pumpkin pie spice that’s layered in at two different stages, giving you a flavor that builds from the first chew to the lingering aftertaste. I dare you to taste this and not go back for seconds – it’s that addictive.
Let me walk you through every single step — by the end, you’ll wonder how you ever made it any other way. Okay, ready for the game‑changer? This next part? Pure magic.
What Makes This Version Stand Out
- Tangy Depth: The sourdough starter adds a gentle acidity that cuts through the sweetness, creating a sophisticated flavor profile you rarely find in a coffee cake.
- Moisture Mastery: Pumpkin puree and two forms of butter lock in moisture, ensuring every slice stays soft for days.
- Spice Layering: By sprinkling pumpkin pie spice both in the batter and the glaze, you get an evolving spice experience from bite to finish.
- Simple Prep: No fancy equipment, just a mixing bowl, a whisk, and a trusty oven – perfect for busy mornings.
- Crowd‑Pleaser: Even the most skeptical coffee‑drinkers rave about the subtle sour note that makes this cake feel grown‑up.
- Make‑Ahead Magic: The starter gives the batter a little extra life, so you can let it sit for a short overnight rise if you’re planning ahead.
- Versatile Glaze: The powdered‑sugar glaze adds a glossy finish that can be swapped for cream cheese if you crave tangier sweetness.
- Seasonal Yet Year‑Round: While pumpkin screams October, the sourdough tang makes it a welcome guest any time you need comfort.
Inside the Ingredient List
The Flavor Base
Brown Sugar is the backbone of the sweet profile, delivering a deep caramel note that pairs beautifully with pumpkin’s natural earthiness. If you swap it for white sugar, you’ll lose that rich depth and end up with a cake that tastes more like a plain muffin. For a healthier twist, you can use coconut sugar, but expect a slightly nutty aftertaste. When shopping, look for a tightly packed brown sugar that’s moist – dry, crumbly sugar will dissolve slower and affect texture.
White Sugar balances the brown sugar’s richness, ensuring the cake isn’t overly heavy. It also helps with the tender crumb by creating a finer crystal structure. If you’re cutting back on refined sugar, try a 1:1 substitution with a blend of coconut sugar and a splash of maple syrup, but remember the liquid addition may require a touch more flour.
The Texture Crew
Flour provides the structure, and using a blend of all‑purpose flour with a small portion of whole‑wheat can add a subtle nuttiness without compromising softness. Skipping the flour or using too much will either make the cake collapse or turn it into a dense bread. When measuring, spoon the flour into the cup and level it off – the infamous “fluff‑and‑scoop” method adds extra air and leads to a lighter crumb.
Salted Butter, both melted and softened, is the secret sauce that keeps the cake moist and gives it a glossy crust. Melted butter coats the flour, limiting gluten formation, while softened butter adds air when creamed with the sugars. If you only use one form, you’ll notice a difference: melted butter alone can make the crumb a bit greasy, while only softened butter may not give that crisp edge. For a dairy‑free version, try a 1:1 swap with coconut oil and a splash of oat milk.
Eggs act as the binder, trapping air bubbles created during mixing and providing richness. Using large eggs is ideal; if you’re short, two medium eggs will do, but the cake may be slightly less lofty. Over‑beating the eggs can lead to a rubbery texture, so whisk just until combined.
The Unexpected Star
Pumpkin Puree is the hero of this cake – it brings natural sweetness, moisture, and that unmistakable autumn aroma. Choose pure pumpkin puree that’s unsweetened and unspiced; canned pumpkin pie filling will add unwanted sugar and spices, throwing off the balance. If you’re feeling adventurous, roast a fresh pumpkin, scoop out the flesh, and puree it yourself for an even richer flavor.
Sourdough Discard or Active Starter injects a gentle tang that cuts through the sugar and spices, preventing the cake from feeling cloyingly sweet. The starter also contributes a bit of extra leavening, giving the cake a light, airy crumb. If you’re using a very active starter, reduce the amount by a tablespoon to avoid over‑proofing.
Pumpkin Pie Spice is a blend of cinnamon, nutmeg, ginger, and cloves that elevates the pumpkin flavor to a true fall classic. Adding it at two stages – once in the dry mix and again in the glaze – creates a layered spice experience. If you love spice, feel free to increase it by a half‑teaspoon, but beware of overwhelming the delicate sourdough note.
The Final Flourish
Baking Powder is the leavening hero that ensures the cake rises evenly. Using a double‑acting powder gives an initial rise when mixed with wet ingredients and a second lift during baking. If you’re out of baking powder, combine 1/2 tsp baking soda with 1 tsp cream of tartar for each teaspoon required.
Vanilla Extract adds aromatic depth, rounding out the spice and pumpkin flavors. A high‑quality pure vanilla will give you a fragrant, lingering aftertaste; artificial vanilla can taste flat and may clash with the sourdough tang.
Powdered Sugar and Milk for the glaze create a silky, sweet finish that glistens like a freshly fallen leaf after a light rain. The glaze sets quickly, sealing in moisture and adding a touch of elegance. If you prefer a thicker glaze, add a bit more powdered sugar; for a thinner drizzle, increase the milk by a teaspoon.
Everything’s prepped? Good. Let’s get into the real action…
The Method — Step by Step
Start by preheating your oven to 350°F (175°C) and greasing a 9‑inch round cake pan with a thin layer of butter, then dust it lightly with flour. This ensures the cake releases cleanly without sticking. While the oven warms, line a second bowl with parchment paper – you’ll use it for the glaze later. The scent of butter melting in the pan is already a promise of the crisp edge to come.
In a large mixing bowl, whisk together the flour, brown sugar, white sugar, ground cinnamon, pumpkin pie spice, baking powder, and a pinch of salt. The dry ingredients should look like a speckled sand dune – the spices creating tiny golden flecks throughout. This is the moment to sift the flour if you want an ultra‑light crumb; the extra air will make a difference later.
In a separate bowl, combine the melted butter, softened butter, eggs, vanilla extract, whole milk, pumpkin puree, and sourdough starter. Whisk vigorously until the mixture is smooth and slightly frothy – you’re looking for a glossy, deep orange batter that smells like a bakery on a crisp morning. If you hear a faint “whoosh” as you whisk, that’s the starter waking up and getting ready to work its magic.
Make a well in the center of the dry mixture and gently pour the wet batter into it. Stir with a wooden spoon or rubber spatula just until combined – over‑mixing will develop gluten and give you a tough cake. The batter should be thick but pourable; if it looks too dry, add a splash of milk, but be careful not to over‑liquify.
Fold in the remaining pumpkin pie spice (about a teaspoon) for that extra flavor punch. This second addition ensures the spice isn’t lost during mixing and creates pockets of aromatic bursts throughout each bite. The batter will start to pull away from the sides of the bowl, a clear sign that the gluten has relaxed and the cake will be tender.
Transfer the batter into the prepared pan, smoothing the top with the back of a spoon. Tap the pan lightly on the counter three times – this releases any trapped air bubbles and settles the batter evenly. The surface should be slightly domed; it will flatten as it bakes, forming that signature coffee‑cake crown.
Slide the pan into the oven and bake for 30‑35 minutes, or until a toothpick inserted into the center emerges clean with just a few moist crumbs. Around the 20‑minute mark, you’ll notice the edges pulling away from the pan, a visual cue that the cake is forming a golden crust. If you hear a faint “crackle” as the top browns, that’s the sugar caramelizing – a sound you’ll want to hear again and again.
While the cake cools in the pan for 10 minutes, whisk together powdered sugar and milk for the glaze until smooth. The glaze should be pourable but not watery – if it’s too thick, add a drop more milk; if too thin, sprinkle in a bit more powdered sugar. Once the cake has cooled enough to handle, drizzle the glaze over the top, letting it cascade down the sides for a glossy finish.
Allow the glaze to set for five minutes, then transfer the cake onto a wire rack to cool completely. This final cooling step lets the crumb firm up, making slicing neat and clean. Serve warm with a cup of coffee, or at room temperature for a perfect snack. And now the fun part: taste, savor, and decide whether you’ll double the batch next weekend.
Insider Tricks for Flawless Results
The Temperature Rule Nobody Follows
Always bring your butter, eggs, and milk to room temperature before mixing. Cold ingredients cause the batter to seize, leading to a dense crumb. A quick 15‑minute sit on the counter does the trick, and you’ll notice the batter coming together more smoothly, almost like a silky sauce. I once tried to speed things up by using chilled butter straight from the fridge – the result was a cake that felt like chewing on a rubber band. Trust the room‑temp rule and you’ll get that tender, melt‑in‑your‑mouth texture every single time.
Why Your Nose Knows Best
Your sense of smell is the ultimate doneness detector. Around the 20‑minute mark, you’ll start to smell toasted pumpkin and caramelized butter; that’s your cue that the cake is developing its golden crust. If the aroma feels faint, give it a few more minutes – the flavor compounds need time to bloom. On the flip side, if the kitchen fills with a burnt sugar scent early, lower the oven temperature by 10‑15°F to prevent a bitter crust.
The 5‑Minute Rest That Changes Everything
After you pull the cake from the oven, let it rest in the pan for exactly five minutes before unmolding. This short rest allows the steam inside to redistribute, preventing the cake from collapsing. Skipping this step often results in a soggy bottom or a cracked top. I’ve seen novice bakers rush to the cooling rack and end up with a broken cake that looks like a crime scene – don’t be that person.
Glaze Timing is Everything
Apply the glaze while the cake is still warm but not scorching. If the cake is too hot, the glaze will melt away; if it’s too cold, the glaze will set too quickly and won’t seep into the crumb. The sweet spot is when you can comfortably touch the surface without feeling a heat shock. This timing creates a glossy, semi‑glazed finish that looks bakery‑professional.
Sourdough Starter Maintenance
A starter that’s been fed within the last 12 hours works best for this recipe. If your starter is a bit sluggish, give it a quick feed of equal parts flour and water, let it sit for an hour, then use the bubbly portion. Using a starter that’s too old or under‑fed can introduce off‑flavors and reduce the rise. I once used a starter that had been neglected for a week – the cake turned out flat and sour in an unpleasant way. Keep your starter happy, and it will reward you with that signature tang.
Creative Twists and Variations
This recipe is a playground. Here are some of my favorite ways to switch things up:
Maple‑Walnut Swirl
Fold in ½ cup toasted walnuts and drizzle a tablespoon of pure maple syrup into the batter before baking. The nuts add crunch, while the maple deepens the caramel notes, making the cake perfect for brunch gatherings.
Chocolate Chip Surprise
Add ¾ cup dark chocolate chips to the batter for pockets of molten chocolate that contrast the tangy sourdough. This variation turns the cake into a dessert that even the kids will adore – just be ready for them to beg for seconds.
Spiced Chai Infusion
Replace the pumpkin pie spice with an equal amount of chai spice blend and add a splash of strong brewed chai tea in place of part of the milk. The result is a warm, aromatic cake that feels like a cozy sweater on a chilly day.
Gluten‑Free Goodness
Swap the all‑purpose flour for a 1:1 gluten‑free blend and add a tablespoon of xanthan gum to maintain structure. The texture stays tender, and the flavor profile remains unchanged – perfect for friends with dietary restrictions.
Savory Pumpkin Twist
Cut the sugar in half, add ½ cup grated sharp cheddar, and sprinkle a pinch of smoked paprika into the batter. This savory version pairs wonderfully with a robust coffee or a glass of cold apple cider, proving that pumpkin isn’t just for sweet treats.
Storing and Bringing It Back to Life
Fridge Storage
Once the cake has cooled completely, wrap it tightly in plastic wrap or store it in an airtight container. It will stay fresh in the refrigerator for up to five days. Before serving, let a slice sit at room temperature for 15 minutes or microwave it for 10‑15 seconds to revive the softness.
Freezer Friendly
Slice the cake before freezing for easy portion control. Place the slices on a parchment‑lined tray, flash freeze for an hour, then transfer them to a zip‑top freezer bag. The cake will keep for up to three months. When you’re ready to enjoy, thaw overnight in the fridge and warm gently in a 300°F oven for 10 minutes.
Best Reheating Method
To bring back that fresh‑out‑the‑oven texture, preheat your oven to 325°F, place a slice on a foil‑lined baking sheet, and add a tiny splash (about a teaspoon) of water around the edges. Cover loosely with foil and heat for 8‑10 minutes. The added moisture creates a gentle steam that revives the crumb without drying it out.