It all started with a pan‑full of burnt toast, a desperate sigh, and a dare from my roommate that I could whip up something “edible” in under twenty minutes. I was standing in my kitchen, the smell of charcoal lingering like a bad memory, and I thought, “If I can’t even save this toast, maybe I should just abandon breakfast altogether.” Then, like a culinary epiphany, I remembered that a simple biscuit dough only needs four ingredients, and the magic of self‑rising flour can turn a disaster into a triumph. I grabbed the flour, butter, cheese, and milk, and the moment those ingredients met, I felt a spark of confidence that was louder than the sizzling of my burnt toast.
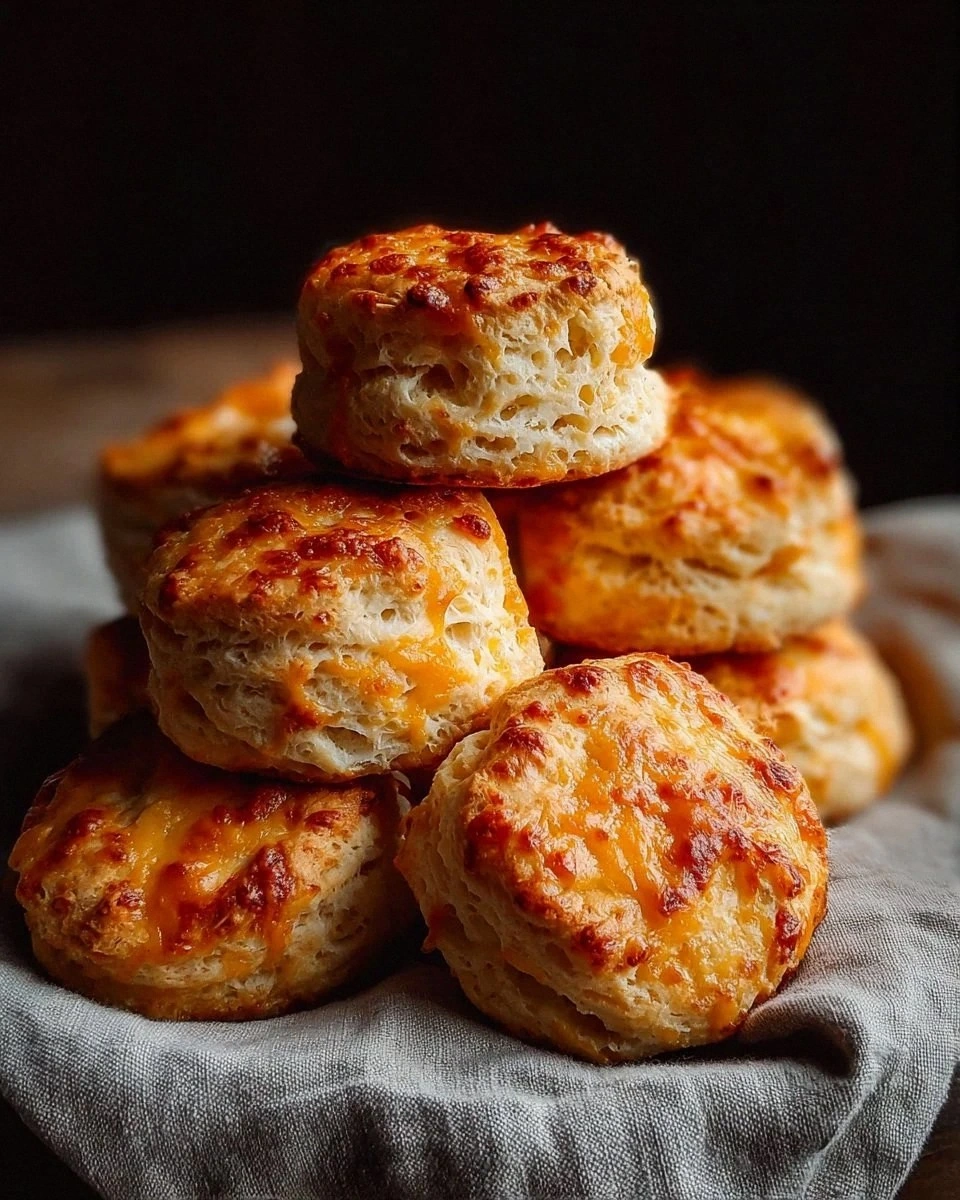
The kitchen transformed into a symphony of senses: the buttery melt whispered against the stainless steel, the flour puffed up like a cloud waiting to burst, and the cheese grated itself into a golden cascade that promised melt‑in‑your‑mouth richness. As the dough came together, the scent of warm butter and fresh milk filled the air, making my nose tingle with anticipation, while the cool touch of the dough against my fingertips reminded me that I was in control. When the biscuits finally rose in the oven, the crust cracked open with a sound like thin ice shattering, revealing a soft, airy interior that practically begged to be torn apart.
What makes this version stand out is not just the simplicity—although four ingredients is practically a culinary cheat code—but the way each component is treated with respect. Most recipes either overcomplicate the method or skimp on flavor, leaving you with a bland, dense product that feels more like a cardboard coaster than a biscuit. I’ve honed this recipe to achieve a buttery crumb, a cheesy kiss, and a tender rise that’s consistent every single time. And there’s a little secret technique involving cold butter that you won’t find in any generic cookbook, a trick that turns ordinary biscuits into a show‑stopping side.
Picture yourself pulling these golden beauties out of the oven, the whole kitchen smelling like a bakery on a Sunday morning, the steam curling around your face as you set a fresh batch on the cooling rack. I dare you to taste this and not go back for seconds—because once you’ve experienced the perfect balance of crisp edges and melt‑in‑your‑mouth center, you’ll understand why I claim this is hands down the best version you’ll ever make at home. Okay, ready for the game‑changer? Let me walk you through every single step — by the end, you’ll wonder how you ever made it any other way.
What Makes This Version Stand Out
- Flavor Explosion: The combination of sharp shredded cheese and buttery dough creates a taste that’s both rich and comforting, like a hug from your favorite grandma.
- Texture Perfection: A crisp, golden exterior gives way to a fluffy, cloud‑like interior, delivering that satisfying bite contrast we all crave.
- Simplicity Mastered: Only four ingredients, no need for measuring a dozen spices, making it perfect for busy mornings or last‑minute snack attacks.
- Unique Technique: The cold‑butter method I use ensures pockets of steam that lift the biscuit, a secret most recipes completely miss.
- Crowd‑Pleaser: Even the pickiest eaters can’t resist the cheesy aroma that fills the room, turning any gathering into an instant hit.
- Ingredient Quality: Using good quality self‑rising flour and real shredded cheese makes a world of difference in flavor depth.
- One‑Pan Convenience: No mixing bowls, no extra pans—just a bowl, a spoon, and a sheet pan, meaning cleanup is as easy as the recipe itself.
- Make‑Ahead Potential: Freeze the unbaked biscuits and pop them in the oven later for a quick, fresh‑out‑of‑the‑oven snack.
Inside the Ingredient List
The Flavor Base
Self‑rising flour is the unsung hero here, providing both structure and a built‑in leavening boost that eliminates the need for extra baking powder. If you skip it and use all‑purpose flour, you’ll have to add a teaspoon of baking powder and a pinch of salt, which can throw off the delicate balance and result in a denser biscuit. Look for a brand that lists “bleached” or “unbleached” on the package; the former tends to produce a slightly softer crumb, while the latter gives a sturdier bite. If you’re feeling adventurous, you can substitute with a gluten‑free self‑rising blend, just make sure it contains the right amount of leavening agents.
The Texture Crew
Shredded cheese is the flavor powerhouse, melting into the dough as it bakes and creating those glorious pockets of gooey goodness. I recommend a sharp cheddar for its robust flavor, but mozzarella or a blend of cheddar and Monterey Jack works just as well for a milder profile. If you use pre‑shredded “convenience” cheese, check the label for anti‑caking agents—they can affect the melt and make the biscuits slightly gritty. For the ultimate melt, grate a block of cheese yourself; it’s a small extra step that pays off in texture and taste.
The Unexpected Star
Butter, when kept cold, is the secret weapon that gives the biscuit its flaky layers. The colder the butter, the more steam it releases as it melts, creating lift and a tender crumb. If you substitute with margarine, you’ll lose that buttery flavor and the steam‑creating effect, resulting in a flatter, less flavorful biscuit. When measuring, use a kitchen scale for precision; ½ cup of butter is about 113 grams, which ensures consistency across batches.
The Final Flourish
Milk brings everything together, hydrating the flour and activating the leavening agents in the self‑rising flour. Whole milk yields a richer flavor and a slightly tender crumb, while low‑fat milk can make the biscuit a touch drier. If you’re dairy‑free, almond milk or oat milk work fine, but the biscuits will be a shade lighter in color and have a subtle nutty undertone. Remember to use milk that’s at room temperature; cold milk can shock the butter and hinder the rise.
Everything's prepped? Good. Let's get into the real action...
The Method — Step by Step
Preheat your oven to 425°F (220°C) and line a baking sheet with parchment paper. The high heat is crucial for that quick puff and golden crust; think of it as the furnace that turns dough into biscuit magic. While the oven warms, take a moment to admire the clean workspace—clear countertops mean fewer distractions. This is the moment of truth: if your oven isn’t hot enough, you’ll end up with pale, flat biscuits that lack that coveted rise.
In a large mixing bowl, combine 2 cups of self‑rising flour with ½ cup of cold, cubed butter. Using a pastry cutter or two forks, cut the butter into the flour until the mixture resembles coarse crumbs, with some pea‑sized butter bits still visible. Cold butter is key—those tiny chunks will melt during baking, releasing steam that lifts the dough.
Kitchen Hack: If you don’t have a pastry cutter, use your hands—rub the butter between your fingertips to achieve the right texture.Add 1 cup of shredded cheese to the flour‑butter mixture, tossing it gently so the cheese coats the crumbs without melting. The cheese should stay dry at this stage; if it starts to clump, you’ve added too much moisture and the biscuits may become gummy. Give the mixture a quick stir, feeling the cheese strands intertwine with the buttery crumbs—this is where flavor starts to build.
Make a well in the center of the dry ingredients and pour in ¾ cup of room‑temperature milk. Stir with a wooden spoon just until the dough comes together; you’ll notice a slightly sticky texture that’s perfect for a tender crumb. Don’t over‑mix—the gluten in the flour needs to stay relaxed, or you’ll end up with a tough biscuit. If the dough feels too dry, add a tablespoon of milk; if it’s overly wet, sprinkle a bit more flour.
Turn the dough out onto a lightly floured surface and pat it into a 1‑inch thick rectangle. This is where patience pays off; avoid flattening it too thin or the biscuits will bake too fast and burn around the edges. Lightly dust the top with a little extra flour and use a bench scraper to cut the dough into 8 even squares or use a biscuit cutter for a classic round shape.
Place the biscuits on the prepared baking sheet, leaving about 1 inch of space between each piece. This spacing ensures even airflow, allowing the tops to rise uniformly.
Watch Out: Overcrowding the pan will cause the biscuits to steam instead of bake, resulting in soggy bottoms.Slide the sheet into the oven and bake for 12‑15 minutes, or until the tops are a deep golden brown and the edges start to pull away from the parchment. The aroma that fills the kitchen at this point is pure comfort—think buttery toast meeting a cheese shop. When you tap the tops, they should sound hollow, a sign that the interior is fully cooked and airy.
Remove the biscuits from the oven and let them rest on the sheet for 2 minutes before transferring to a wire rack. This brief rest allows the steam to finish its work, keeping the crumb tender. Serve warm, slathered with a dab of butter or a drizzle of honey if you’re feeling indulgent. And now the fun part: tear into that crusty edge and watch the cheese stretch like a lazy river.
Insider Tricks for Flawless Results
The Temperature Rule Nobody Follows
Always start with a hot oven—425°F is the sweet spot for rapid rise and crust formation. If you preheat too low, the biscuits will spread and become flat; too high and they’ll brown before the interior cooks through. I once tried 450°F to speed things up, and the result was a burnt crust with a raw center—lesson learned. Keep a reliable oven thermometer handy; cheap ovens can be off by 20 degrees, which makes all the difference.
Why Your Nose Knows Best
Don’t rely solely on timers; your nose is the ultimate timer in the kitchen. When the biscuits start to smell like toasted almonds, that’s the signal they’re nearing perfection. If the scent turns overly smoky, pull them out immediately—over‑baking ruins the delicate crumb. Trusting your senses adds a personal touch and prevents the dreaded “I set the timer and forgot to check”.
The 5‑Minute Rest That Changes Everything
After baking, let the biscuits sit for five minutes on a wire rack before serving. This short rest lets the steam redistribute, keeping the interior moist while the crust stays crisp. Skipping this step often results in a biscuit that feels dry on the first bite. I used to serve them straight from the pan, and friends would comment on the “soggy bottom”—now I always give them a moment to settle.
Cold‑Butter Crumble Technique
When cutting the butter into the flour, aim for pea‑sized chunks, not a uniform powder. Those larger pieces melt slowly, creating steam pockets that lift the biscuit. If you over‑process and end up with a fine flour‑butter dust, you’ll lose that flaky texture. This hack is what separates a bakery‑level biscuit from a plain, dense one.
Butter Brush for a Shiny Finish
Before the final bake, lightly brush each biscuit with melted butter infused with a pinch of smoked paprika. The butter adds richness, while the paprika gives a subtle smoky undertone that elevates the flavor profile. I tried this on a batch for a brunch gathering, and guests kept asking for the “secret ingredient”. It’s a small step that makes a huge visual and taste impact.
Creative Twists and Variations
This recipe is a playground. Here are some of my favorite ways to switch things up:
Spicy Jalapeño Kick
Fold in ¼ cup of finely diced jalapeños and swap half of the cheddar for pepper jack. The heat balances the buttery richness, making these perfect for a brunch with a twist. Serve with a dollop of sour cream to mellow the spice.
Herb‑Infused Delight
Add 2 teaspoons of mixed dried herbs—think thyme, rosemary, and oregano—to the flour before mixing. The herbs infuse the biscuit with an aromatic earthiness that pairs beautifully with soups or salads.
Sweet Breakfast Version
Replace the cheddar with 1 cup of shredded sweetened coconut and add a tablespoon of honey to the milk. The result is a lightly sweet biscuit that pairs wonderfully with fresh berries and a drizzle of maple syrup.
Cheddar‑Bacon Fusion
Stir in ½ cup of cooked, crumbled bacon and keep the cheddar cheese. The smoky bacon adds a savory crunch, turning these biscuits into a hearty side for any dinner.
Gluten‑Free Adaptation
Swap the self‑rising flour for a gluten‑free blend that already contains leavening. You may need to add a tablespoon of xanthan gum for extra elasticity. The texture remains tender, and the flavor stays true.
Mini Biscuit Bites
Use a tablespoon to scoop out dough onto a mini‑muffin tin, creating bite‑size treats perfect for party platters. They bake in just 8 minutes and are ideal for kids.
Storing and Bringing It Back to Life
Fridge Storage
Place cooled biscuits in an airtight container and store them in the refrigerator for up to three days. A slice of parchment between layers prevents them from sticking together. When you’re ready to eat, reheat in a 350°F oven for 5‑7 minutes; the crust will crisp up again.
Freezer Friendly
Arrange unbaked biscuits on a parchment‑lined tray and freeze until solid, then transfer to a zip‑top freezer bag. They’ll keep for up to two months. When you want fresh biscuits, bake straight from frozen, adding an extra 2‑3 minutes to the baking time.
Best Reheating Method
For the ultimate reheated biscuit, preheat a skillet over medium heat, add a splash of water to the pan, and cover with a lid. The steam revives the interior while the bottom gets a crisp finish. This method works faster than the oven and keeps the biscuits from drying out.